To create an outbound integration with any system using API JSON, follow these steps:
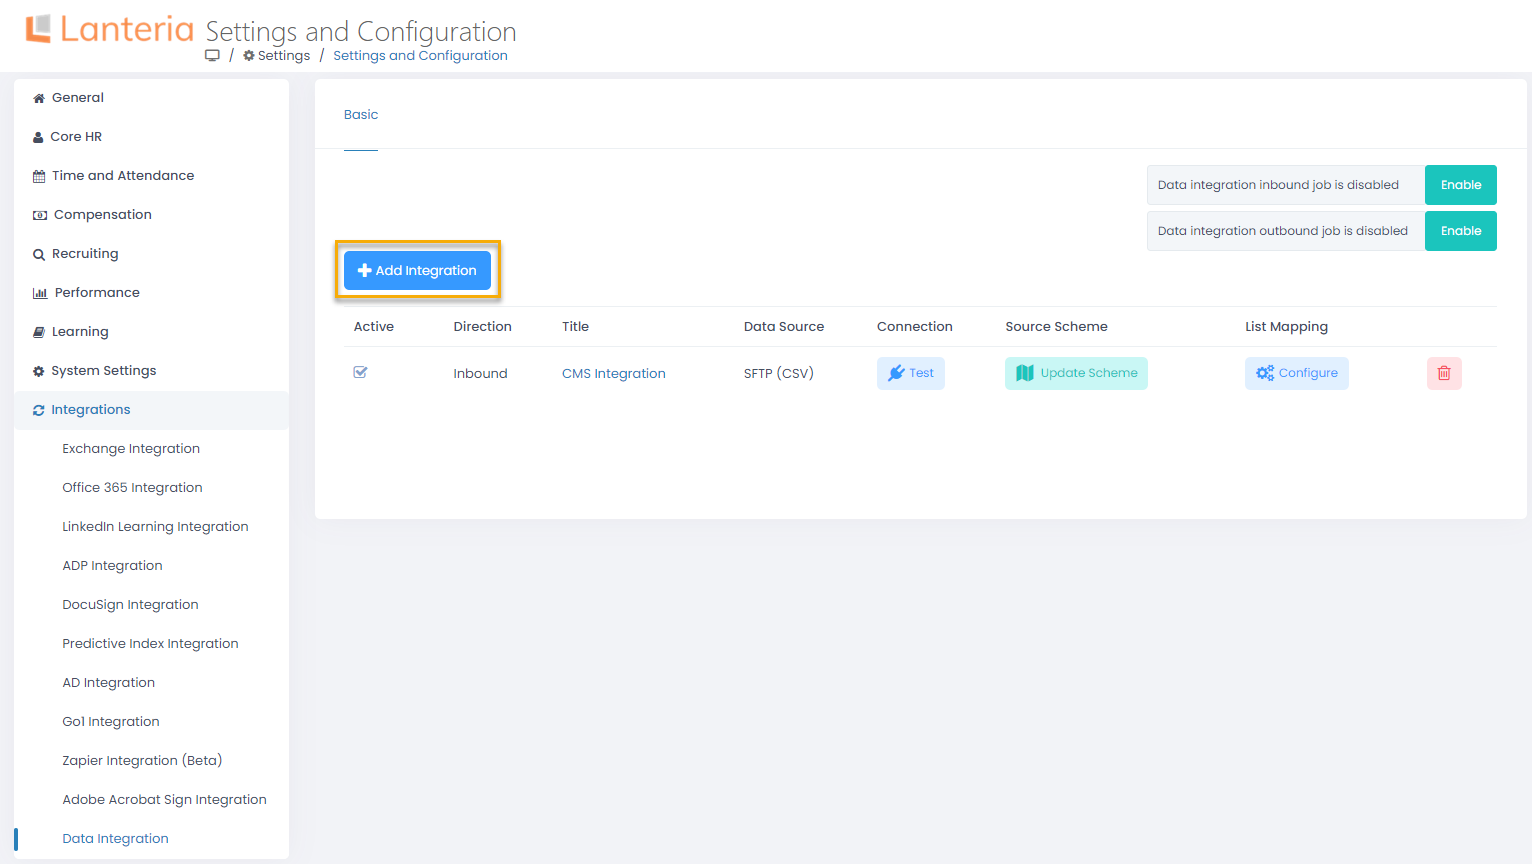
- In Lanteria HR, go to Settings > Settings and Configuration > Integrations and click Data Integration.
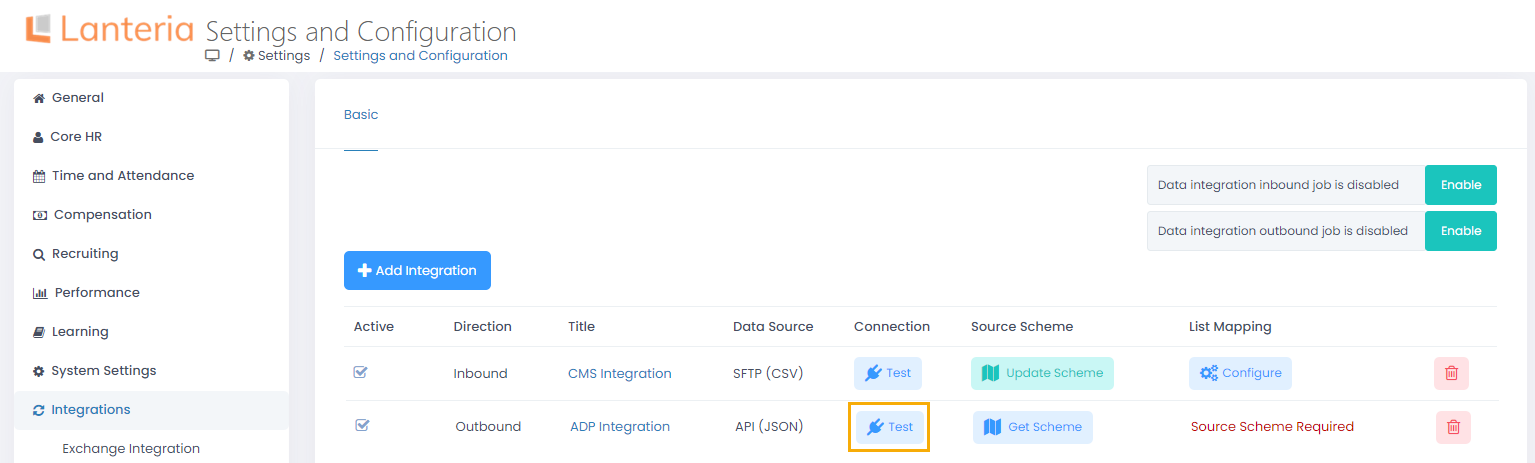
- Next, click Add Integration.
- On the page that opens, provide title for the integration being created and set Direction to Outbound, meaning that data will be transferred from Lanteria HR to another system.
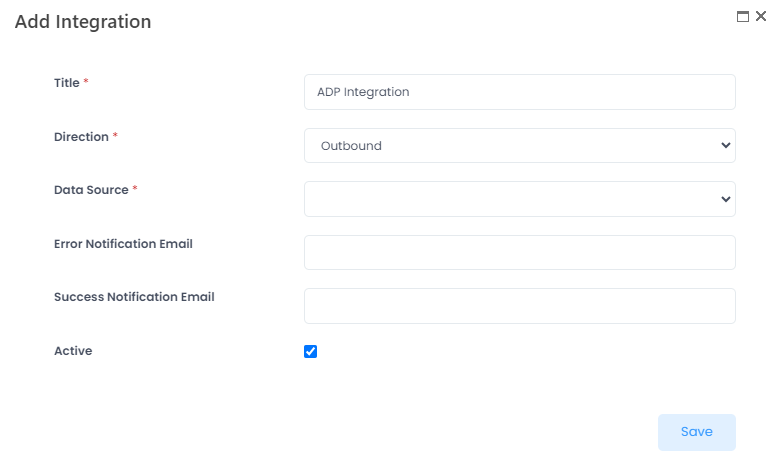
- Next, select a data source to be used in the Data Source field. Currently, only JSON (API) is supported. After you select a data source, additional sections related to it will be displayed: Data Source Settings, API Response Settings, Endpoint Parameters.
- Use the Error Notification Email and Success Notification Email fields to set mail addresses for sending notifications if any errors occur during the data synchronization and in case the data synchronization was successful.
- Select or clear the Active check box to switch the integration on or off, correspondingly.
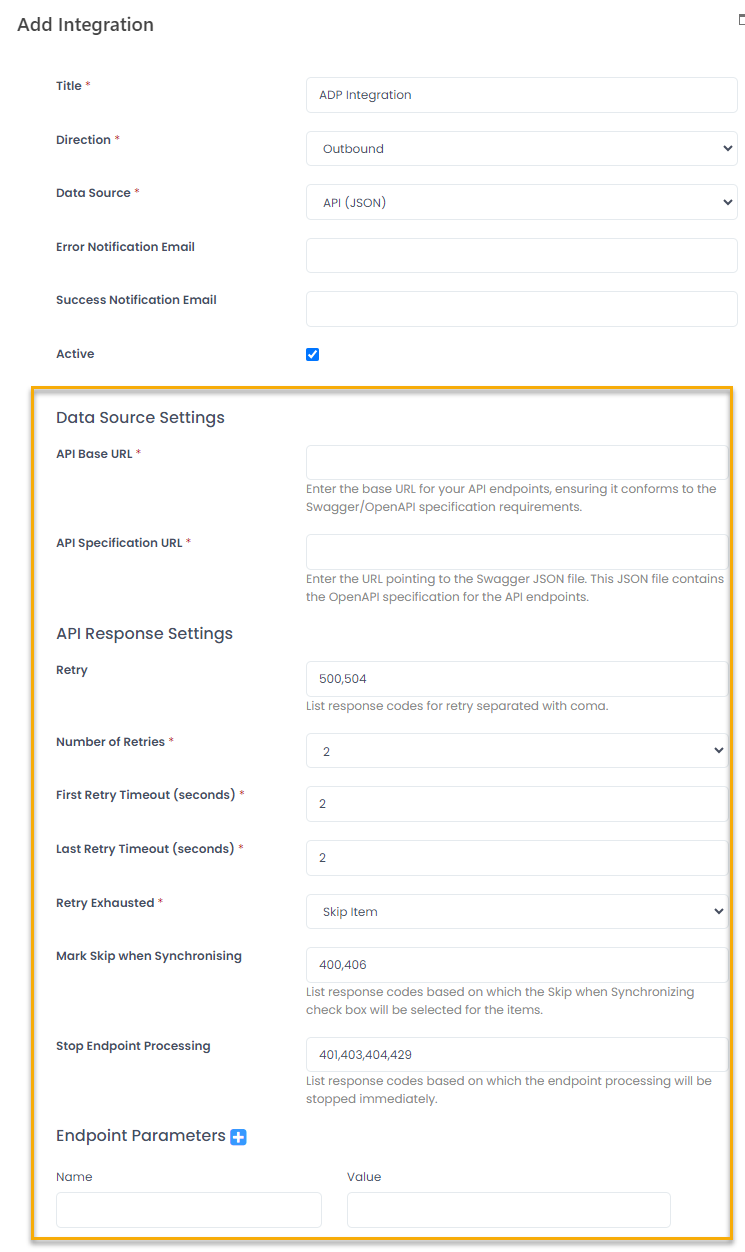
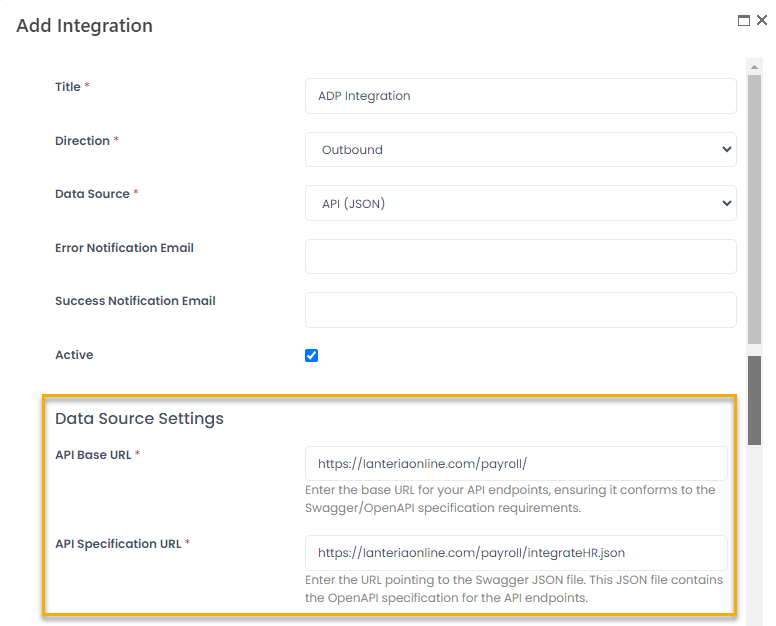
- Under Data Source Settings, provide details for connecting to API endpoints. In the API Base URL filed, provide URL for your API endpoints, ensuring it conforms to the Swagger/OpenAPI specification requirements.
- In the API Specification URL field, enter the URL pointing to the Swagger JSON file. This JSON file contains the OpenAPI specification for the API endpoints.
 NotePlease note that only the simple field types are supported (string, number, integer, boolean). If any API endpoints contain required fields of any other types, such endpoints won't be fetched after getting the API data scheme. If an endpoint contains non-required fields of other types, such endpoint will be fetched without these fields.
Retry and API Response Setup
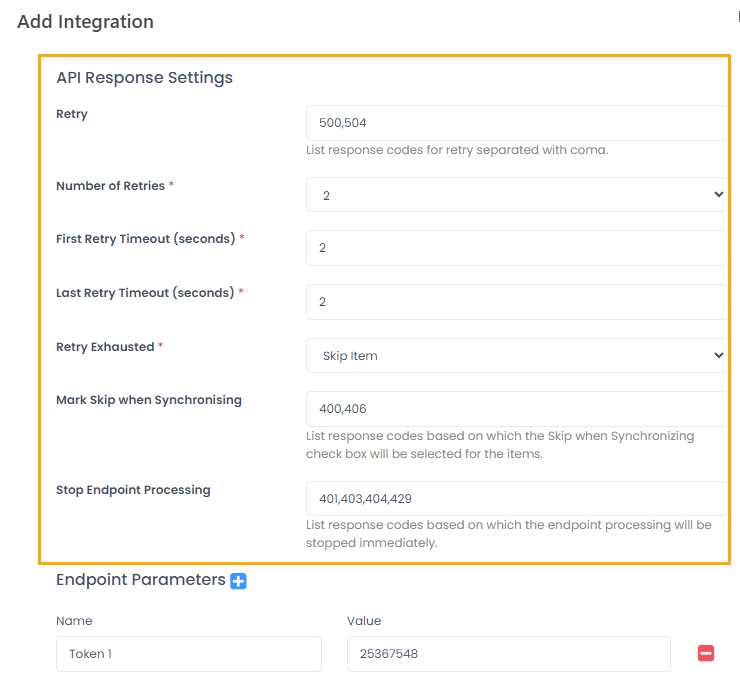
Use the API Response Settings section to define how the data synchronization will react on different API response codes. Set up response codes that will lead to:
- Retrying data sync for endpoint
- Marking record as Skip When Synchronizing until the data issue is resolved
- Stopping an endpoint processing
Retry Setup
- First of all, define the retry policy. In the Retry field, specify the response codes that will initiate record sync retry when received. By default, these are 500 (service unavailable) and 504 (timeout).
- Use the Number of Retries field to specify how many retries will be performed (from 2 to 5), and the Retry Exhausted field to define which action will be performed after these retires have been exhausted and the response is still the same. The following options are available:
- Skip Item - the record that caused an unsuccessful retry will be skipped and data sync will continue
- Halt Endpoint - processing of the endpoint the record belongs to will be stopped and data sync will continue for the following endpoint
- Halt Integration - data sync will be stopped
- Next, specify the number of seconds before timeout for the first and last retry. The timeout intervals will be spread between the number of retries. For example, if the first retry is 2, the last is 10, and the number of reties is 3, timeouts will be: first 2, second 6, third 10 seconds. NoteAll the retries will be saved to the DataIntegrationAPIRequestLogs SQL table. For notifications, Application Log and event viewer only one try will be written - a successful one or if all retries are unsuccessful, the first failed one.
Skip When Synchronizing
Specify the response codes that will set Mark Skip When Synchronizing to true for the record. By default, these are 400 (wrong data) and 406 (validation error).
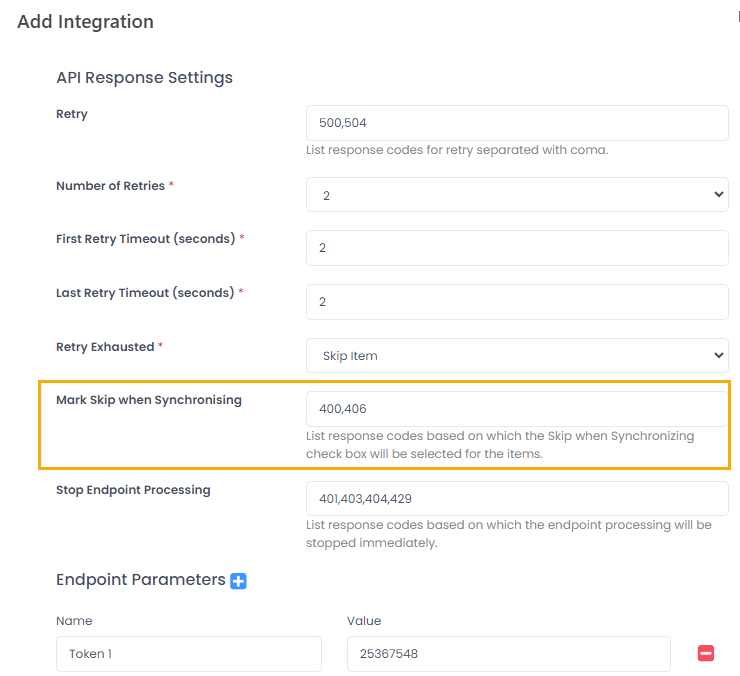
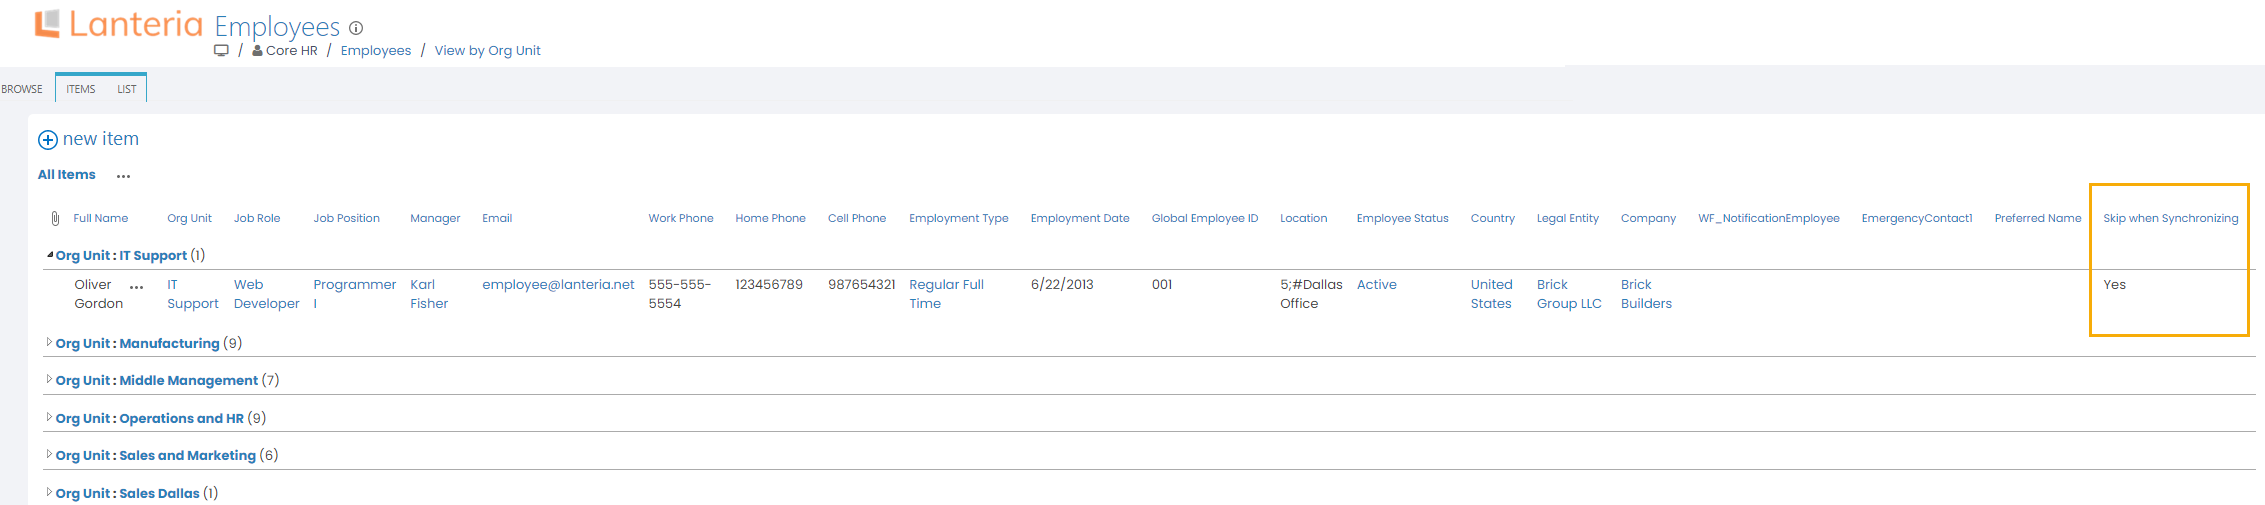
If any of these response codes are received for a record, this record will get the Mark Skip When Synchronizing check box selected (the check box will be automatically added to all the lists that are mapped with the data integration endpoints).
Any existing dependent list records (those with dependent filtering set up) will not be processed as well until the data issue is fixed. For example, if some employee processing failed and there is an endpoint for the absence records processing with filter that depends on Employees, this employee's absence records won't be processed until the user clears the Mark Skip When Synchronizing check box for the employee. Please note that any new related records that are created after the Mark Skip When Synchronizing check box has been selected will be processed by the job. In our example, the absence records created for the employee after marking his/her record for skipping, will be processed during the next job run even if Mark Skip When Synchronizing is still selected.
Stop Endpoint Processing
Use the Stop Endpoint Processing field to specify which response codes must result in breaking out the data synchronization for endpoint whose processing returned the response code. By default, these are 401, 403 (authentication errors), 404 (page not found) and 429 (too many requests). 
Endpoint Header Parameters
Next, set up the endpoint header parameters required by the API model. Under Endpoint Parameters, specify the parameter name and acceptable value. Use the Add and Delete icons to add as many parameters as required and delete the obsolete ones. When configuring each endpoint and its field mapping, you'll be able to map the parameters registered here with the parameters fetched from the API data model. 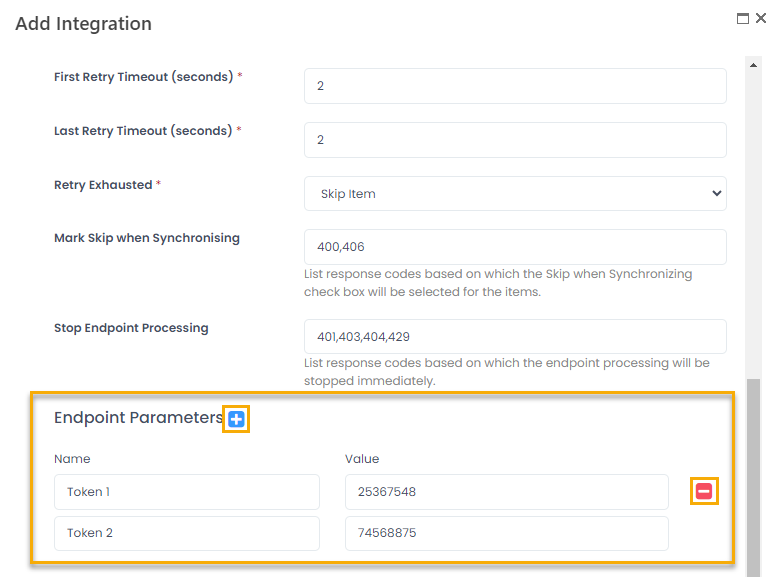
That being done, you can proceed to configuring the endpoints and field mapping.