Create Application for Data Sync
- 22 Jul 2024
- 1 Minute to read
- Print
- DarkLight
Create Application for Data Sync
- Updated on 22 Jul 2024
- 1 Minute to read
- Print
- DarkLight
Article summary
Did you find this summary helpful?
Thank you for your feedback!
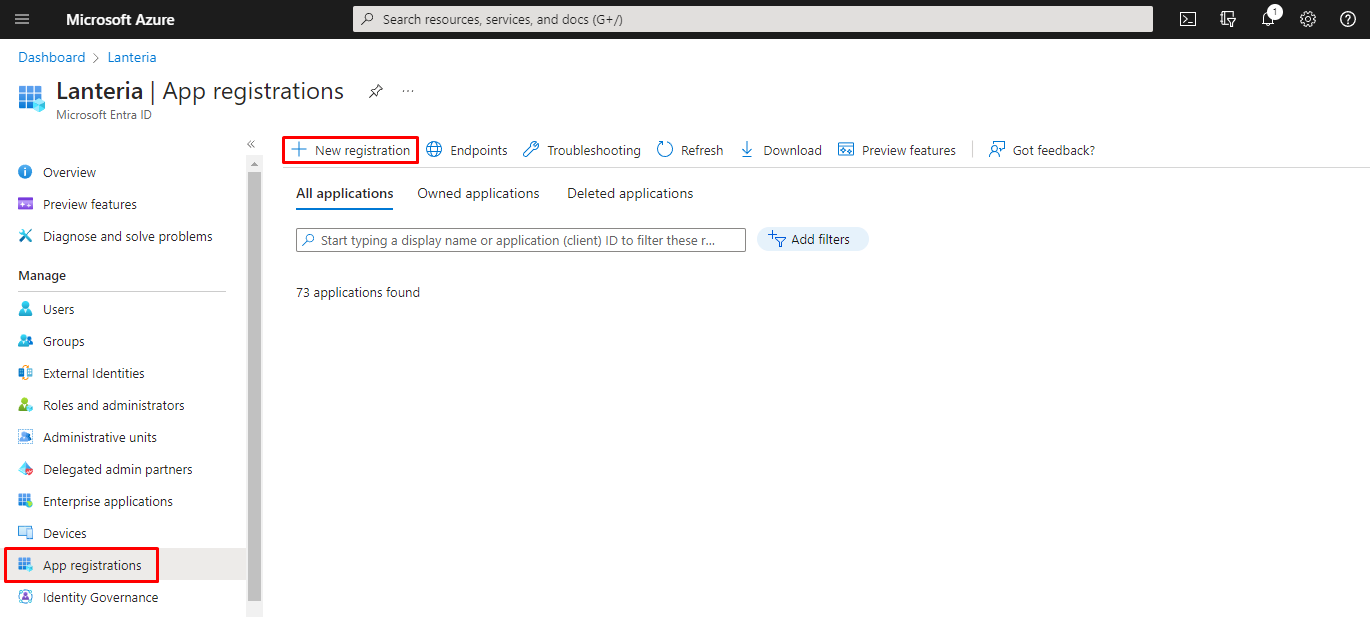
- Sign in to the Azure portal, browse to Microsoft Entra ID > App registrations, and then click New registration to create a new application registration.

- In the Register an application window, in the Name field, specify the name of the application.
- Under the Supported Account Types field, select Accounts in this organizational directory only (Default Directory only - Single tenant).
- Under Redirect URI (optional), select web, and then type your Lanteria HR site URL.
- Click Register.
- Once registered, you can see Application (client) ID and Directory (tenant) ID. Save these IDs somewhere; they will be required when filling in the Azure AD Connection Settings field while configuring Office 365 Integration Settings in Lanteria HR.

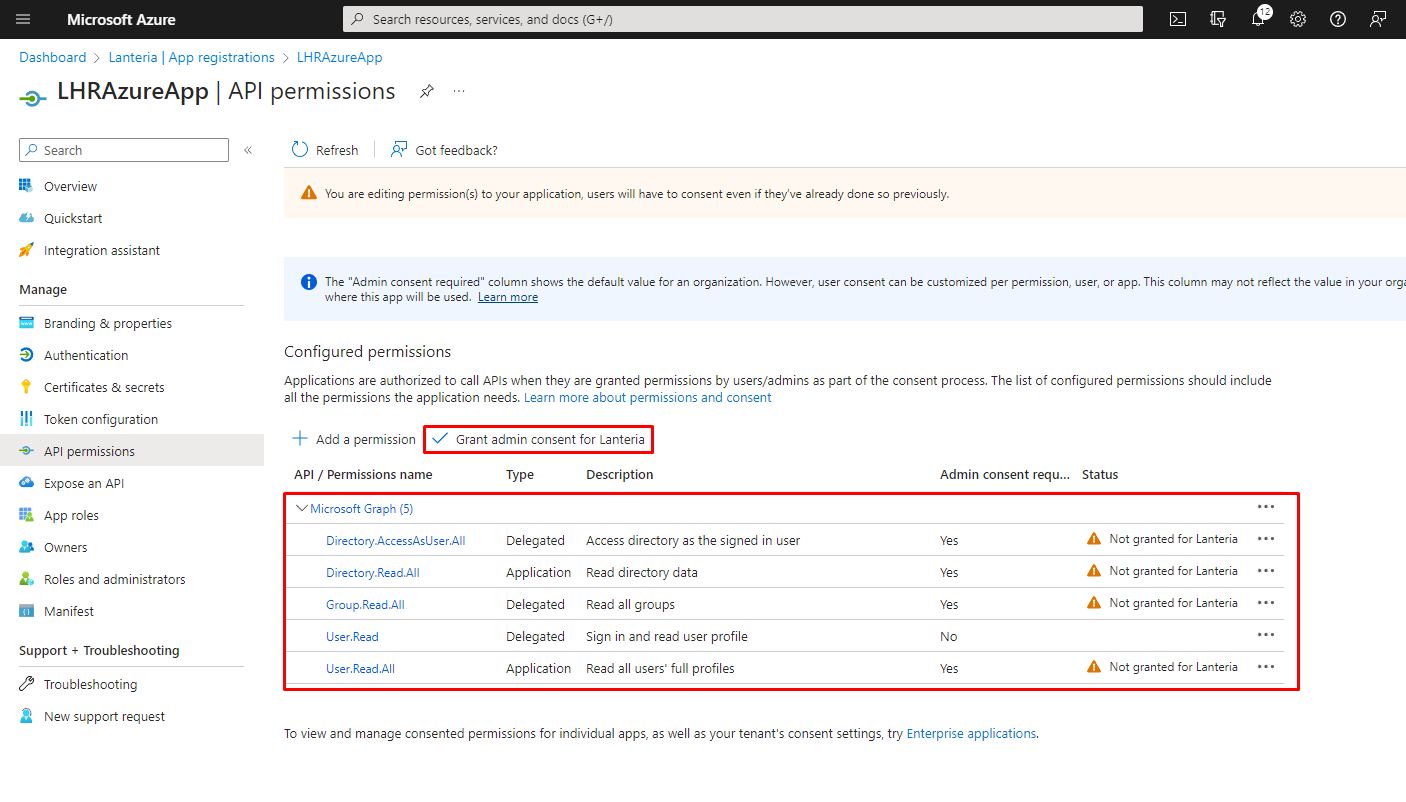
- Click API Permissions, and ensure that the following permissions are granted:
API/PERMISSION NAME TYPE DESCRIPTION ADMIN CONSENT REQUIRED STATUS Microsoft Graph (5) Directory.AccessAsUser.All Delegated Access directory as the signed in user Yes Granted / Not Granted for [Your directory] Directory.Read.All Application Read directory data Yes Granted / Not Granted for [Your directory] Group.Read.All Delegated Read all groups Yes Granted / Not Granted for [Your directory] User.Read Application Sign in and read user profile No Granted / Not Granted for [Your directory] User.Read.All Application Read all users' fill profiles Yes Granted / Not Granted for [Your directory] - Under Grant Consent, click Grant admin consent for [Lanteria].

- Click Yes to the confirmation message that appears.
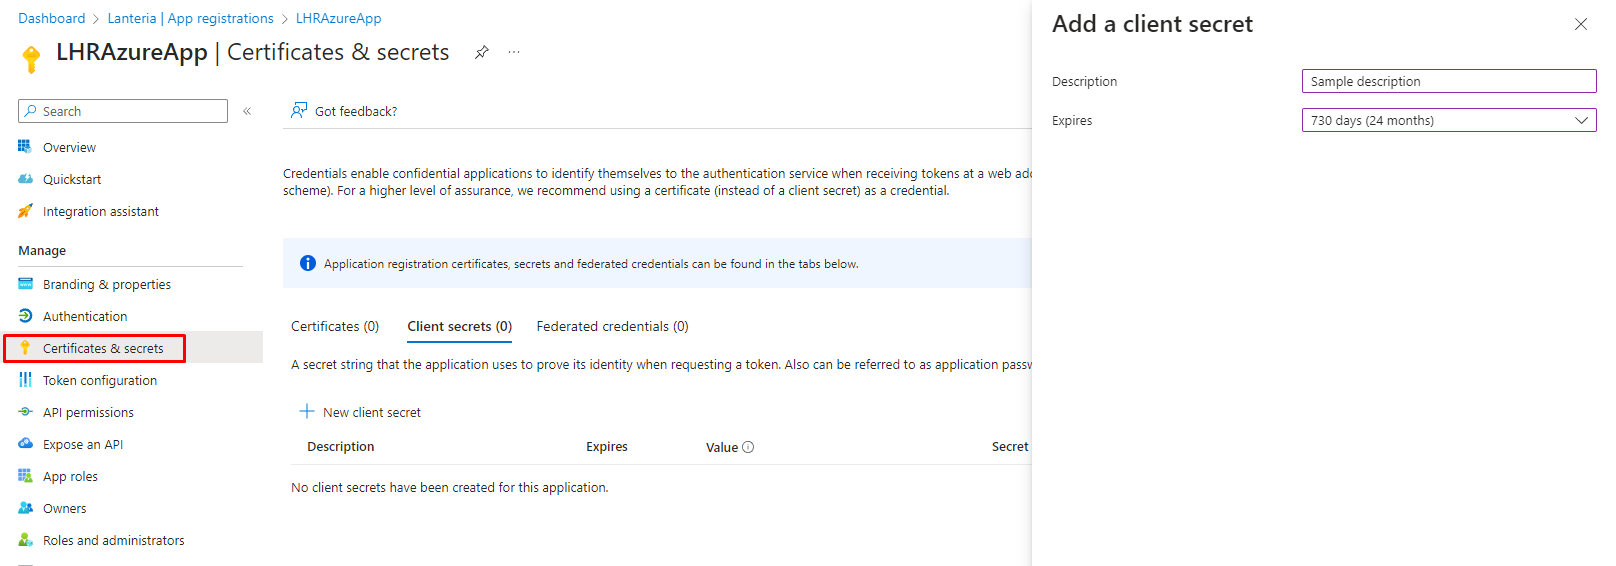
- Under Manage, click Certificates and Secrets, and then add a new client secret that will be used when filling in the Azure AD Connection Settings field while configuring Office 365 Integration Settings in Lanteria HR.
- In the Description field, type the secret description.
- Set Expires to 730 days (24 months).
- Click Add.

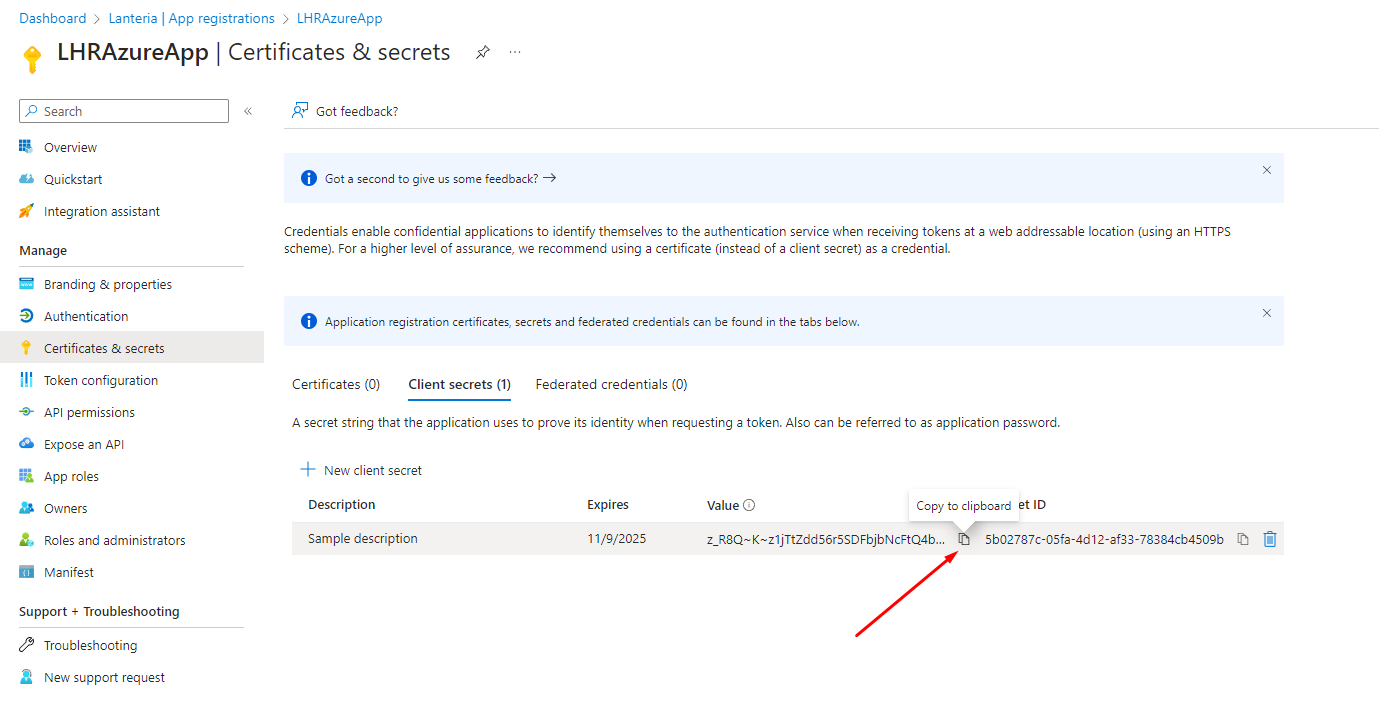
- Once a new client secret is created, copy it's value and save it somewhere, it will be used when configuring Lanteria HR.
 NoteThe Never Expire portal option for the Client Secret Expiry was removed in April 2021.
Please set up a reminder to create a new client secret and update Lanteria HR settings before it expires.
Was this article helpful?

