The Data Export functionality gives you an ability to export employee data on a set schedule and send it by e-mail or upload it to an FTP server. Only data from Employees and Employee Salary Details lists can be exported.
The process of scheduling data export is described below.
Follow these steps:
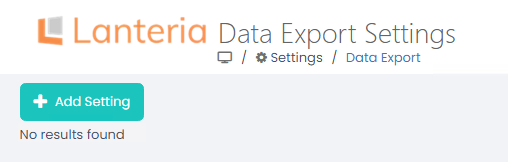
- Go to Settings > Data Export.
- Click the Add Setting button to add a new data export rule.
- On the form that appears enter the new setting title into the Title field.
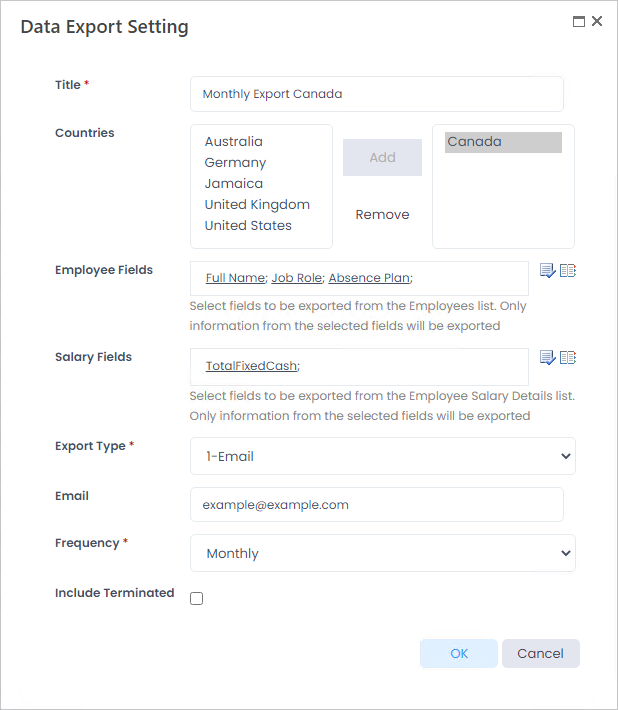
- Select the countries this setting is being created for in the Country field. A separate export file will be created for each country.NoteIf you do not select any country, information for all the countries will be exported and united into one file.
- Select the fields that you need to export from the Employees and Employee Salary Details lists in the Employee Fields and Salary Fields, respectively.
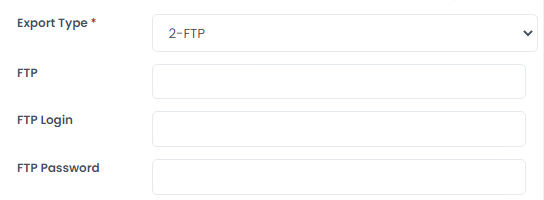
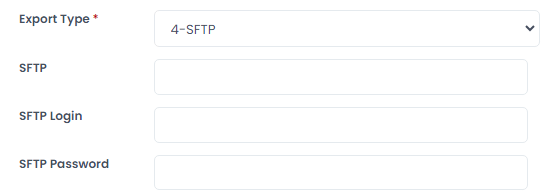
- Select the export type from the drop-down list in the Export Type field. The available options are:
- 1-Email, where the data is sent via e-mail
- 2-FTP, where the data is uploaded to an FTP server
- 3-Save to Library, where the data is stored in the document library Data Export Library available in Settings > Site Lists and Libraries
- 4-SFTP, where the data is uploaded to an SFTP server NotePlease note that when exporting to FTP, SFTP or email, the data is also temporarily saved to the Data Export Library , but is deleted immediately after sending to the selected location.
- If the Email option is selected, enter the recipient's e-mail address into the Email field.
- If the FTP option is selected, enter the FTP credentials into the FTP, FTP Login and FTP Password fields.
- If the SFTP option is selected, enter the SFTP credentials into the SFTP, SFTP Login and SFTP Password fields.
- Select the data export frequency from the drop-down list in the Frequency field. The available options are:
- Daily – The report is generated every day.
- Weekly – The report is generated once a week, on Monday.
- Monthly – The report is generated once a month, on the first day of the month.
- Select the Include Terminated check box to include terminated employees into the dataset for export.
- Click the OK button.
After a setting is created, the Data Export system job will use it to export and send relevant data.