When the integration is added, connection tested and the .csv file is in the configured FTP/SFTP folder, you are ready to proceed to data mapping. Follow these steps to map data for synchronization:
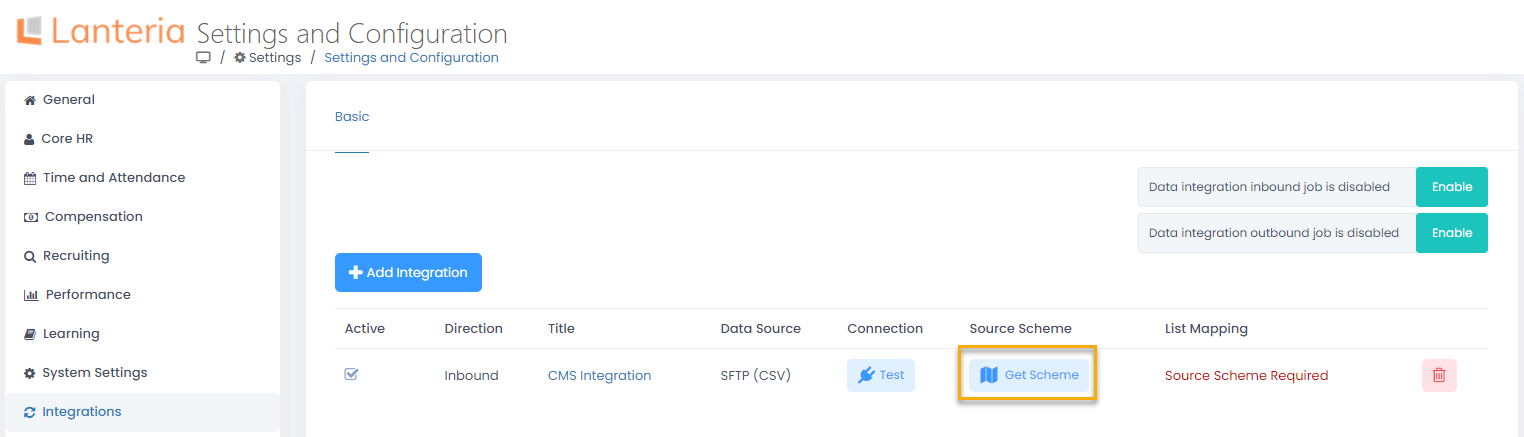
- First of all, the .csv file data scheme must be uploaded to Lanteria HR. Under Settings > Settings and Configuration > Integrations > Employee Integration, locate the newly created integration and click Get Scheme in the Source Scheme column.
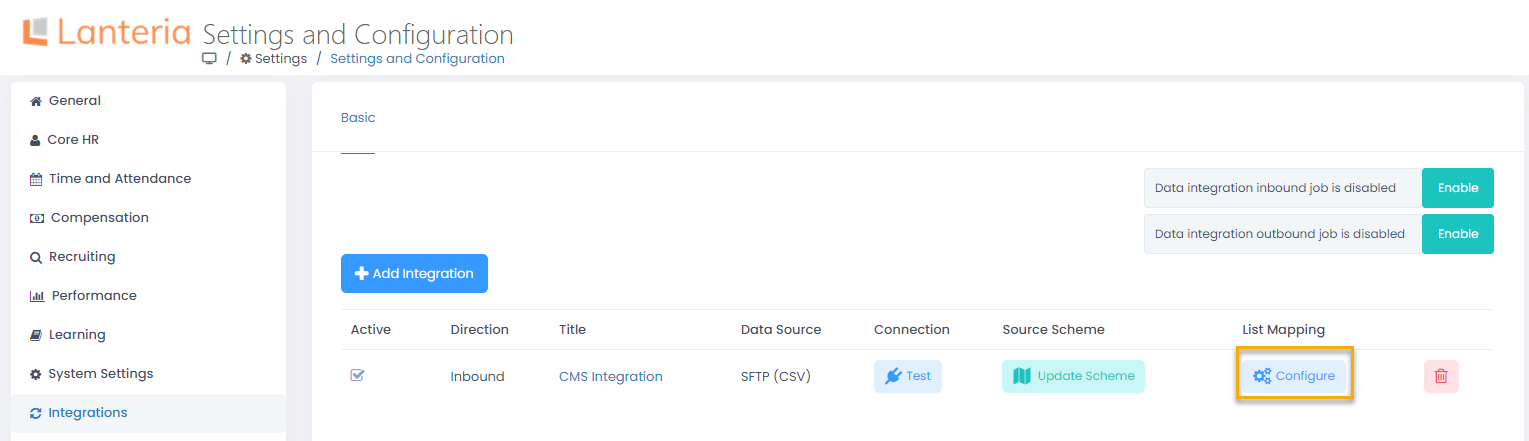
- A message will display informing that the data source scheme was successfully updated and how many fields (first line fields from the .csv file separated with the delimiter specified when creating the integration) were found. Instead of the Get Scheme button, Update Scheme will be now displayed so that data scheme could be updated in case of any changes to the .csv file. Also, the Configure button will display in the List Mapping column. Click Configure.
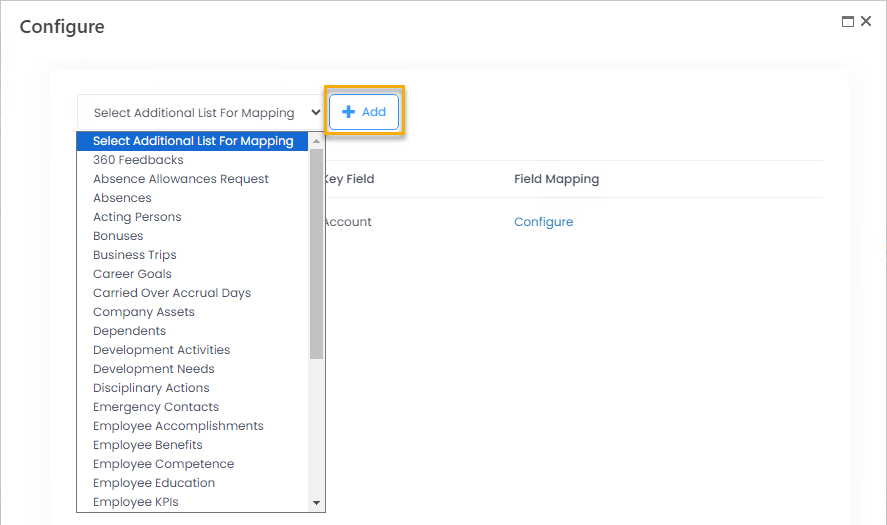
- On the page that opens, you can see lists in which data will be updated based on the .csv file. By default, it is only the Employees list. You cannot remove Employees from the lists for synchronization, since it's a basic list that is being updated. You can add other (additional) lists that are connected with the Employees list through lookups. After you click Select Additional List for Mapping and select a list, a suggested key field will be displayed next to it. Change the key field, if relevant, and then click Add to add the list.NoteOnce a list has been added to the integration, it won't be available for selection any more. You cannot add the same list twice.
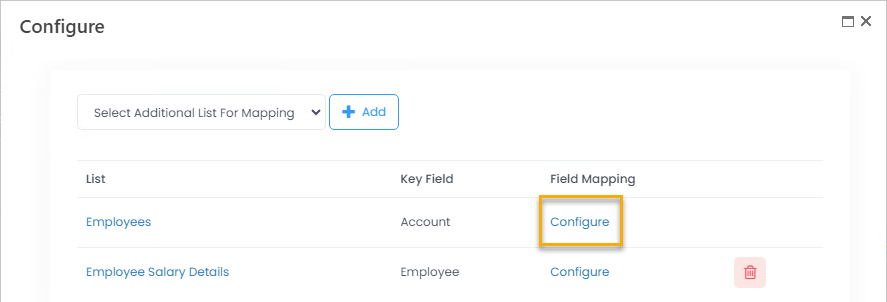
- To set up the field mapping for a list, click Configure.
- For the Employees list fields that must be updated, select the corresponding fields from the .csv file. NoteThe list of the fields you can choose from is identified when you click Get for Mapping or Update for Mapping for the Source Scheme. For example, in the .csv file with such structure
 the following fields have been recognized
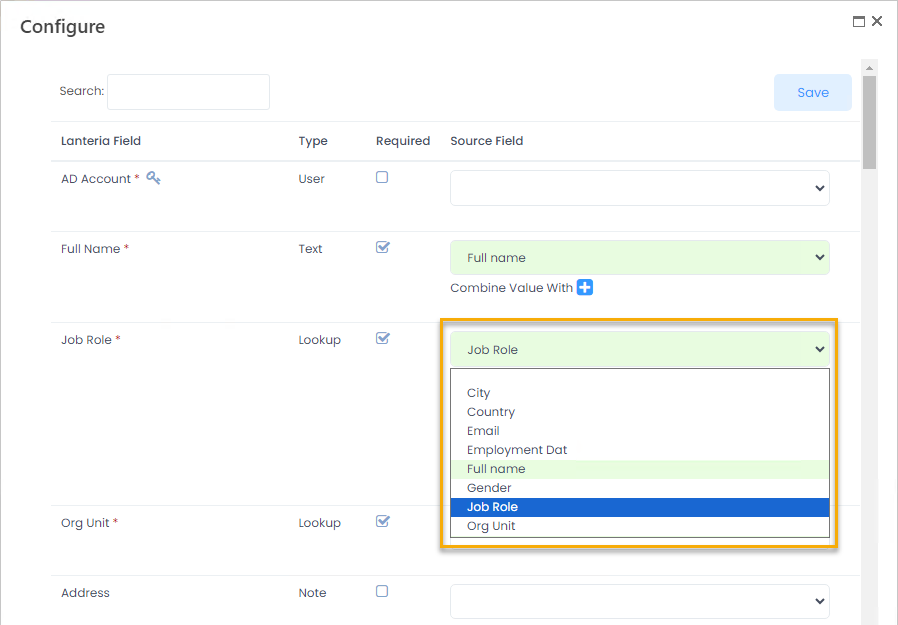
The text is recognized as a field if it is in the first line of the file and is separated with the delimiter specified when creating an integration.
For the Employees list, the Full Name, Job Role, Org Unit and key field are mandatory to be mapped. - When mapping the fields of different types, you have the following options:
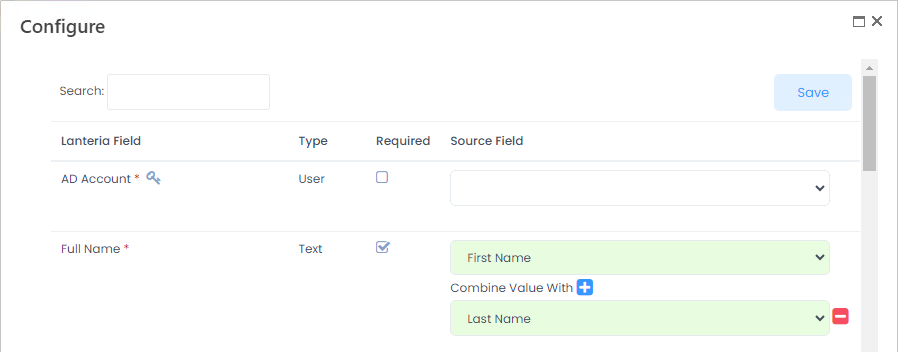
- Text (single line of text), Note (multiple line of text)- have option to combine value with another field from the source .csv file. Values will be combined together with the space delimiter. For example, if the source file doesn't have the Full Name field, but has First Name and Last Name, these can be combined when mapping to get the full name for Lanteria HR.
 NoteFor the single line of text, if length of text exceeds 255 symbols, it will be trimmed and the extra text won't be saved.
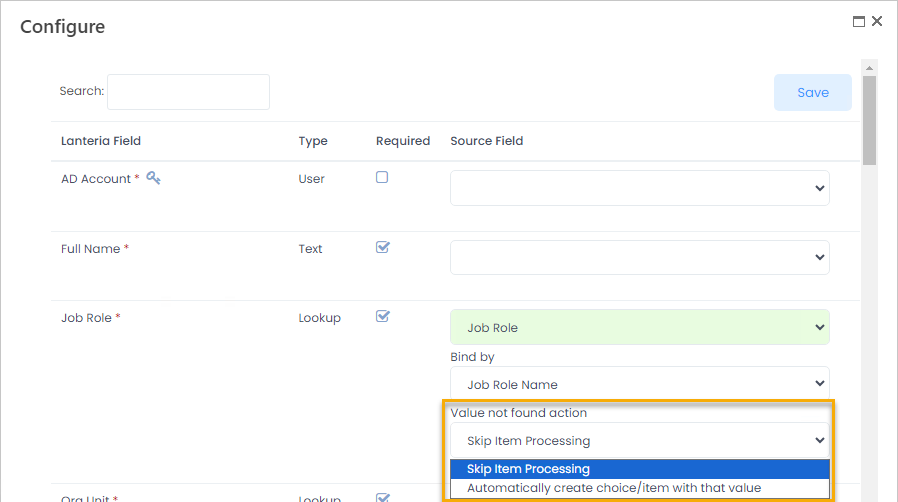
 - Lookup - The lookup values can be mapped by any single line of text or number field. Select it in the Bind by field that becomes available after mapping a lookup.
 Also, select what is to be done if a lookup value wasn't found. Set the Value not found setting to one of the following values:
- Skip Item Processing - default choice - if a lookup value is not found, an error will be recorded to the log and the item with unknown lookup value won't be processed.
- Ignore Item Field Processing - this option is available only for non-mandatory fields and for non-self-lookups (like Manager, etc). If value is not found, an error won't be recorded and item will be updated without changing the value of that field.
- Automatically create choice/item with that value - if the value is not found, the missing item will be created, and if the mapped field (Code or Title) is filled in for the created item, the employee record will be processed and the missing item filled in.
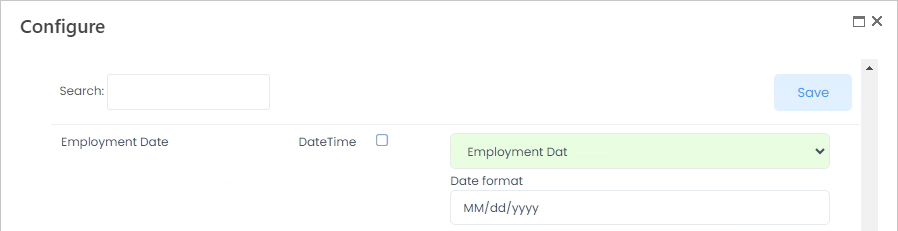
- DateTime - Specify the date format of the source file field.
- Choice - For the choice fields, it is possible to transform the source value. For each choice, you can specify how the value of the source file corresponds to the Lanteria HR field value. For example, in the source file, the gender is marked as M or F, whereas in Lanteria HR, it is Female or Mail. Specify it when mapping the Gender field.
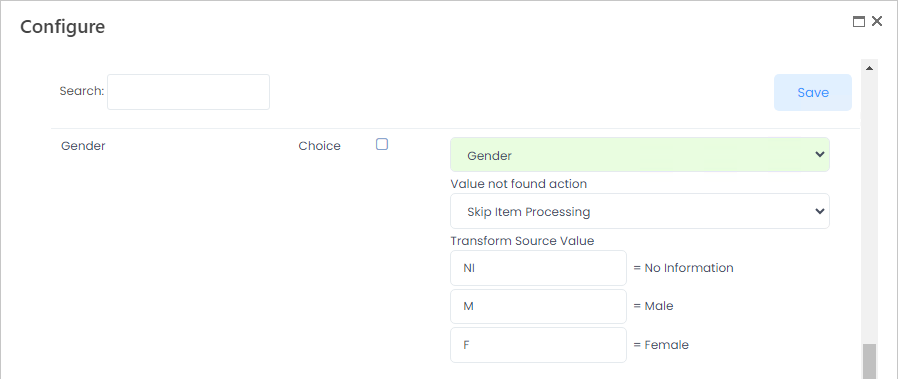 The choice fields have the same options for the value not found action as lookups.
 - Number
- Yes/No - for the Boolean fields, the value will be interpreted as true if it equals 1, y, yes or true.
- Hyperlink or Picture
- Text (single line of text), Note (multiple line of text)- have option to combine value with another field from the source .csv file. Values will be combined together with the space delimiter. For example, if the source file doesn't have the Full Name field, but has First Name and Last Name, these can be combined when mapping to get the full name for Lanteria HR.
- When all the fields have been mapped, click Save.