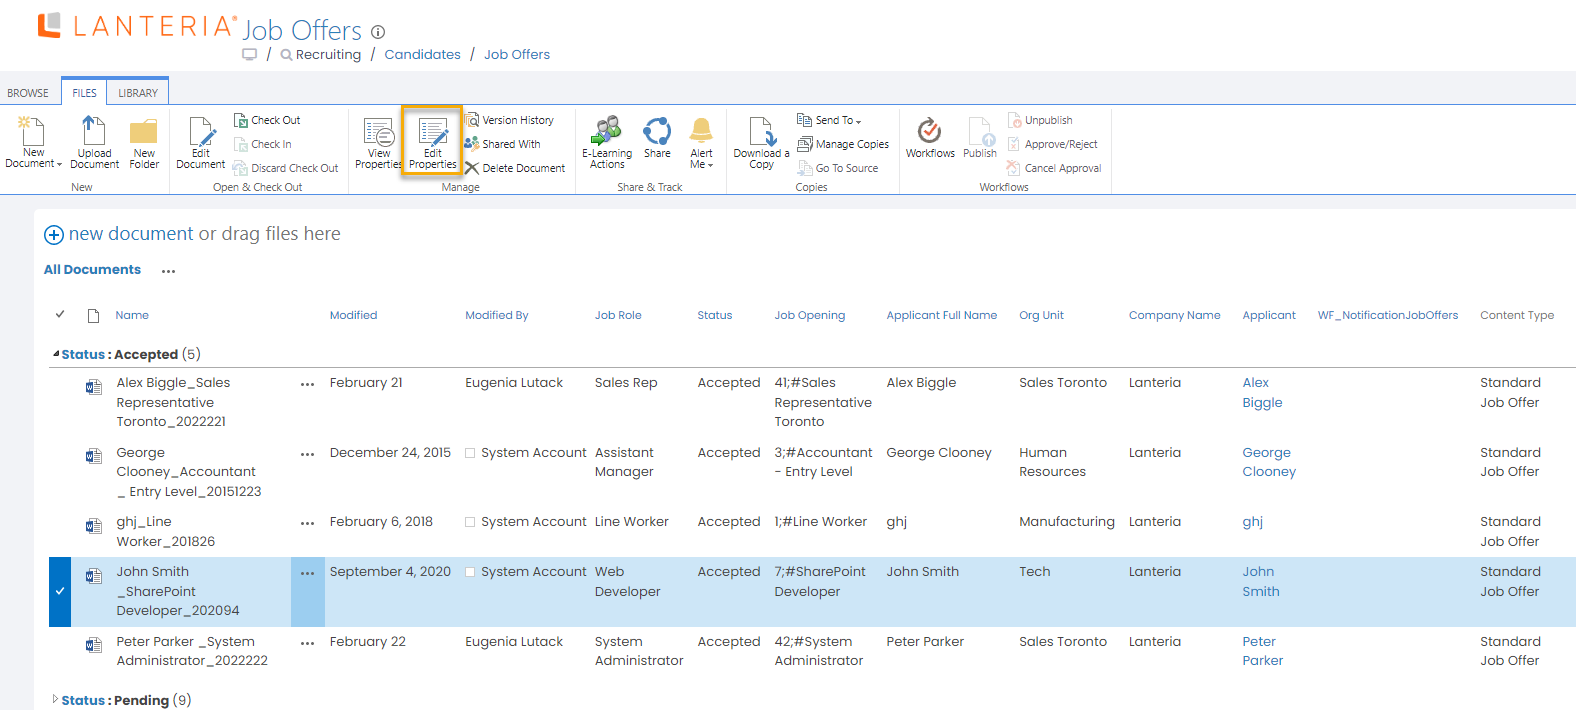
You can access the Job Offers page through Recruiting > Candidates > Job Offers. You can see the list of job offers that were generated/uploaded to the system.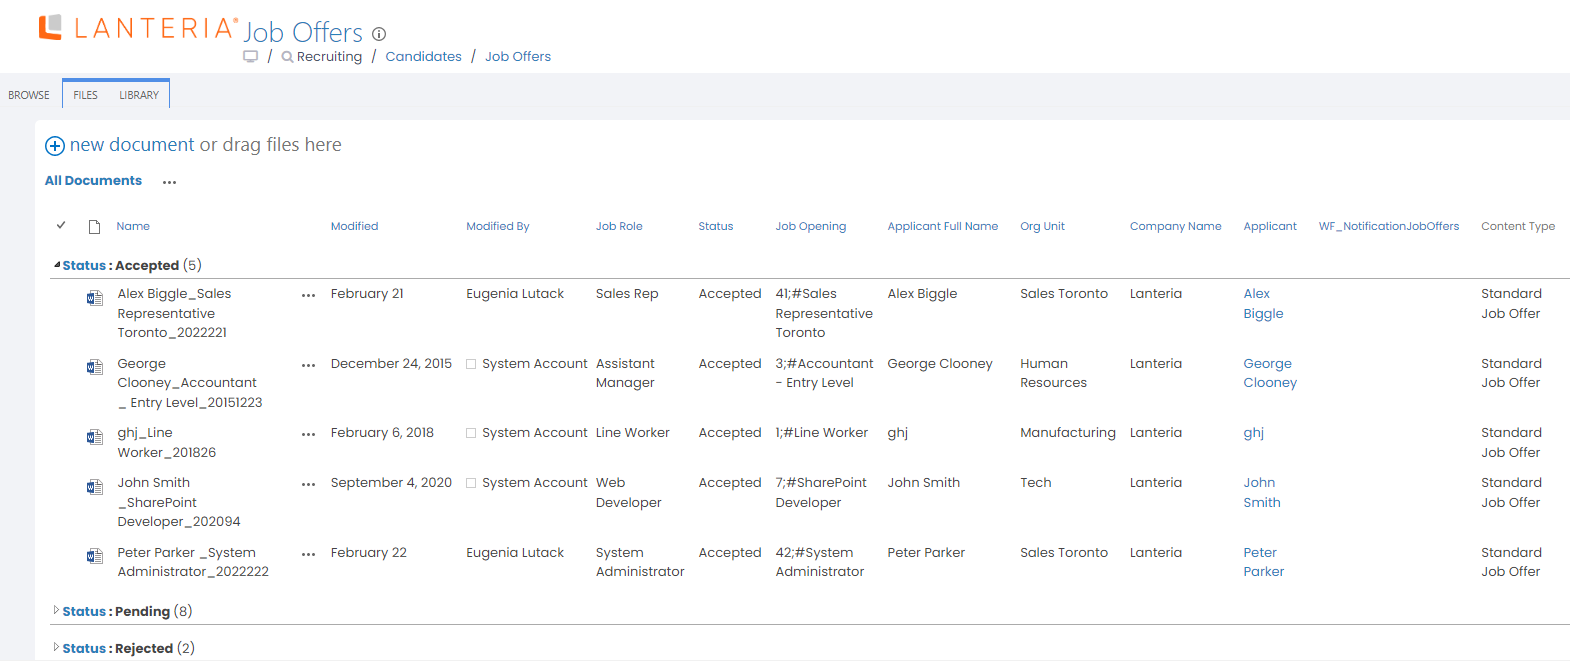
Generate a job offer for candidate
To generate a job offer for one or multiple candidates:
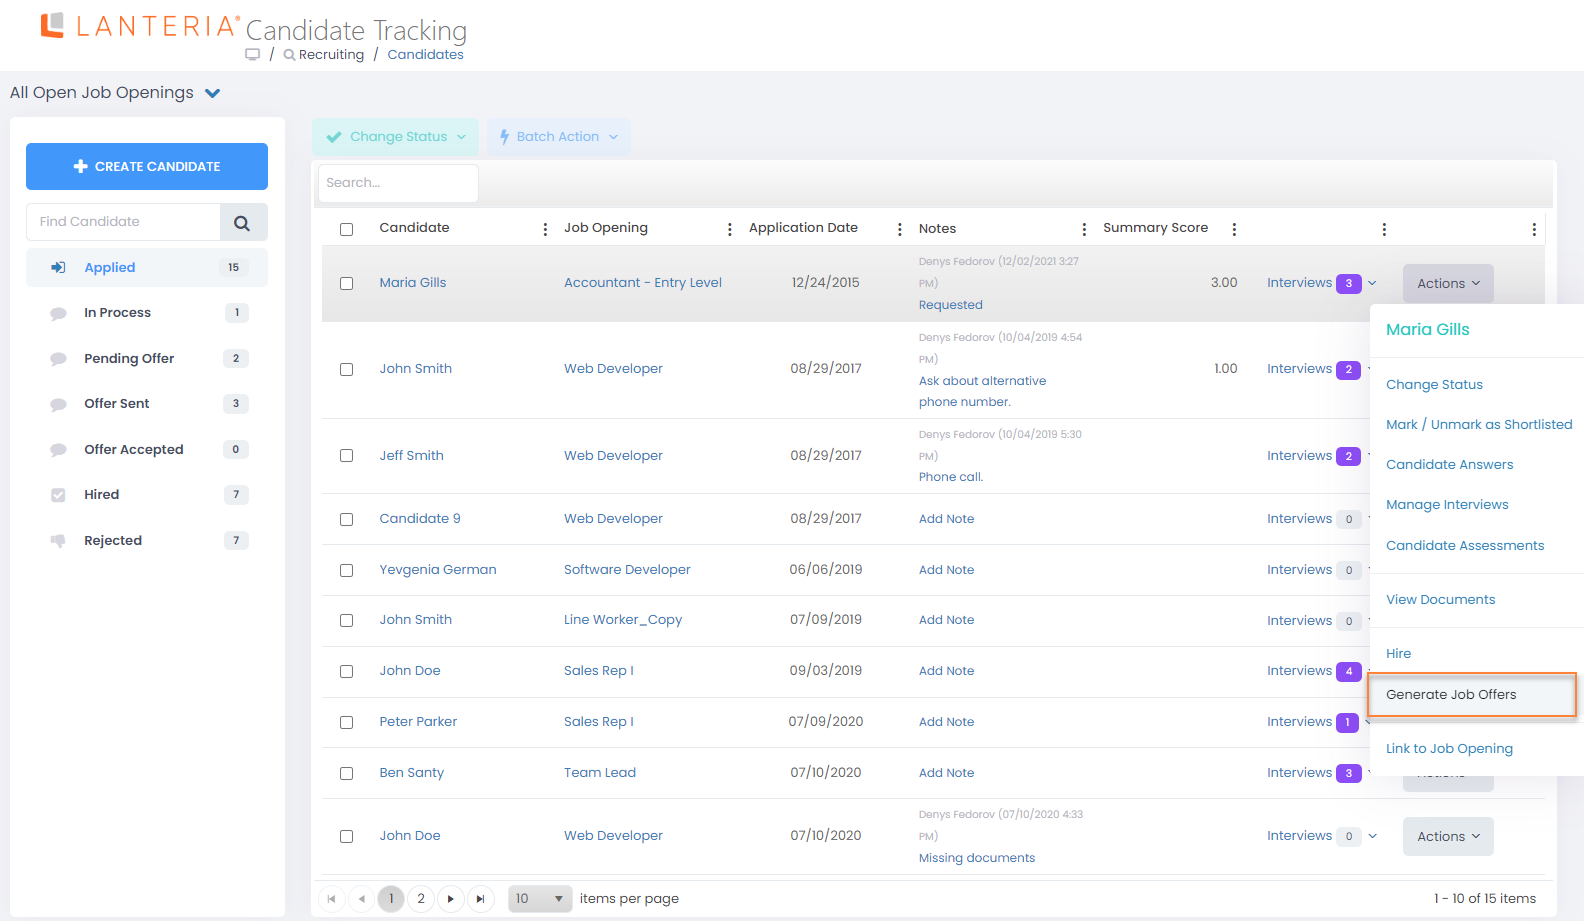
- Go to Recruiting > Candidates > Candidates.
- On the Candidate Tracking page, find a candidate that you want to generate an offer for, and then select Actions > Generate Job Offer next to this candidate.
 If you want to generate a job offer for several candidates at the same time, select two or more candidates, and then select Batch Action > Generate Job Offers.
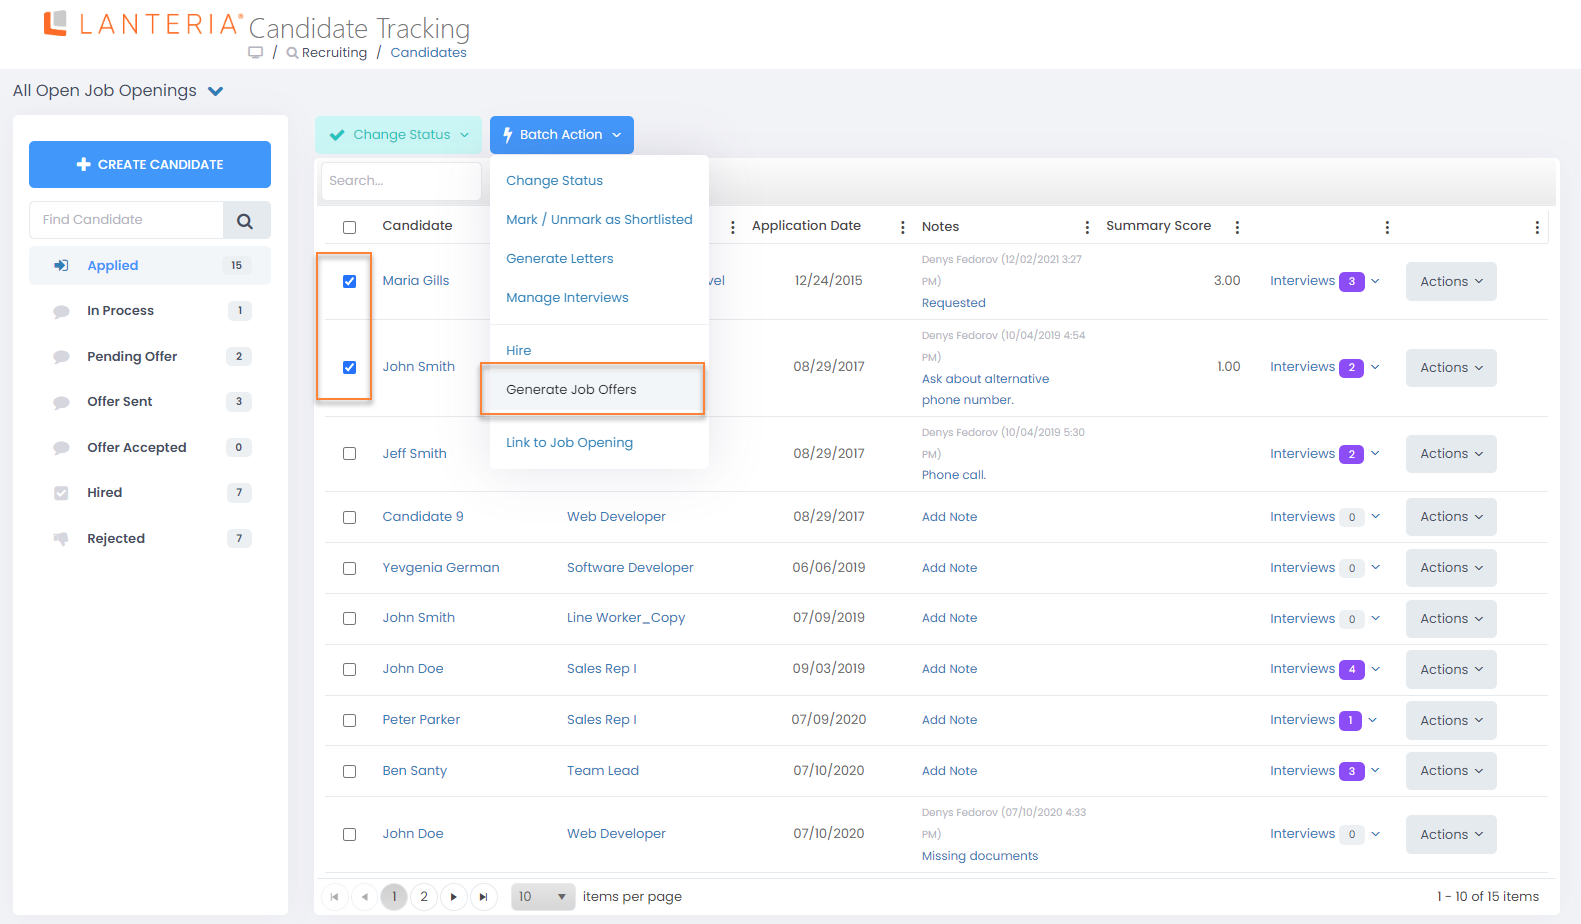
- In the Process Candidates dialog window that appears, select the following options:
- Set Candidate Status - Select the candidate status that will be applied upon offer generation. Statuses available for selection depend on candidate statuses configured in your Lanteria HR.
- Notes - Add notes if necessary.
- Generate Job Offers - Select the job offer template that will be used to generate a job offer. Templates available for selection depend on job offer templates configured in your Lanteria HR.
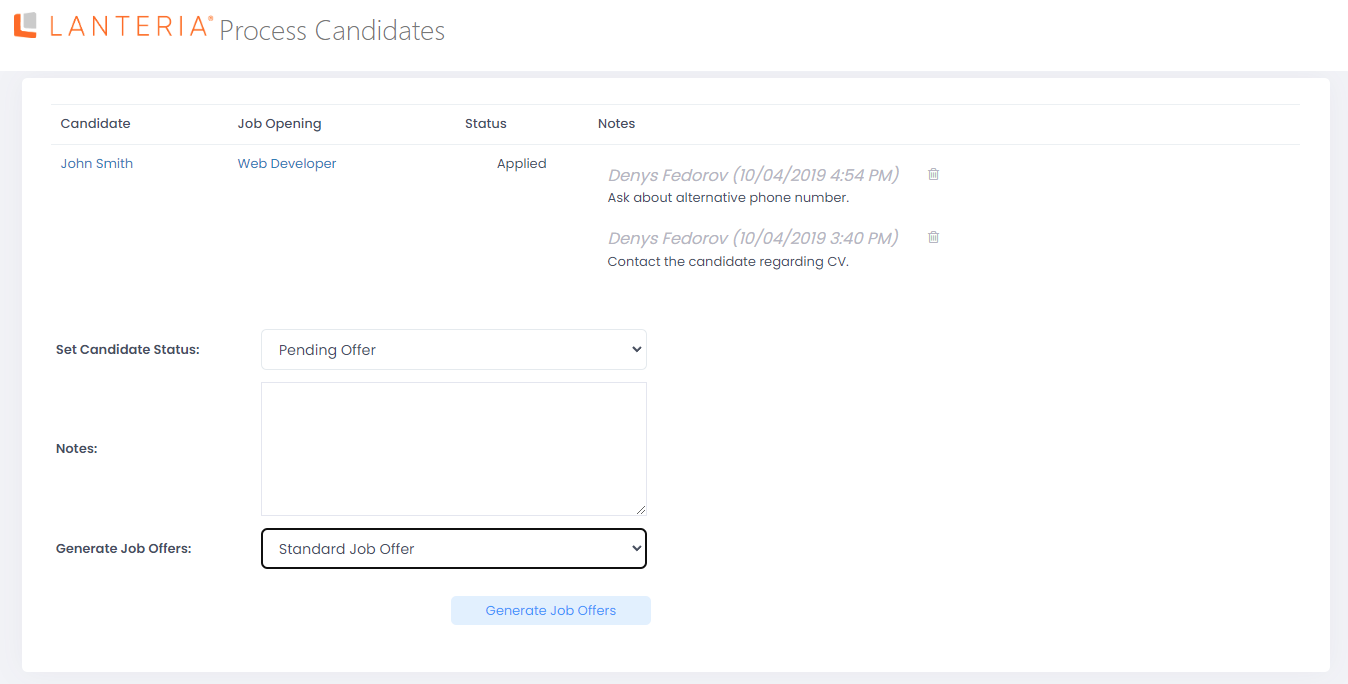 NoteAt the top of the page, you can see the selected candidate(s) for whom a job offer will be generated.
- Click Generate Job Offers to generate a job offer for the selected candidate(s).
The job offer(s) are generated with the Pending status and become available on the Job Offers page. Newly generated or uploaded job offers are marked with  . You still need to send them.
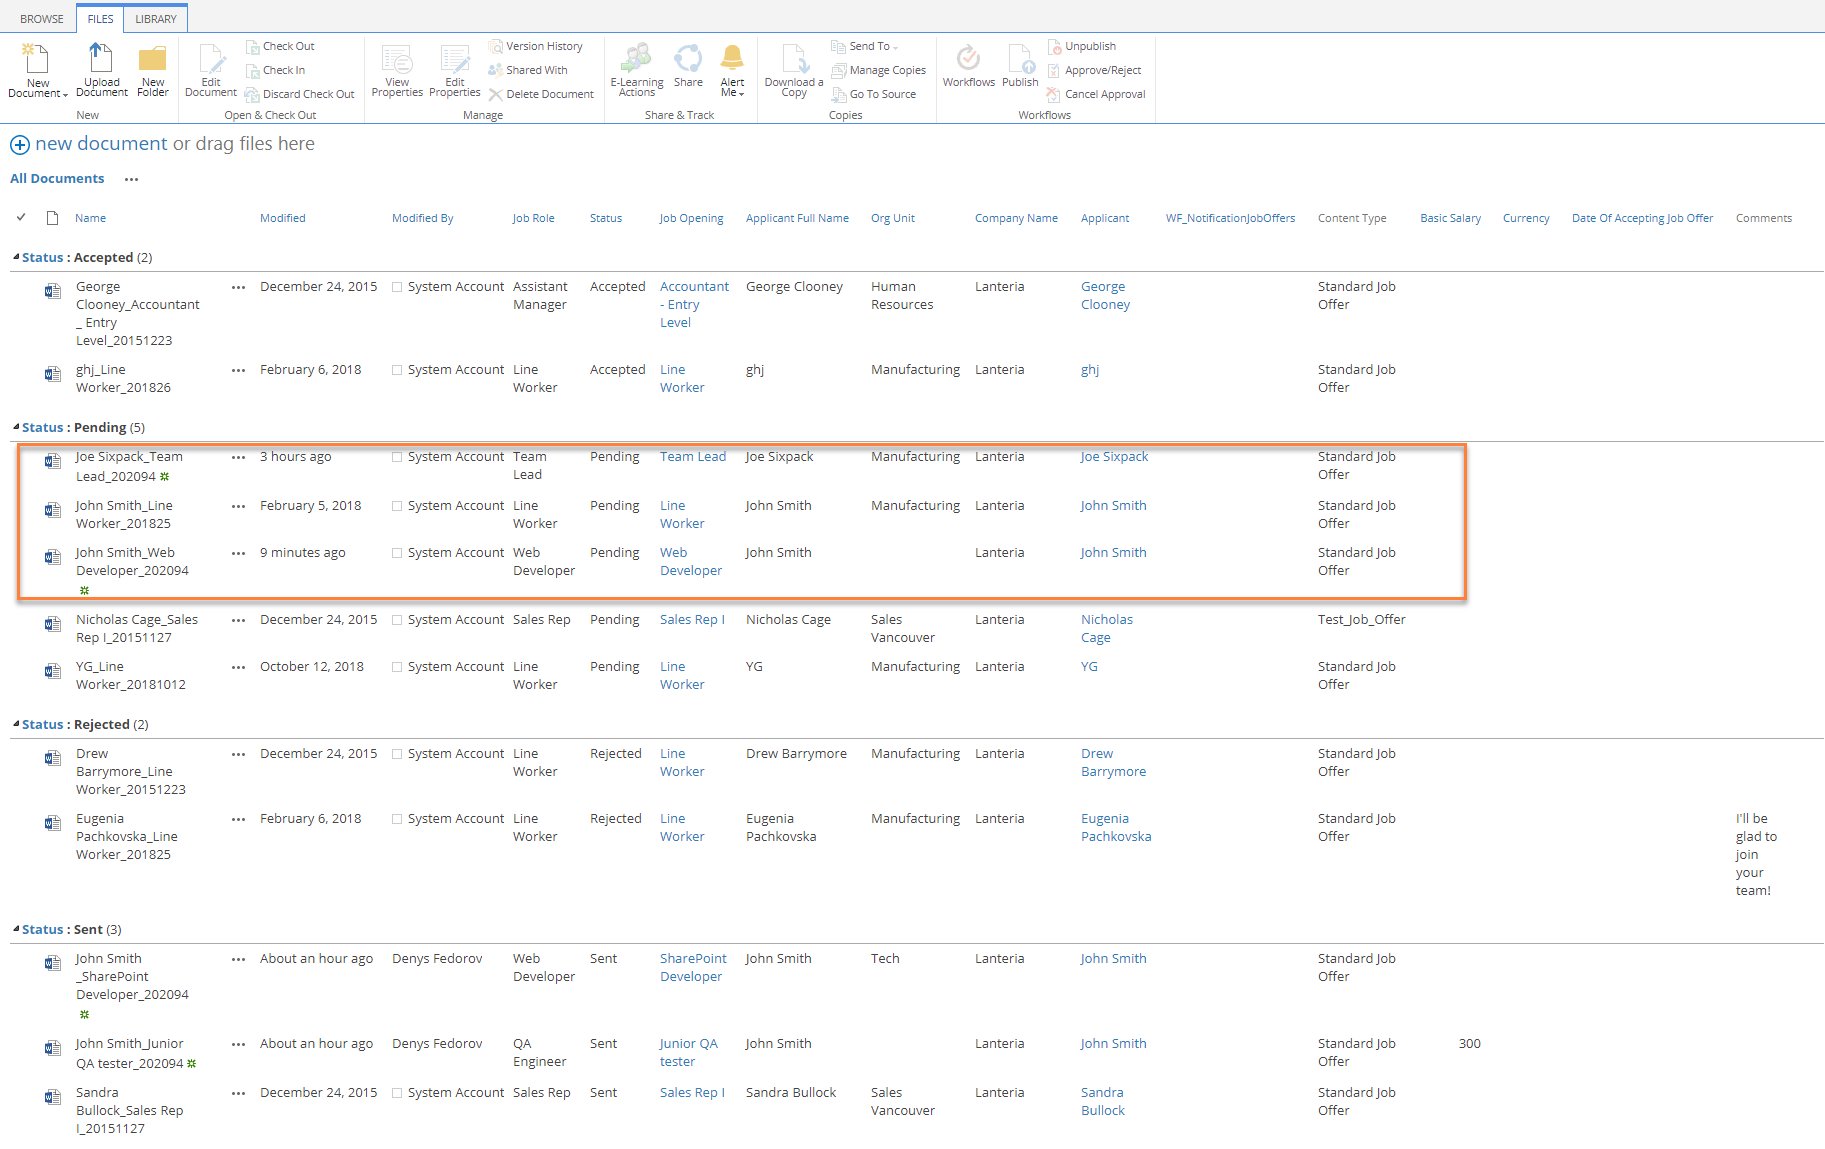
Please note that upon generating of a job offer, only the following fields on the Job Offers page as well as on the generated Word document, if they have been added as document properties on the job offer document template, will be filled in automatically:
- Applicant Full Name - will be taken from the candidate card
- Applicant - will be taken from job opening
- Job Opening - will be taken from job opening
- Vacancy_title - will be taken from job opening
- Company Name - will be taken from General Settings - Company Name
- Org Unit- will be taken from job opening
- Job Role - will be taken from job opening
- Status - will be taken from job opening
- Fields from the content type that have the same internal name as the fields on the candidate card
For these filled to be filled in automatically, they must be added to the list of columns of the content type the job offer template is based on. Other fields can be filled in manually after job offer generation before sending the offer to the candidate.
Upload a job offer
You can upload an already created job offer document.
To upload a job offer:
- Go to Recruiting > Candidates, and then click the Job Offers link in the top right corner.
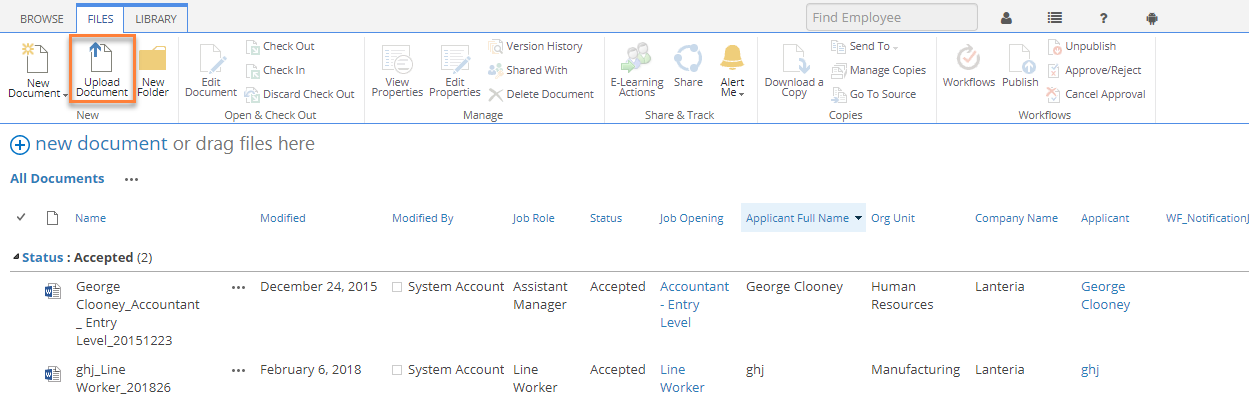
- On the Job Offers page, on the Files tab, select Upload Document.
- In the Add a document dialog window, click Choose File, browse the to the job offer document, and then click Open.

- Select the Add as a new version to existing files check box if you want to overwrite an existing file if a file with the same name already exists. The new file will have a new file version. If you clear this check box, an error will occur if a file with the same name already exists.
- Optionally, in the Version Comments field, add comments about the document version.
- Click OK to upload the document.
- If the document has been successfully uploaded, the window with document properties is opened where you can edit the job offer details:
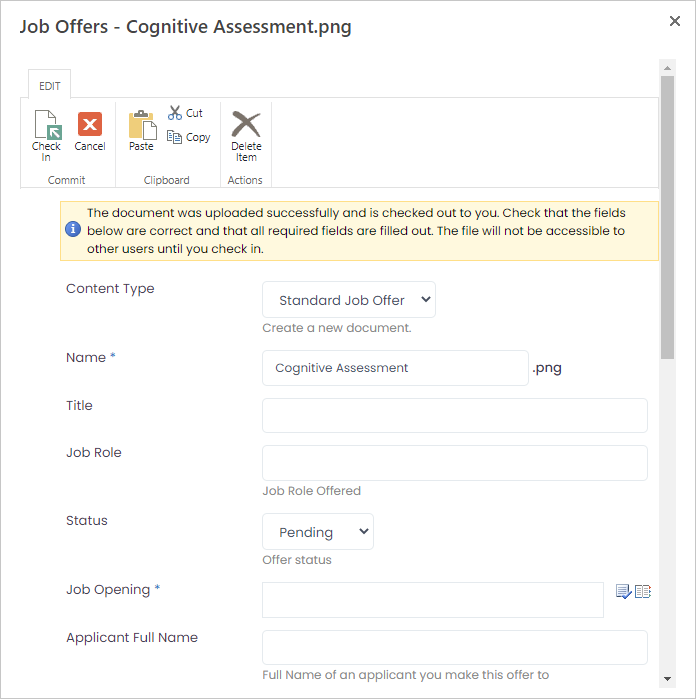
- Edit document properties:
- Content Type – Specifies the job offer template. Select a job offer template from the list of available templates configured in your Lanteria HR.
- Name – Specifies the name of the job offer Word document. This field is filled in automatically with the name of the uploaded document, but you can change it if necessary. This field is mandatory.
- Title – Specifies the title of the job offer.
- Job Role – Specifies the job role the job offer is intended for.
- Status – Specifies the status of the job offer document:
- Pending - Select this status if you want to send the document to the candidate later.
- Sent - Select this status if you want the offer to immediately become available for the candidate on the Candidate Self-Service site (if such a site has been configured for your Lanteria HR) where the candidate will be able to accept or reject the offer. You can also select this status if the job offer has already been manually sent to the candidate by email.
- Accepted - Select this status if the candidate has already accepted the offer.
- Rejected - Select this status if the candidate has rejected the offer.
- Job Opening – Specifies the job opening the job offer will be linked to. This field is mandatory.
- Applicant Full Name – Specifies the full name of the candidate the job offer will be uploaded for.
- Org Unit – Specifies the org unit that the job role in the offer is intended for.
- Company Name – Specifies the name of the company.
- Applicant – Specifies the name of the candidate the uploaded job offer will be linked to.
- Address – Specifies the office address of the company.
- Basic Salary – Specifies the basic salary offered to the candidate.
- Currency – Specifies the currency of the offered base salary.
- Date Of Accepting Job Offer – Specifies the date when the candidate accepted the job offer. Fill in this field only if the candidate has already accepted the job offer.
- Comments – Specifies comments related to the job offer if any.
- Click Save.
Send a job offer
Job offers with the status Pending need to be sent to candidates. You can send a job offer to the Candidate Self-Service site where the candidate will be able to accept or reject the offer or manually send the offer by email.
To send a job offer to the Candidate Self-Service site:
- Go to Recruiting > Candidates, and then click the Job Offers link in the top right corner.
- On the Job Offers page, select a job offer with the Pending status that you want to send to the candidate, and then, on the Files tab, click Edit Properties.
- Set the Status property to Sent.
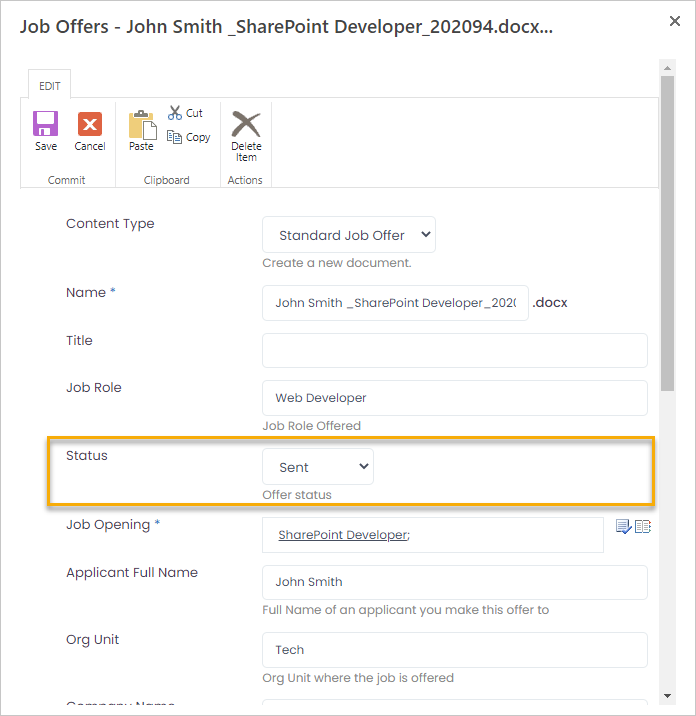
- Click Save.
The job offer becomes available for the candidate on the Candidate Self-Service site on the My Applications page for the corresponding application where the candidate can accept or reject the offer.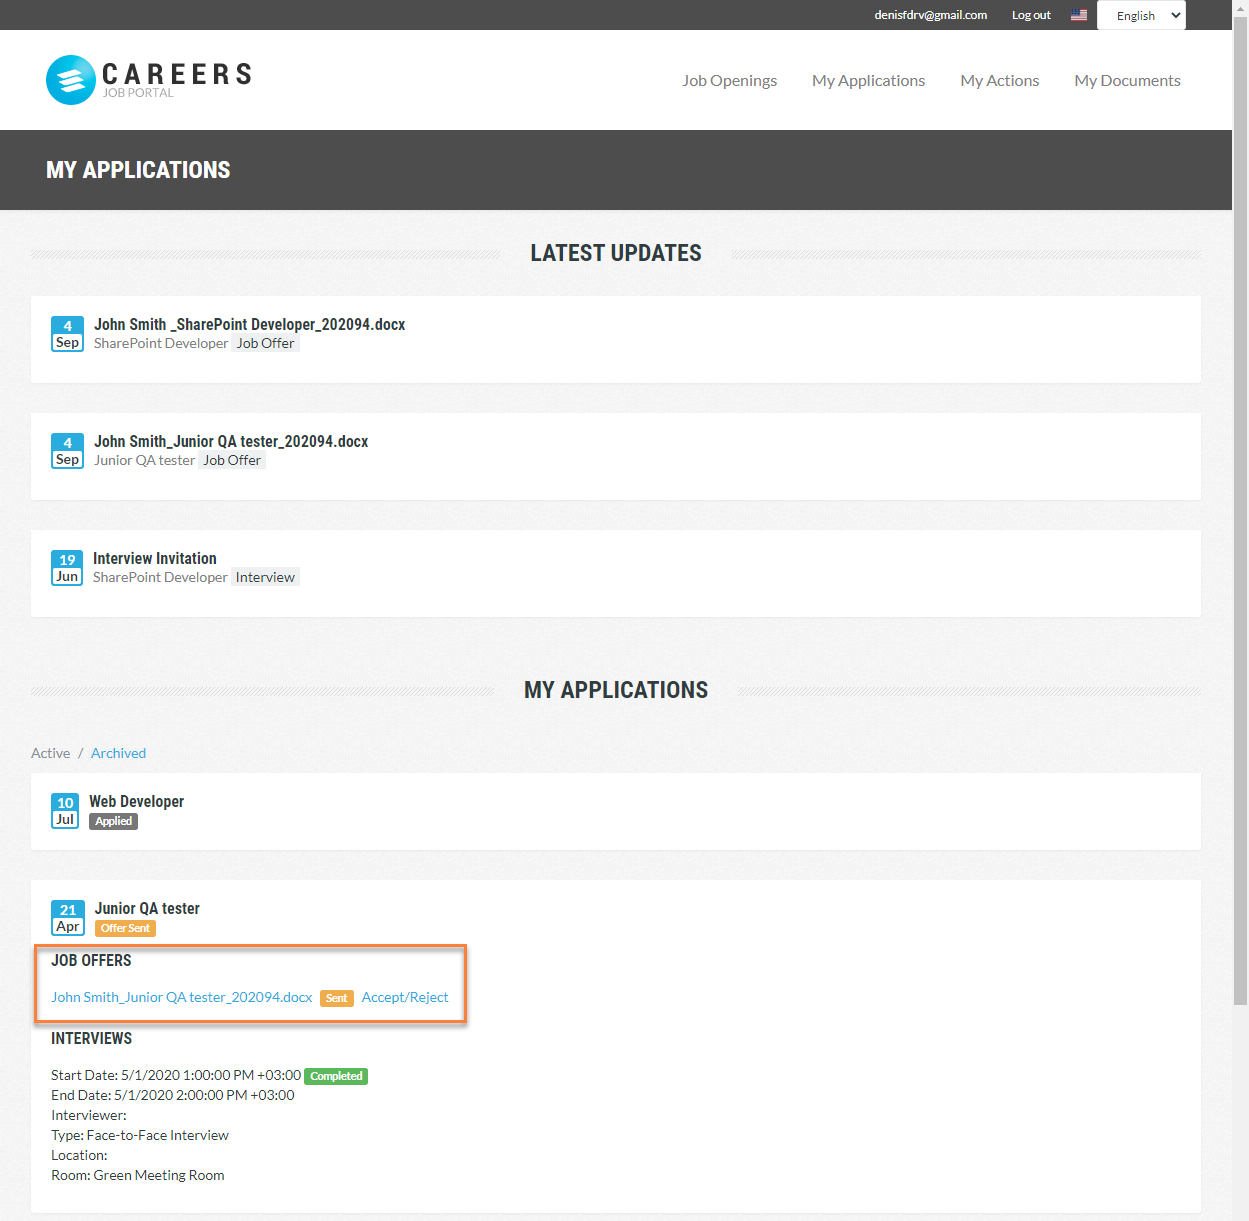
If the candidate accepts/rejects the offer on the Candidate Self-Service, the document status will be automatically updated to Accepted or Rejected.
To send a job offer by email:
- Go to Recruiting > Candidates, and then click the Job Offers link in the top right corner.
- On the Job Offers page, select a job offer with the Pending status that you want to send to the candidate, and then, on the Files tab, click Download a Copy.
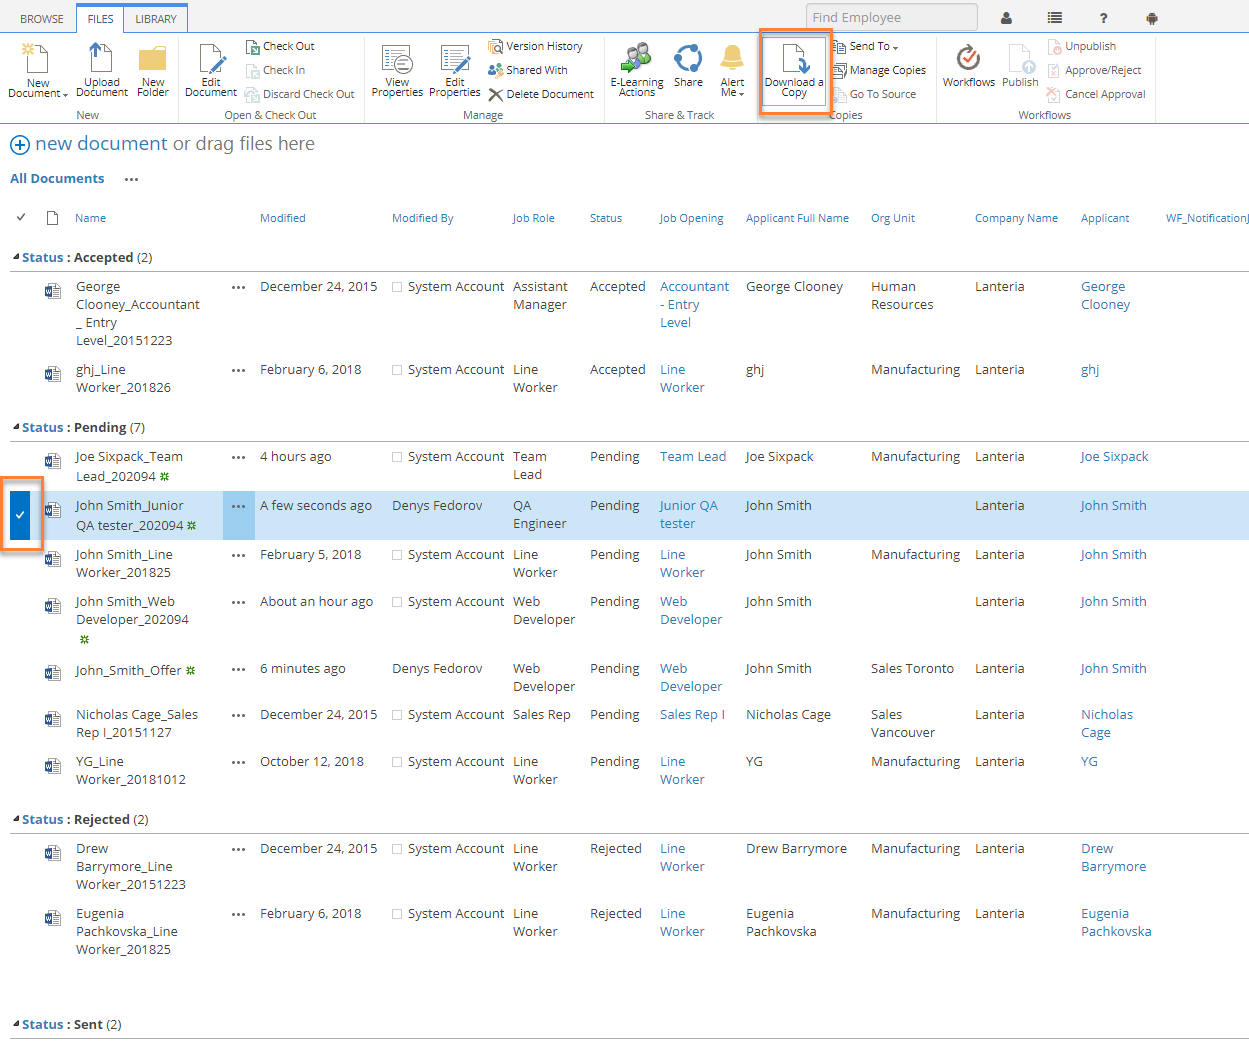
- Select a location where to save the document, and then click Save.
- Review the downloaded offer and edit it if necessary.
- Send the offer to the candidate via email. You can find the candidate personal email on the candidate card (Recruiting > Candidates, and then click a candidate name to open his or her card).
- On the Job Offers page, select the job offer that you have just sent by email, and then, on the Files tab, click Edit Properties.
- Set the Status property to Sent.NoteThe status may be already set to Sent if the offer has already been sent to the Candidate Self-Service site. In this case, you don't need to change the status.

- Click Save. NoteIf the Candidate Self-Service site was not configured and you only sent the offer by email, you will have to manually update the offer status to Accepted or Rejected after receiving a response from the candidate.