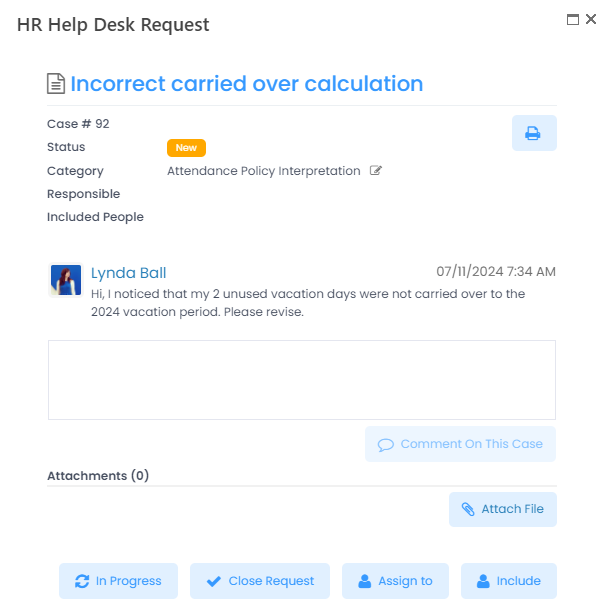
When a new HelpDesk request is created, it has the New status and is waiting to be processed. HelpDesk requests can be processed by both the request initiator in the Employee role or by any employee in the HR role, with certain actions, such as assigning a responsible person, available only if you are the responsible person or you have the HR role.
A new request is assigned to a responsible person(s) immediately in case the default responsible person(s) for the category the request belongs to is defined in the HelpDesk request category. This can be changed if necessary. If the request category doesn't have a default responsible person, an employee in the HR role is expected to assign a responsible person.
To process a HelpDesk request in the HR role
- In the HR role, go to Dashboard, and then click HR HelpDesk.

.png)
- At the top of the dashboard, you can set filters by the HelpDesk request status, by category, and/or select the Require My Action Only check box to view only requests where you are the responsible person.
- Click the title of a HelpDesk request that you want to process or update.
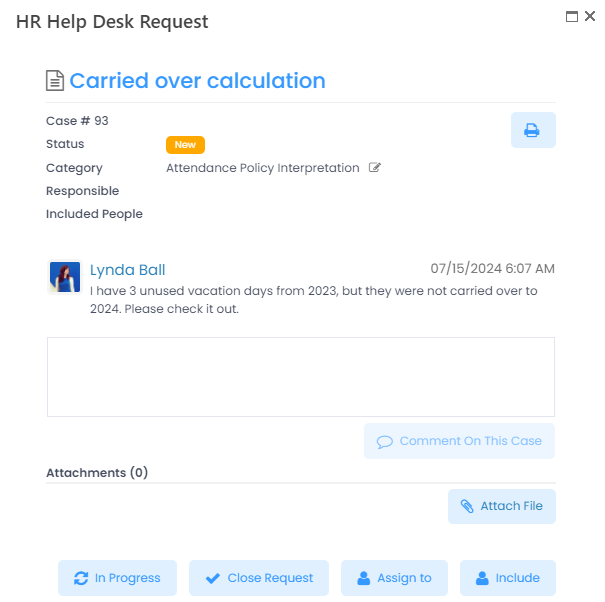
- In the HR role, you can do the following actions:
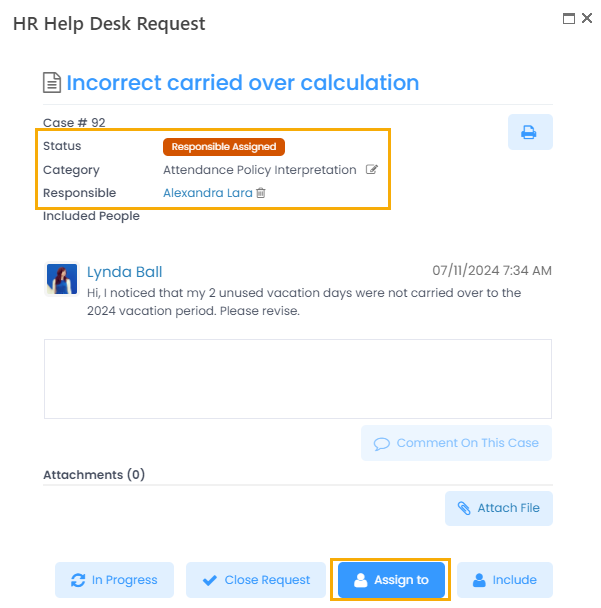
- Assign or change the responsible person(s). This is especially necessary if the request doesn't have any responsible person assigned to it. Click Assign to and in the text box, type or select the name(s) of the employees you want to assign the request to, and then click Yes. This also changes the status of the request from New to Responsible Assigned. The assigned responsible person gets an email notification about the request. To remove a responsible employee, click the recycle bin icon next to his or her name.
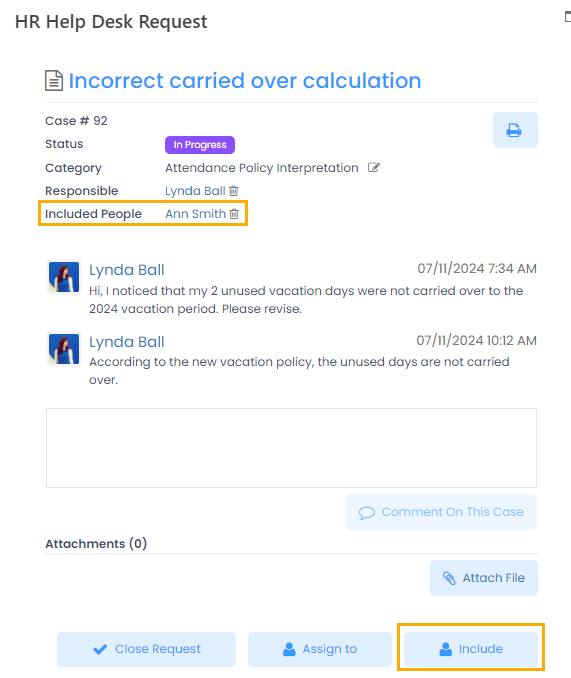
- Include employees as observers: click Include, select employee(s) and click Yes grant the selected employees the read-only access to the request. The included employees can be removed using the recycle bin icon next to their name.
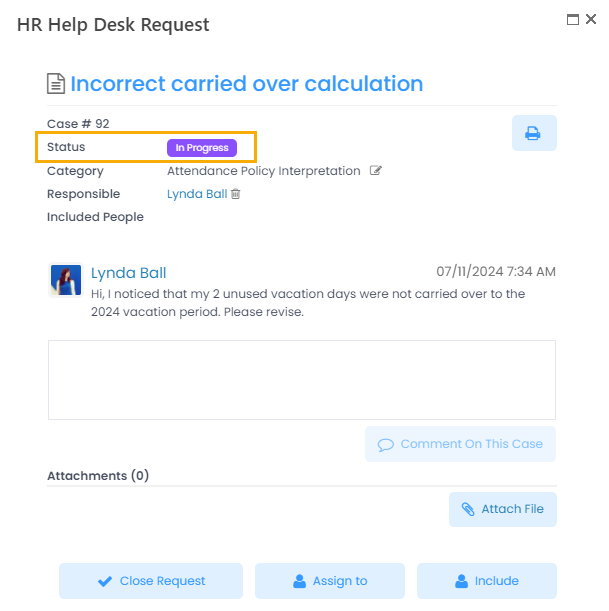
- Change the status to In Progress to indicate that the request is being looked into now: click In Progress. The button will be hidden after you set this status.

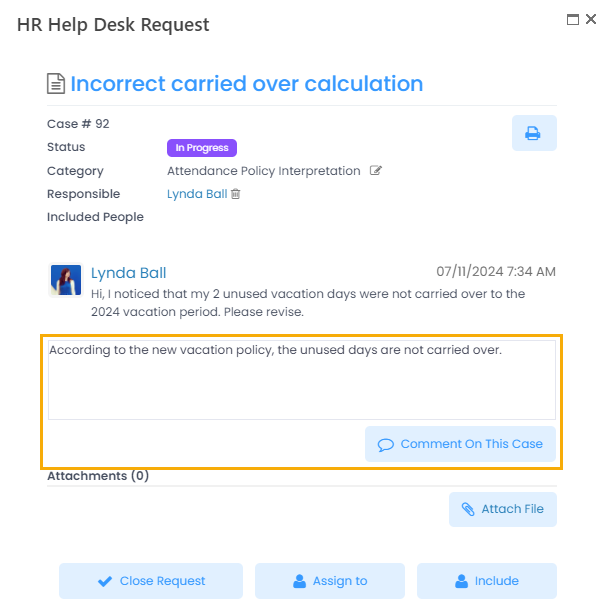
- Add comments: type a comment in the text box, and then click Comment On This Case. Added comment will be visible for everyone who opens this request.
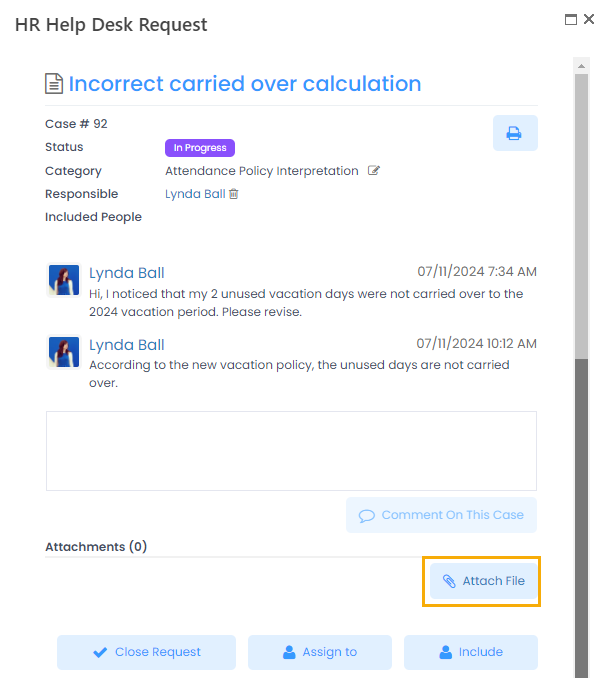
- Attach a file: click Attach File and browse for a file to attach to the case.
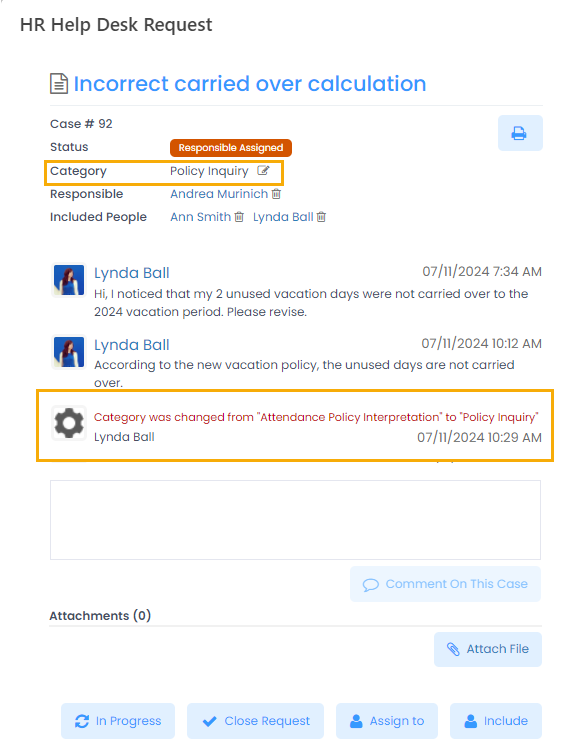
- Change the request category: click the Edit icon next to the category name. A system message will display in the Comments section informing about the category change. If the category has a default responsible specified in the category settings, the responsible will be changed to the new category responsible.
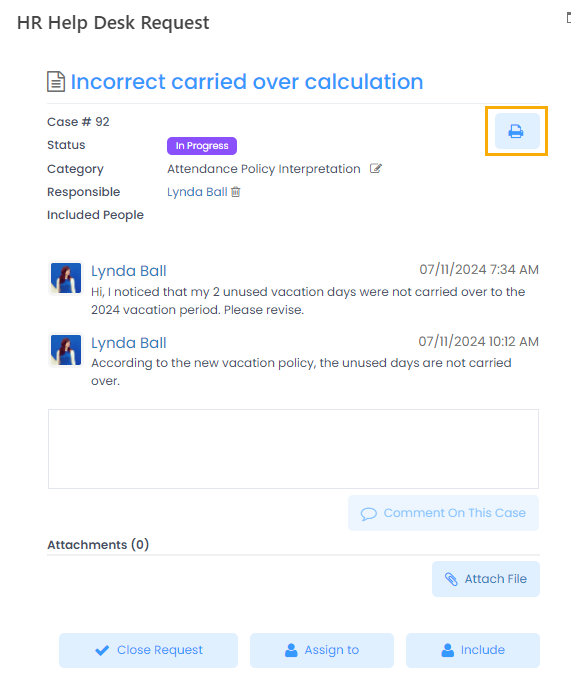
- Print out the request: click the Print icon in the top right corner.
- Close the request to indicate that it has been processed: click Close Request. This changes the status to Closed. The In Progress action becomes available again to reopen the request if need be.

- Assign or change the responsible person(s). This is especially necessary if the request doesn't have any responsible person assigned to it. Click Assign to and in the text box, type or select the name(s) of the employees you want to assign the request to, and then click Yes. This also changes the status of the request from New to Responsible Assigned. The assigned responsible person gets an email notification about the request. To remove a responsible employee, click the recycle bin icon next to his or her name.
To process a HelpDesk request in the Employee role
- In the Employee menu, click My Details > HR HelpDesk and check the requests under Require My Action.
Under My Requests, you can see requests that you initiated. You can edit them if necessary.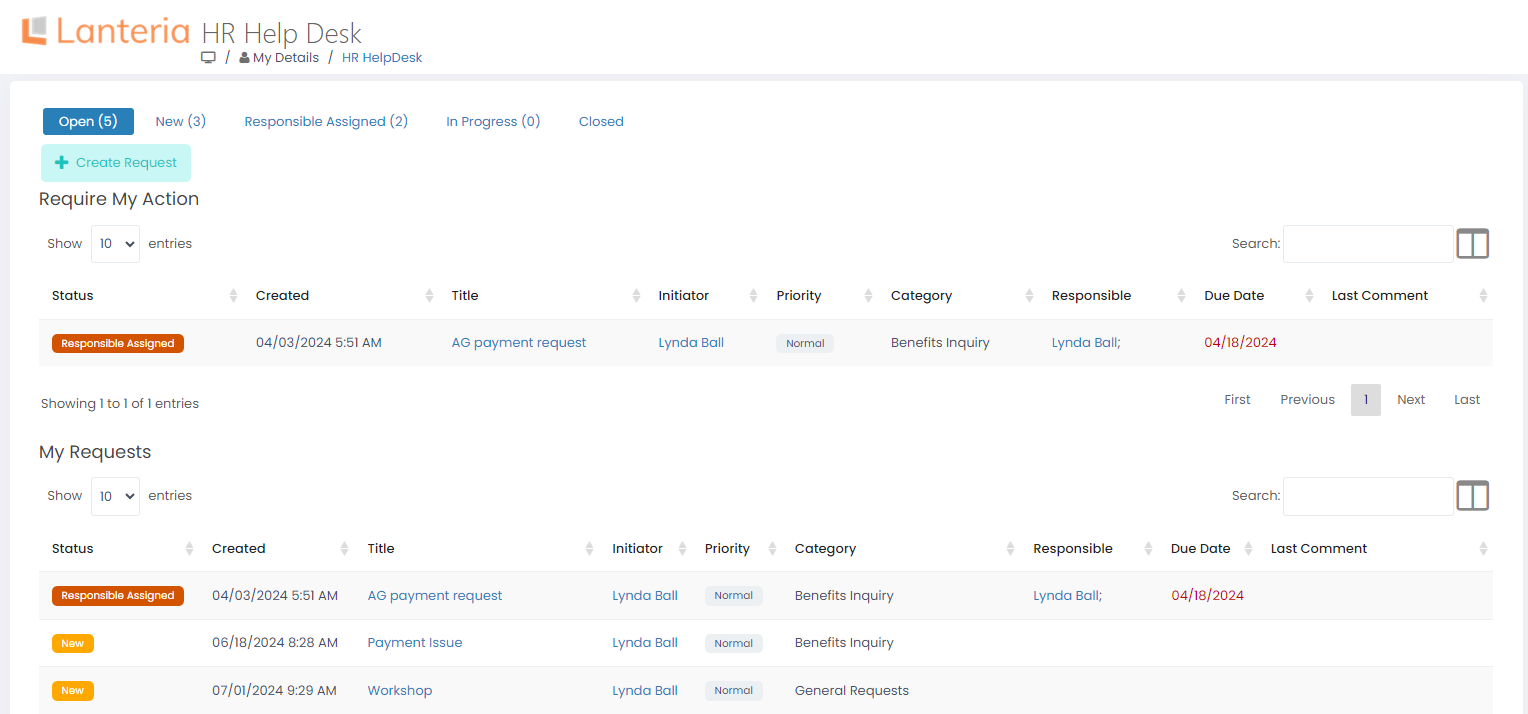
- Click the title of a request under Require My Action that you want to process or a request under My Requests that you want to edit.
- When working on the request in the Employee role, you can do the following:
- Assign or change the responsible person(s). This action is available in the Employee role only if you are currently responsible, i.e. you are editing a request that requires your action. This may be useful if you need to assign a different person to work on the request. Click Assign to, type or select the name(s) of the employees you want to assign the request to, and then click OK. The assigned responsible person gets an email notification about the request.
- Include other employees as observers. Click Include and select employees to be added. These employees will view the request from My Requests, but won't be able to do anything with it, but for excluding himself/herself and adding other employees to the included. The latter option is available only if the Limit HelpDesk Request Editing check box is cleared under Settings > Settings and Configuration > System Settings, the Advanced tab of the User Interface.
- Change the status to In Progress to indicate that the request is being looked into now: click In Progress. This button will become unavailable after you set this status. NoteTo hide Assign to, Include and In Progress buttons for the Employee role, select the Limit HelpDesk Request Editing check box in the system settings.
- Add comments: type a comment in the text box, and then click Comment On This Case. Added comment will be visible for everyone who opens this request.
- Attach a file: click Attach File and browse for a file to attach to the case.
- Print out the request: click the Print icon in the top right corner.
- Close the request to indicate that it has been processed: click Close Request. This changes the status to Closed. The In Progress action becomes available again to reopen the request if need be.