The employees can record the time spent on various projects and activities on the My Timesheets page that can be opened by switching to the Employee role and going to My Time & Attendance > My Timesheets > My Timesheets. HR and Managers can register time on behalf of employees by clicking Enhanced Details > Timesheet Details on the employee card.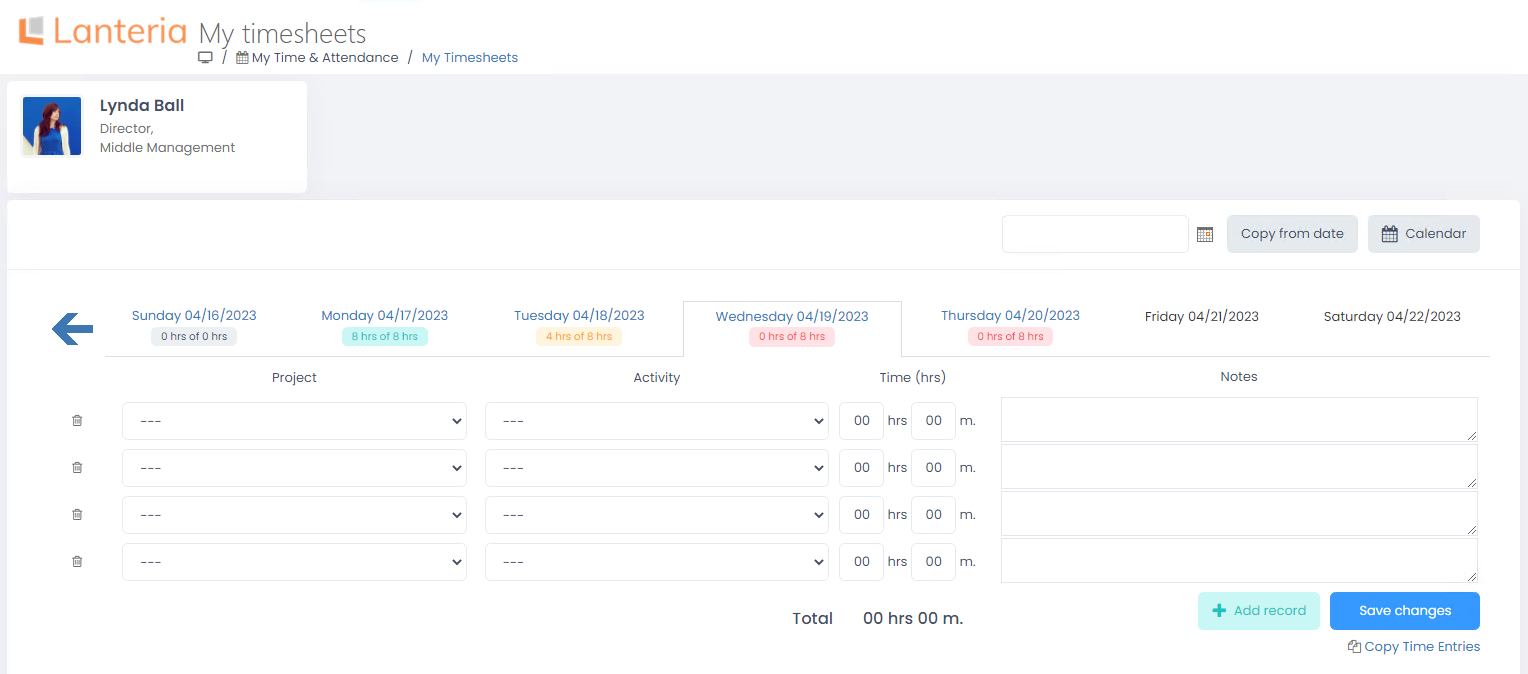
It displays the current week, and the employee can register time for each day of the week. The days are highlighted in different colors depending on the data entered:
- Red – no data entered for the day
- Yellow – data partially entered. The system compares the number of entered hours to the employee’s work pattern.
- Green – the required number of hours is recorded for the day
- Grey – a day off or days when an employee has a registered absence
Follow these steps to create a time record for a project:
- On the My Timesheets page, select the day to register time for. By default, the current week is displayed. To enter time for another week day, use the arrows to go to the previous/next week or enter a date in the date field, and then press Enter or click Calendar, and then select a specific week on the timesheet calendar.
- Select the project to enter the time data for from the drop-down list in the Project field.
- Select the project activity to enter the time data for from the drop-down list in the Activity field.
- Enter the time spent on this activity in hours and minutes into the Time (hrs) field. You can time the activities automatically using the Clock In button at the beginning of the activity and Clock Out button at its end.
- Enter any relevant notes into the Notes field.
- Add as many records as needed for the day. There are four records available by default. Click the Add record button to add more records.
- After the records are ready, check the total calculated in the Total field. Please note that the hours for the non-countable activities are not included into this amount.
- If the records for this day are similar to the records for one of the previously recorded days, there is an option to select this day and use the Copy from date button. The activities and times from the selected day will be copied to the current day. Alternatively, you can click Copy time entries, and then, on the Copy Time Entries request page, select a date to copy entries from as well as the date to paste the time entries to (or the whole current week), and then click Copy to copy the selected entries.
- Click the Save changes button.
- To delete a record click the delete (
 ) button next to the record.
Another way to track time with Lanteria HR is to enter specific time intervals instead of the time in hours and minutes. To use this feature, select the Use Time Period check box in the Settings > Settings and Configuration > Time and Attendance > Timesheets and click the Apply Changes button. This will display time interval fields on the timesheets instead of hours/minutes fields and will allow you to enter the exact hours spent working on a particular project activity.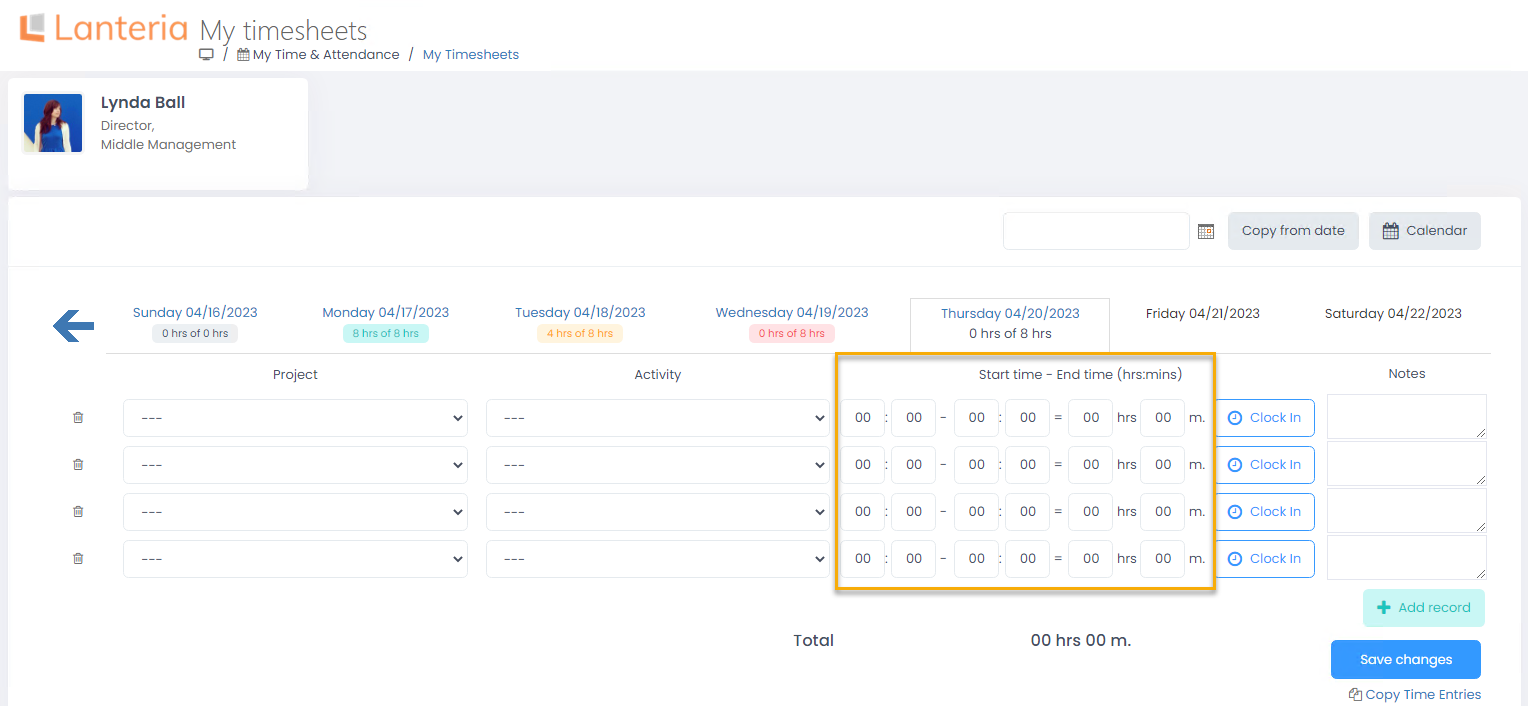
Time registration can be monitored through Timesheet Calendar and Timesheet Report by the employee, manager or HR.