Custom roles in Lanteria HR serve to restrict a user's access only to specific modules, as needed according to their job role profile, for example, a Recruiting or Training Manager would only need access to Recruiting or Learning module, respectively.
Follow these steps to create a custom role in Lanteria HR:
- Go to Settings > Settings and Configuration > System Settings > Roles and Permissions and click Edit next to Lanteria HR Roles setting name.
.png)
- You can create a new custom role directly in the spreadsheet view
.png)
 or use the new item button and fill in the form that appears.
 .png)
- Enter the name of the custom role into the Title field.
- Enter the role's description into the Description field.
- Enter the path to the icon associated with this role into the IconURL field.
- Enter the name under which the role will appear in the roles menu into the Menu Title field.
- Enter the item's number into the Order field. The items in the Roles menu will be ordered by these numbers.
- Enter the URL for the first page the employee signing in under this role should see into the Home Page URL field.
- Click Save.
The next step is to create a Site Permission Group.
- Go to Settings > SharePoint Settings > Users and Permissions > Site permissions.
.png)
- Since the group has to be created at the root level, click the root site link (Lanteria HR Demo in this example).
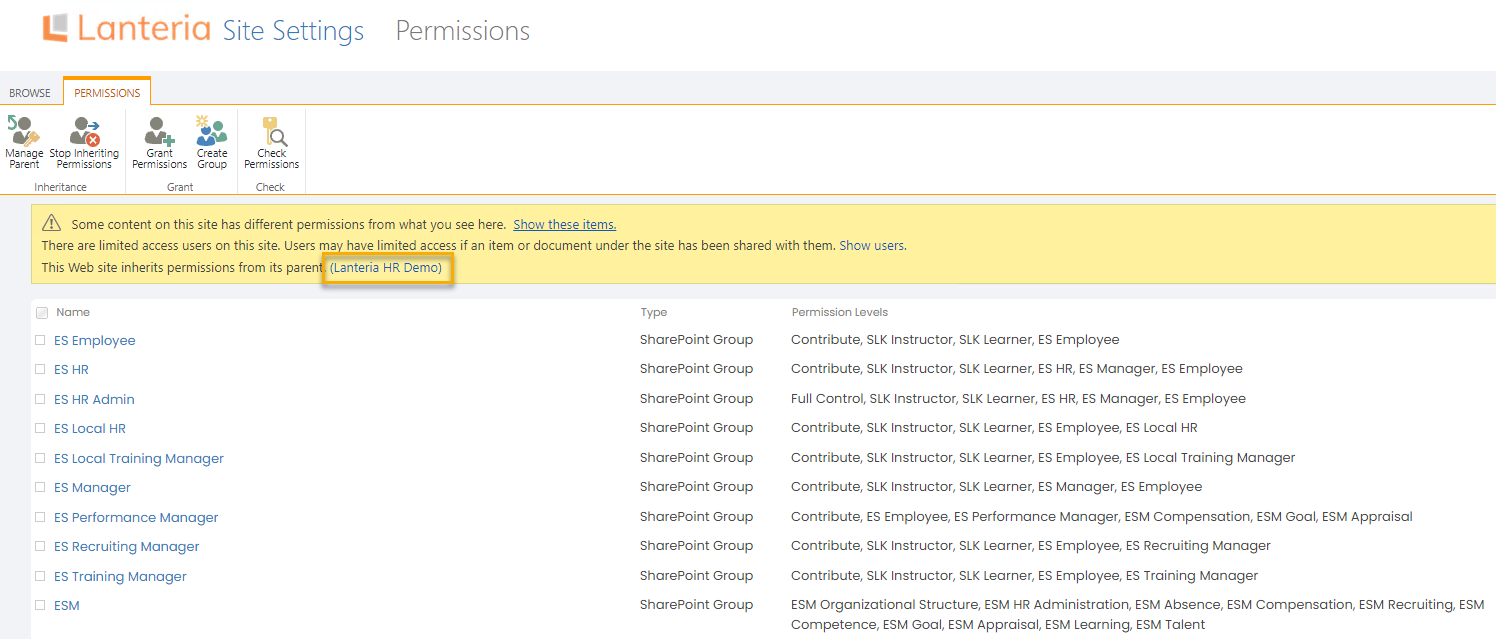
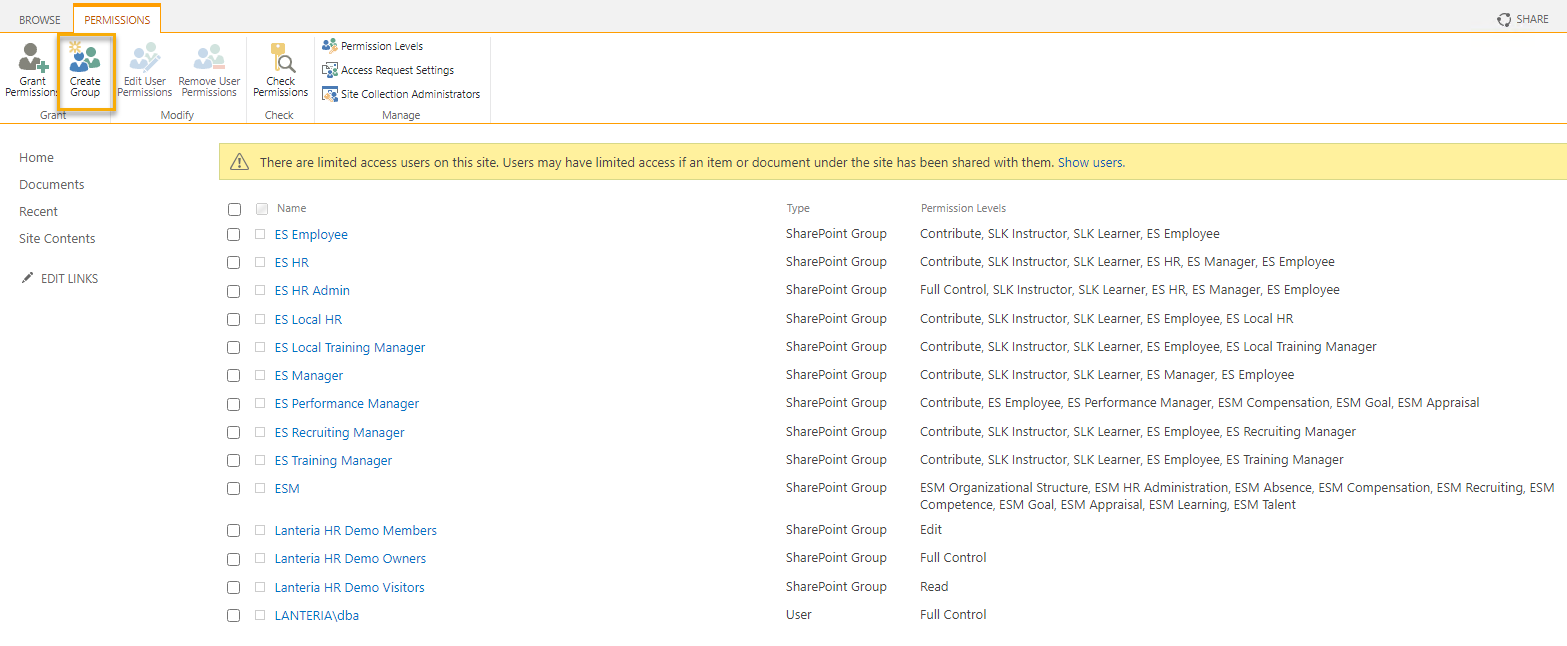
- Click the Create Group button.
- Fill in the group information.
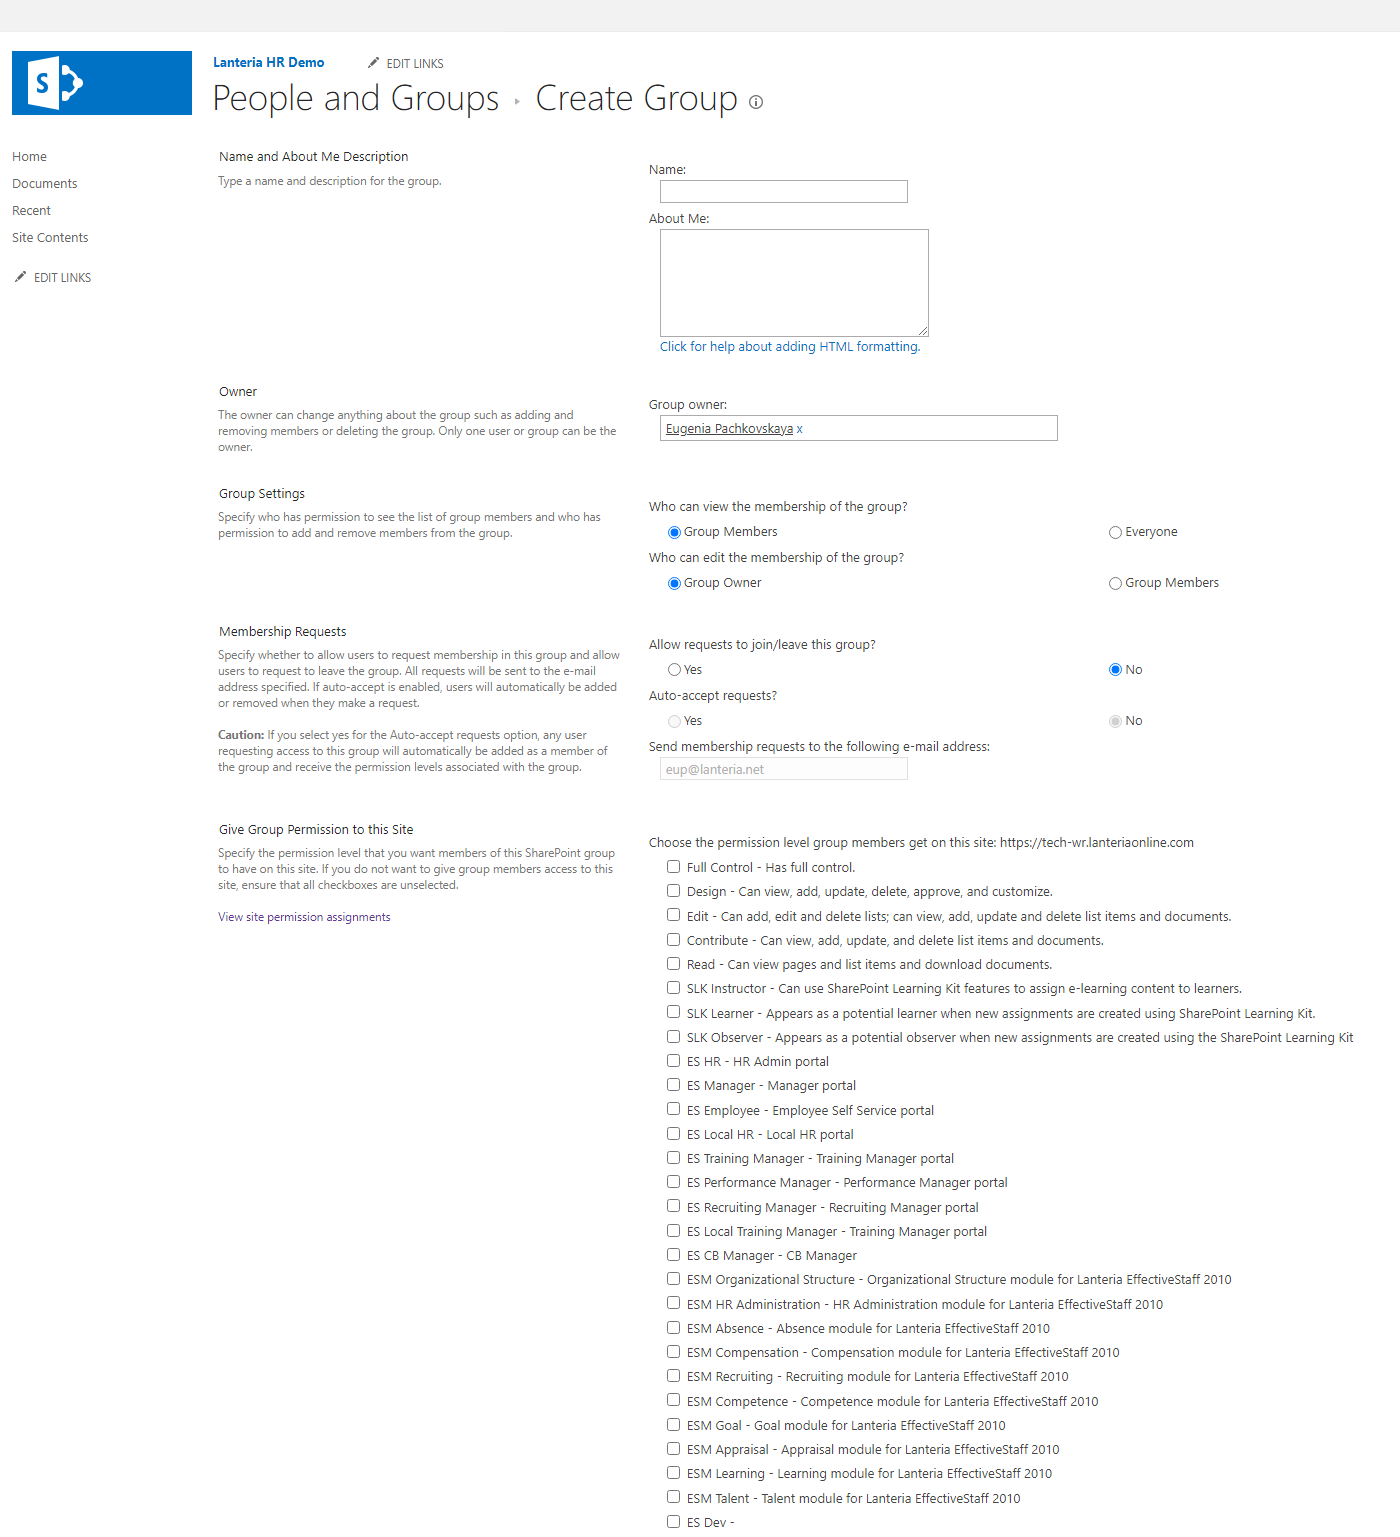 WarningThe name of the group in the Name field must be the same as the role name you entered into the Title field when creating the role.
Notes on filling in the fields:
- The group owner you specify in the Owner field normally is a specific system account, if the group is to be handled only by support engineering staff, or, more often and preferably, by the HR group (ES HR), so that all HRs can manage the newly created group.
- Group Settings and Membership Requests fields are best left with default values, but can be changed, if needed.
- The necessary permissions are granted to the group by selecting the necessary check boxes in the Give Group Permissions to this Site field.
- Click the Create button to create the group.
The last part is customizing the permissions for the newly created to access specific pages using the Permissions Editor.
Note
Any person granted a custom system role must also have the role of the Employee in the system.