Timesheets are used to track the time employees spend on various activities in different projects.
The timesheets setup includes creating a list of projects to use while recording employees' time and a list of activities that can be project-specific or used across several projects, like meetings, training, etc.
You can set up timesheets in the Timesheets section of the Settings > Settings and Configuration > Time and Attendance settings.
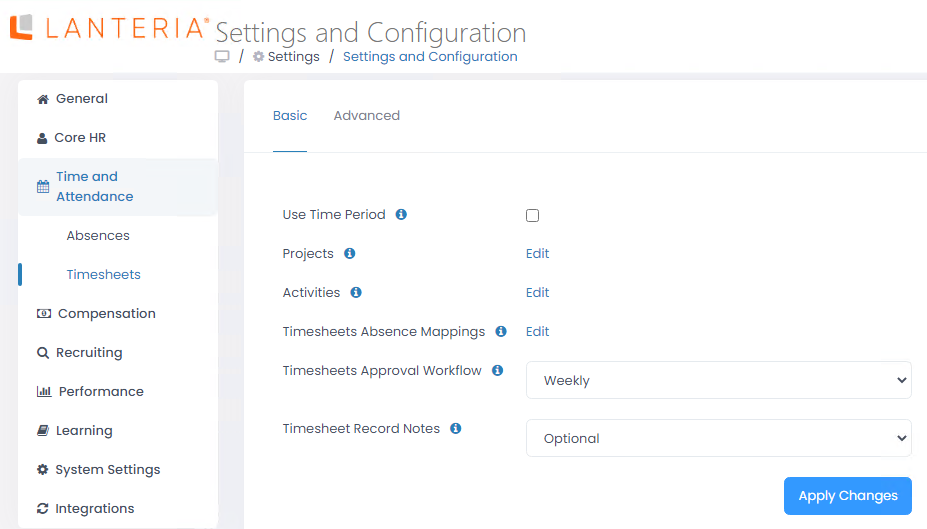
Time Periods
Select the Timesheets: Use Time Period check box to display time interval fields on the timesheets to keep track of the exact hours spent working on a particular project activity. Click the Apply Changes button for the changes to take effect.
Setting up Timesheet Projects
Follow these steps to create a list of projects for the timesheets:
- Click the Edit link next to the Projects setting which will open the Timesheet Projects list in spreadsheet view.
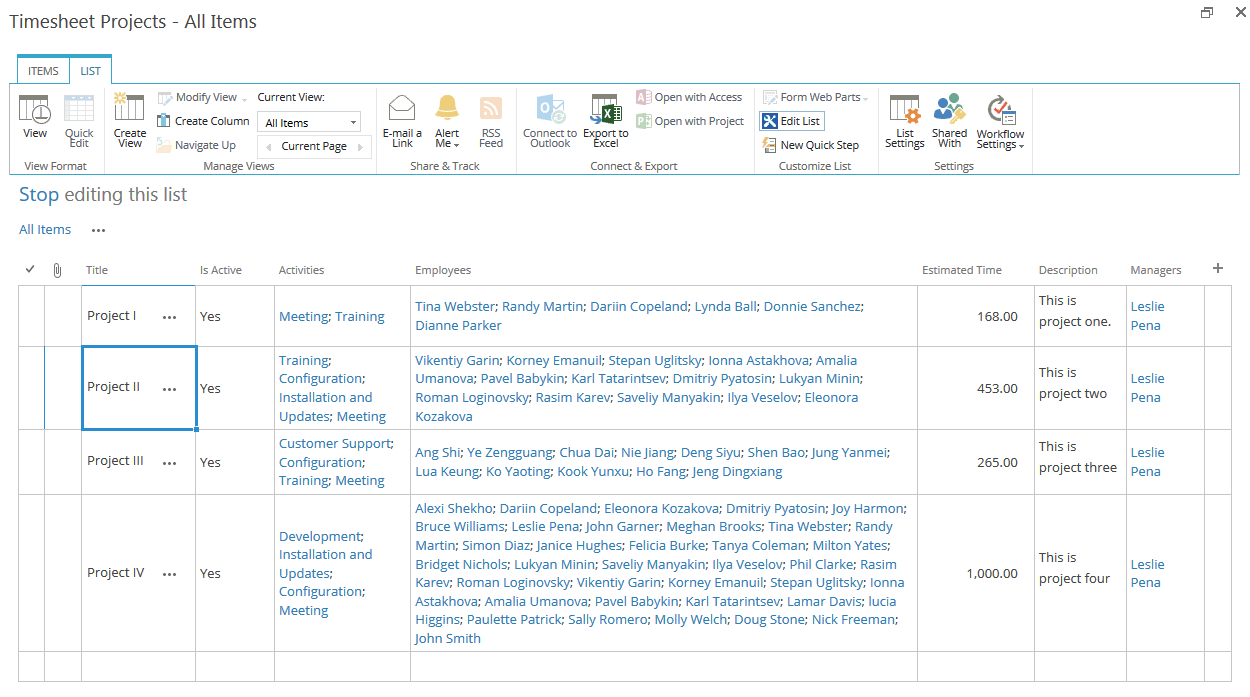
- Another way of editing the project properties is to either click on the project name or select Edit Item from the list item menu.
This will open the project details form in the edit view where you can make all the necessary modifications.
Enter the following information:
- Specify the project name in the Title field.
- Select the Is Active check box if you want the project to be displayed in the list of projects available for time registration in employees' timesheets.
- Select the project managers in the Managers field. The project managers will have access to timesheet records registered for their projects, but not to the employee information unless the employees are their direct subordinates.
- Select the activities necessary for this project in the Activities field.
- Select the employees who will take part in the project in the Employees field. These employees will be able to register their working hours for this project's activities.
- Enter the time estimation or budget for this project in hours in the Estimated Time field, if an estimation or budget exists.
- Enter a brief description of the project in the Description field.
- Select the Is Default box for this project to be selected by default in the timesheets.
Setting up Timesheet Activities
Follow these steps to create a list of activities for timesheet projects:
- Click the Edit link next to the Activities setting which will open the Timesheet Activities list in spreadsheet view.
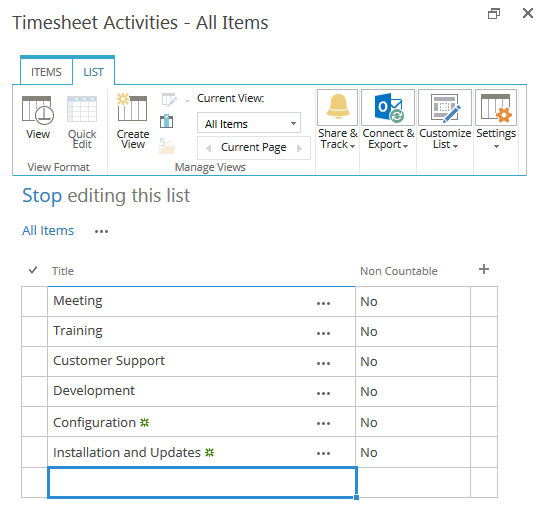
- Another way of editing an activity is to either click on the activity name or select Edit Item from the list item menu.
This will open the activity details form in the edit view where you can make all the necessary modifications..png)
Enter the following information:
- Specify the activity name in the Title field.
- Select the Non Countable check box if you want the activity to be registered, but do not want to include it into the reports.
- Select the Is Default check box for this activity to be selected by default in the timesheets.
Setting up Timesheets Absence Mappings
Timesheets absence mappings can be used to ease the timesheets filling during employees' absences. If a mapping is set up, the timesheet records are filled in with the necessary project/activity pairings automatically, once the absence is approved.
Follow these steps to establish absence mappings:
- Click the Edit link next to the Timesheets Absence Mappings setting which will open the Timesheet Absence Mapping list in spreadsheet view.
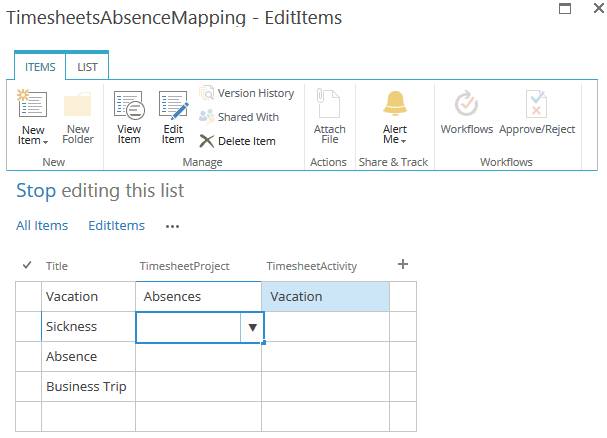
- The Title column is filled in automatically with the types of absences available in the system.NoteFor the sickness absence type, the title can be either Sickness or Sick Leave (case sensitive) to have a timesheet entry created automatically upon sick leave approval.
- Select the project you created for keeping track of the records of this absence type from the drop-down list in the TimesheetProject column.
- Select the activity you created for keeping track of the records of this absence type from the drop-down list in the TimesheetActivity column.
Setting up Timesheets Approval
The system offers the timesheets approval functionality for the cases where the employees' timesheets have to be approved by the manager. It is regulated by the Timesheets Approval Workflow setting.
It is set to Never by default, which means that the timesheets approval is not needed. In case timesheets approval is part of the company's process, select the necessary approval period from the drop-down list. Click the Apply Changes button for the changes to take effect.
Timesheet Record Notes
The Notes field in the timesheet records can be set up to be mandatory or optional. Set the Timesheet Record Notes field to the required option.
.png)
Fill out Timesheets Automatically
The timesheets can be filled in automatically, based on the default project and activity and working schedule from the employee's work pattern. On the public holidays and days when an employee has registered absences, the timesheets won't be filled in.
.png)
To enable the automatic fill out, follow these steps:
- On the Advanced tab of the Timesheets settings, select the Fill out automatically check box. In this case, the LHR - Process Timesheets system job will daily fill in timesheets for all the employees.
- In the Timesheets project, select a project that will be used for the automatic timesheet fill out. Please note that this project will be the same for all the employees.
- In the Timesheets activity field, select the activity with which the employee timesheets will be filled in.
- Click Apply Changes.
The number of hours for the timesheets will be taken from each employee's work pattern.