The Discussion Board is a page where training participants can discuss any topics, both in the general public discussion and in private discussions, as well as view other training-related information, such as announcements, course guide, training details, etc.
You can access the training discussion board as soon as you have been added as a participant in a training. The participants can take part in discussion on the discussion board at any time before, during, or after the training. The discussion board can be opened from two places:
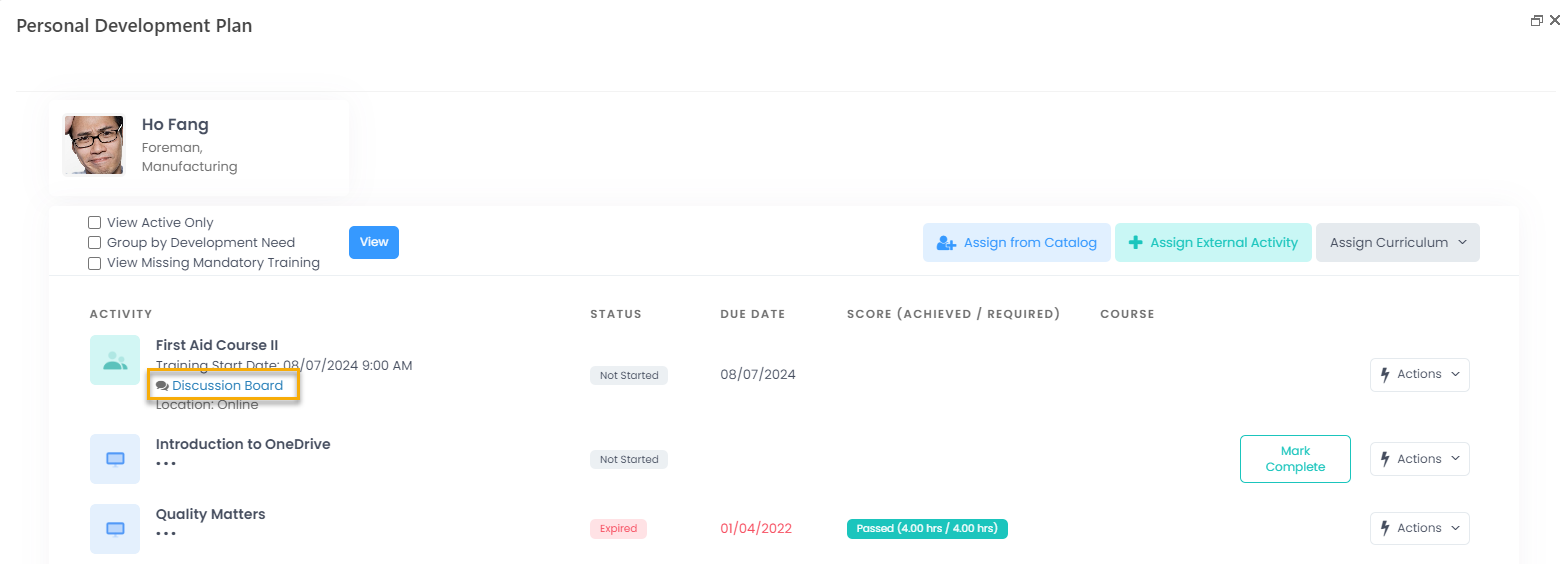
- From the development plan: click Discussion Board under a training development activity.
- From the training details page, which can be opened by clicking a scheduled training event in the training schedule: click the
 icon, and then select Discussion Board (or simply click Discussion Board if you do not have permission for other actions).
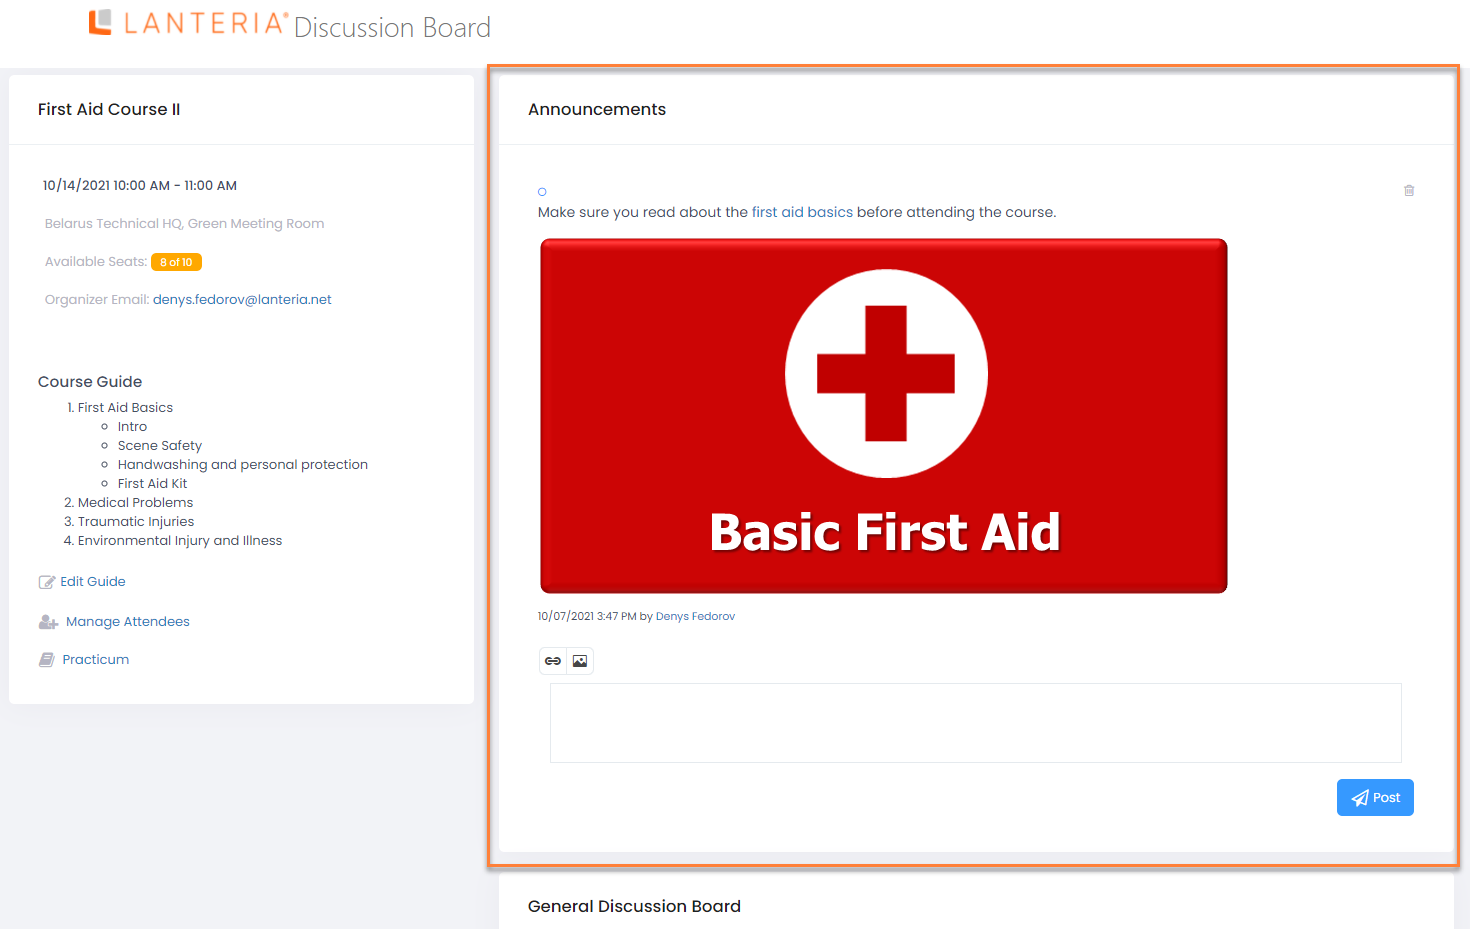
The discussion board looks as shown in the example below.
The discussion board contains the following sections:
Training details
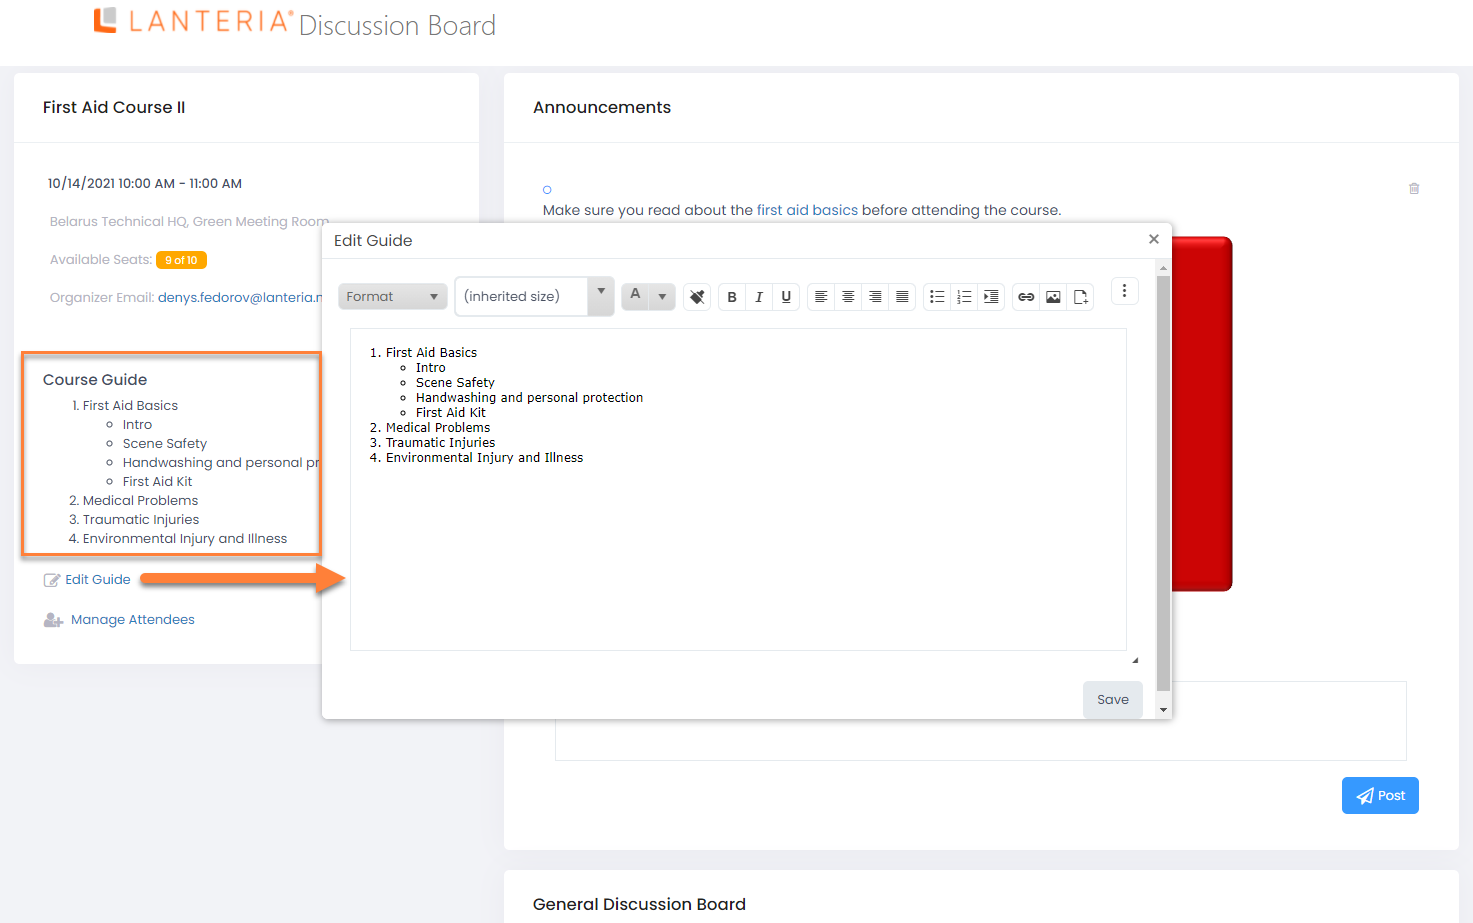
In the upper left corner, you can see the training details, such as the training title, training date and time, location, meeting room, available seats, and organizer email.
Course guide
Shows the guide for this training, which may contain any text information as well as images, hyperlinks, etc. To edit the course guide, click Edit Guide, type the required information, and then click Save. For example, you can use the course guide to add the training agenda or links to related information.
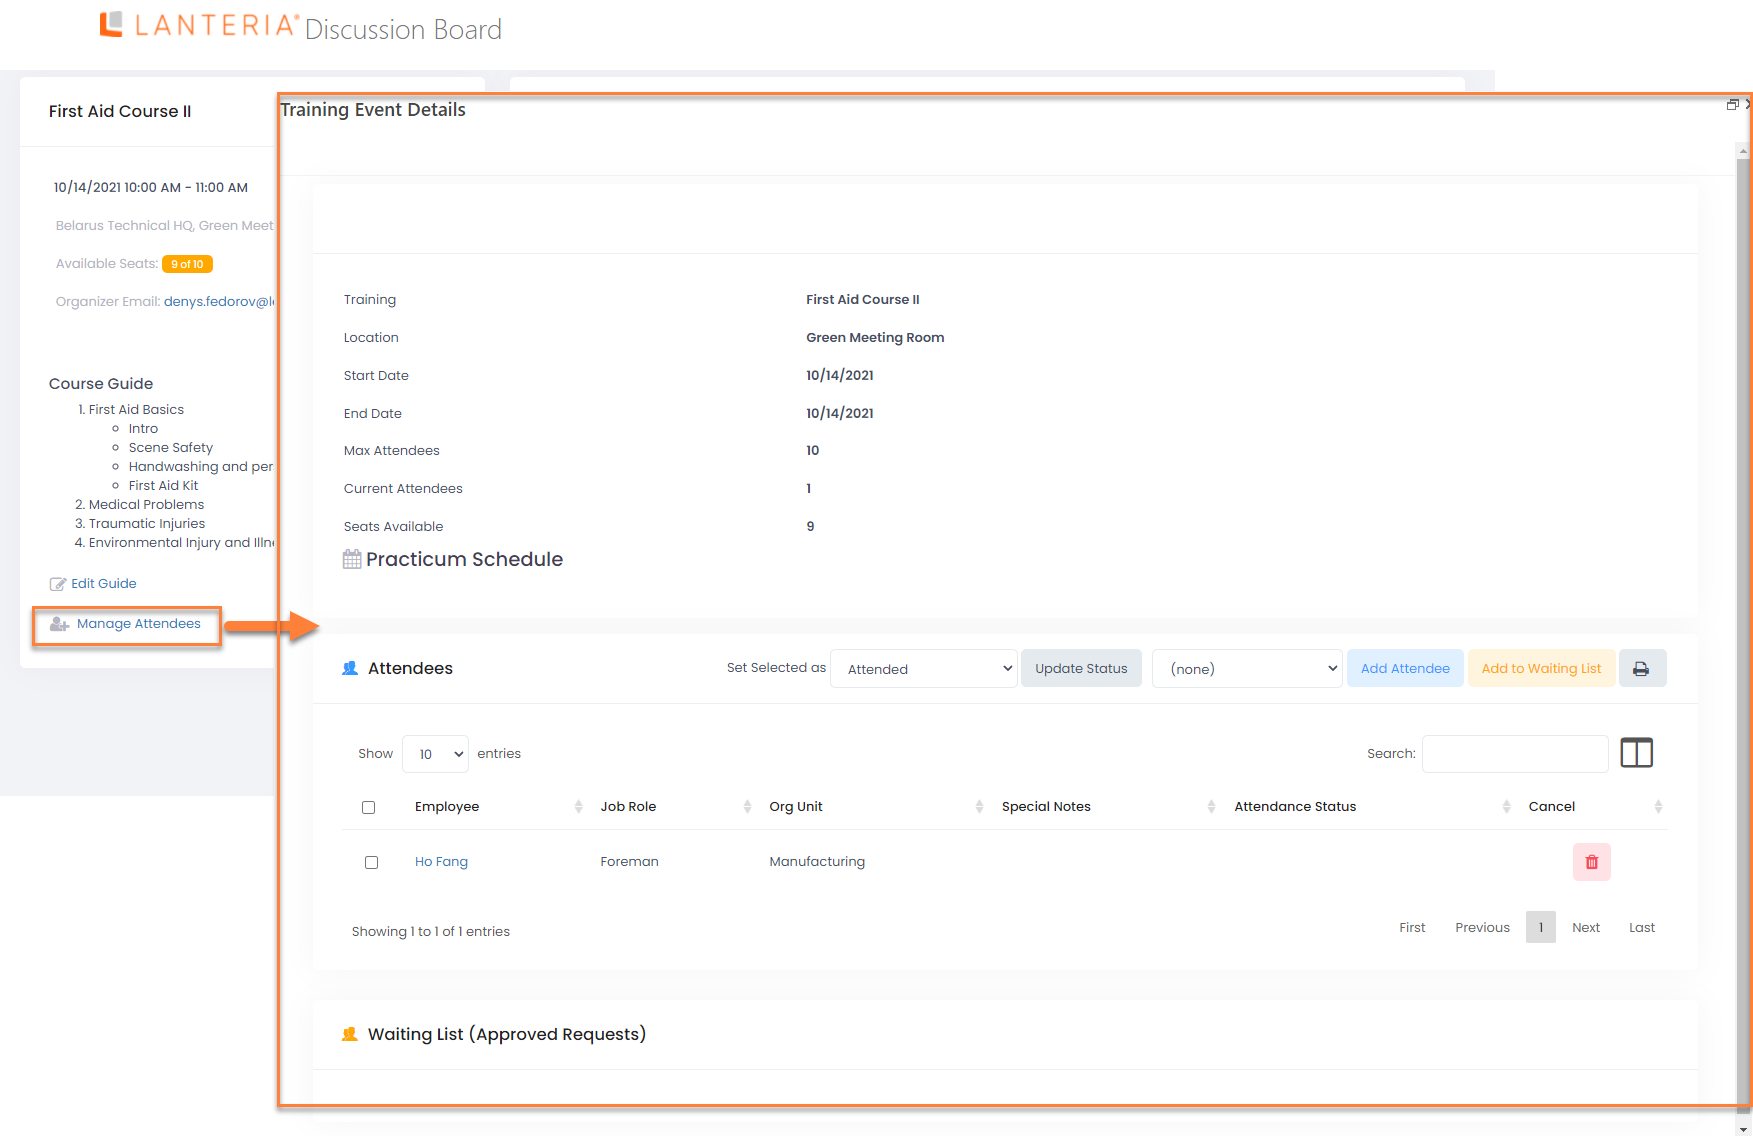
Manage Attendees
Click Manage Attendees to open the Training Event Details page where you can add or remove attendees, add them to the waiting list, etc.
Upload and Submit Practicum Results
If there's a practicum linked to the learning material the classroom training is based on, there will be the Practicum link available on the discussion board. The training attendees can click this link to open the window where they can upload a document with their practicum results by clicking Actions > Upload Document, and then submit results for review by clicking Actions > Submit for Review.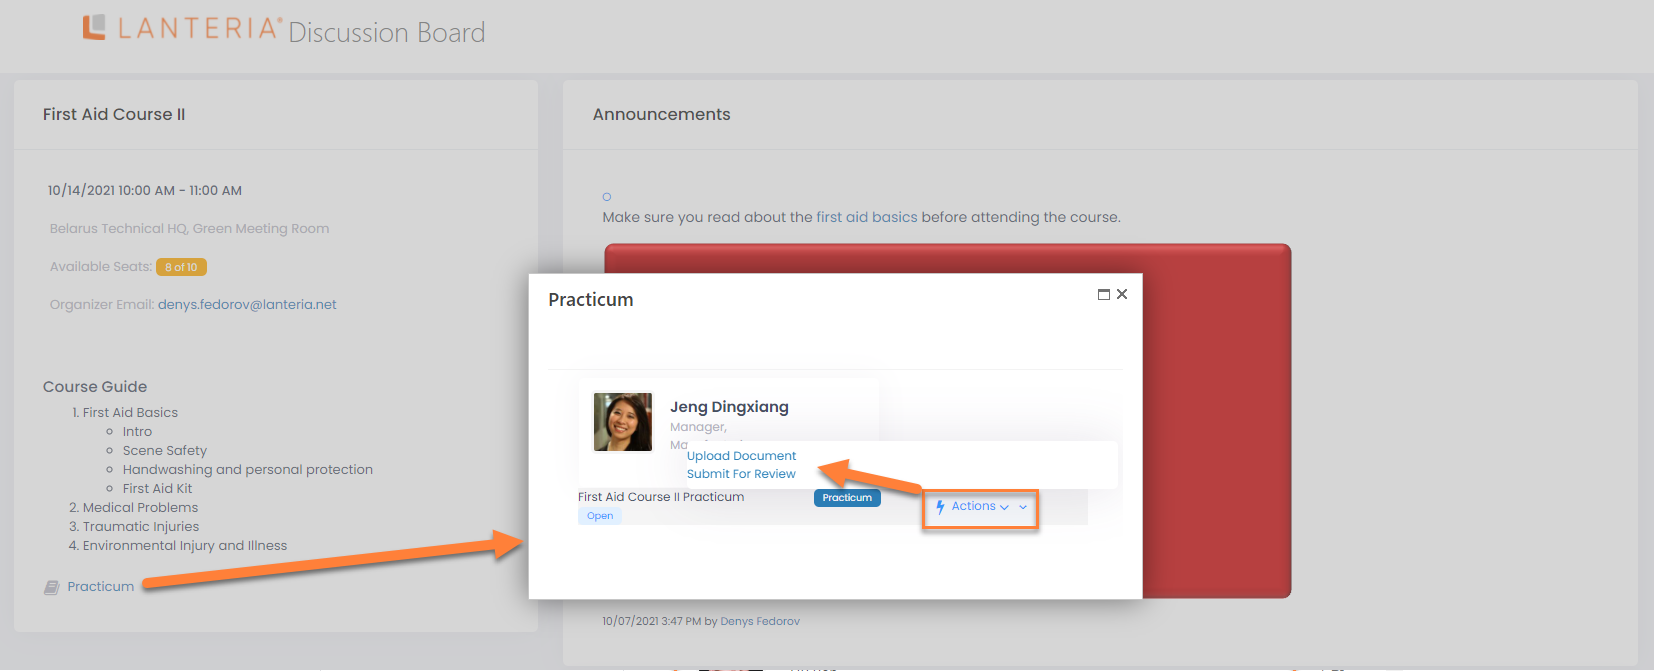
If the practicum has attached documents, they can be viewed, downloaded, and submitted from the personal development plan by clicking Practicum under the corresponding development activity.
The practicum information can also be edited for each attendee from the Training Event Details window that can be opened by clicking Manage Attendees.
Announcements
The announcements sections displays written statements that inform the participants about something.
To add an announcement:
- On the Discussion Board page, in the Announcements section, type your statement in the text box.
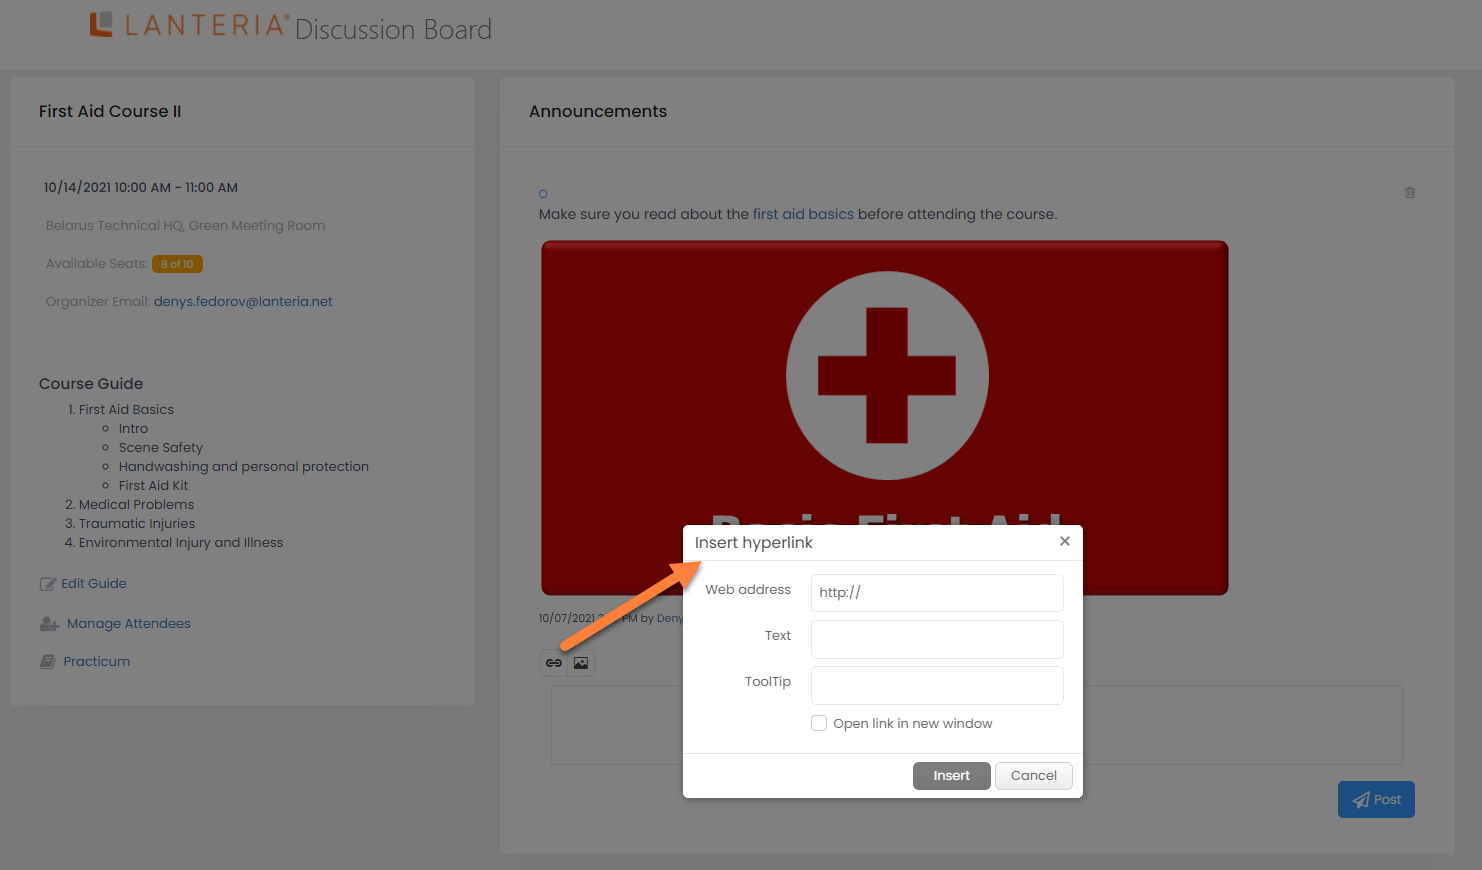
- If you want to add a hyperlink to the announcement, click the
 icon above the text box, fill in the fields as described below, and then click Insert:
- Web address - Specifies the URL of a web page to which a participant will be redirected if they click the link. Alternatively, instead of a URL, you can specify the path to a file in the Site Assets folder within Lanteria HR. For example: /es/SiteAssets/images/filename.png where "filename.png" is the name of the file with the corresponding extension; and "images" is the name of the folder within SiteAssets where this file is located (it may be located in a different folder or be in the root of that folder).
- Text - Specifies text of the hyperlink.
- ToolTip - Specifies text that will be displayed if a participant hovers over the hyperlink.
- Open link in new window - Select this check box if you want this hyperlink to be opened in a new browser window when clicked.
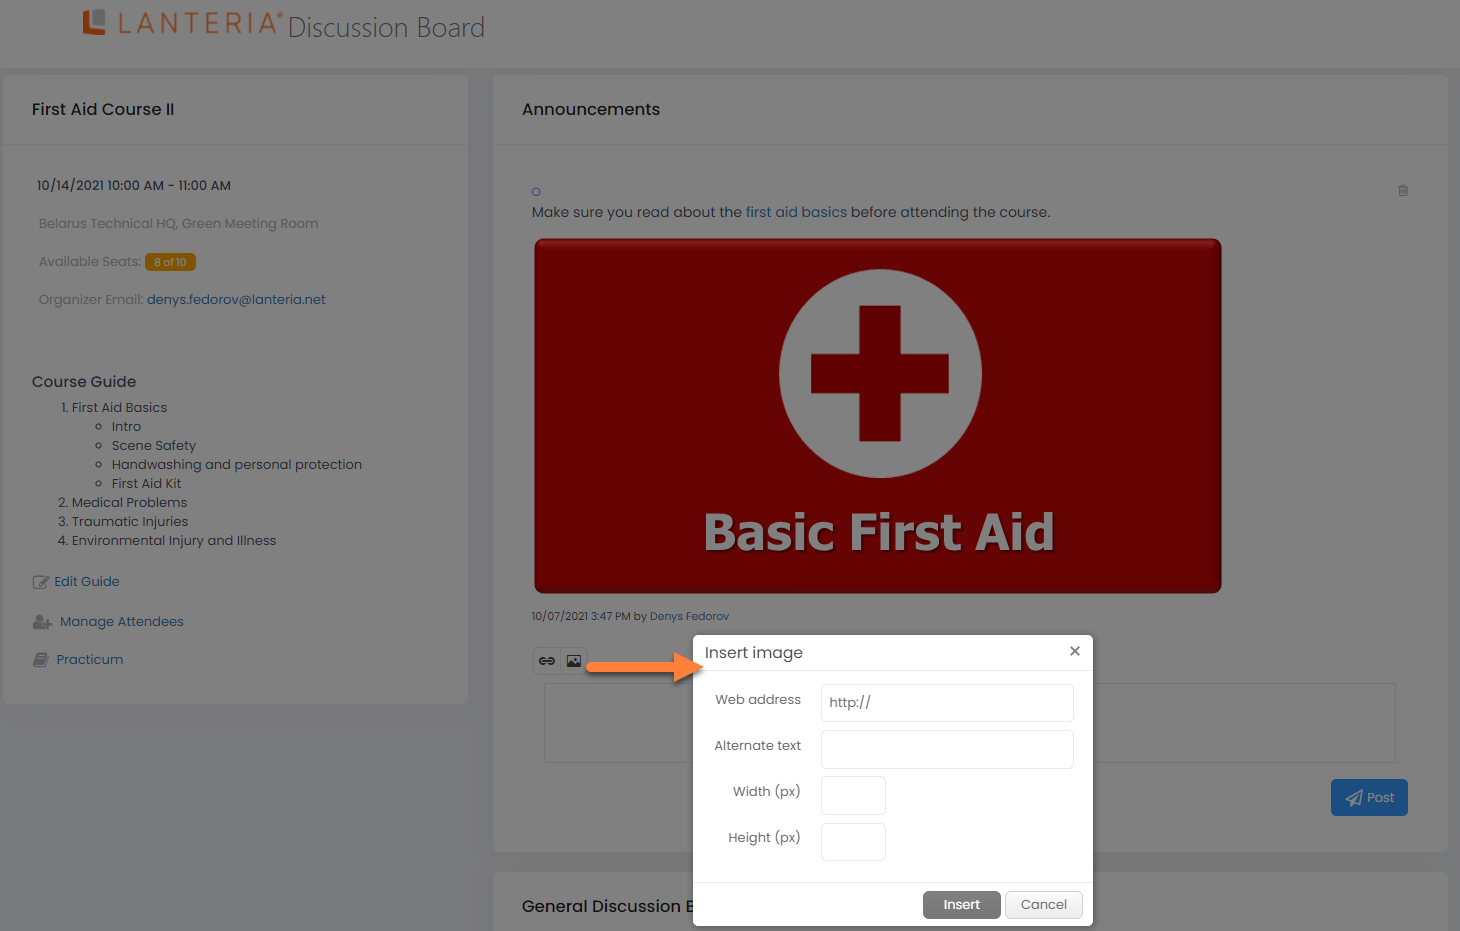
- If you want to add an image to the announcement, click the
 icon above the text box, fill in the fields as described below, and then click Insert:
- Web address - Specifies the URL of the image that will be inserted into the post.
- Alternate text - Specifies the alternative text that will be displayed if the image cannot be displayed.
- Width (px) - Specifies the width of the inserted image in pixels.
- Height (px) - Specifies the height of the inserted image in pixels.
- Click Post.
To delete an announcement, click the  icon next to it. An announcement can be deleted only by its author.
General Discussion Board
The General Discussion Board section contains discussions visible to all training event participants. A general discussion can be initiated by any participant. Next to each discussion, you can see how many attachments (the number next to the  icon) were added and replies (the number next to the
  icon) were made in total in this discussion.
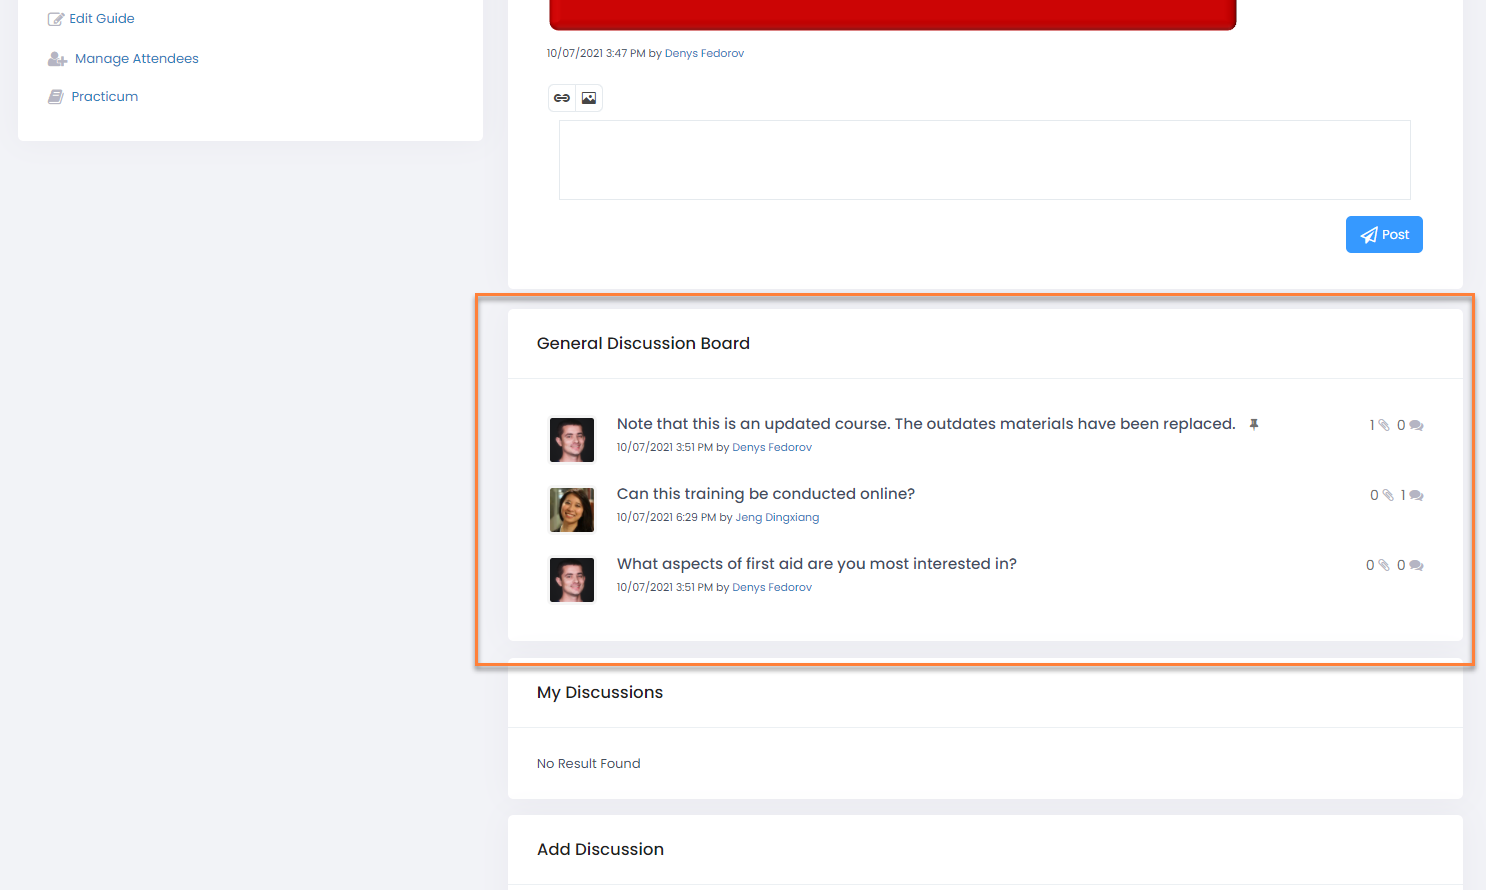
To add a general discussion:
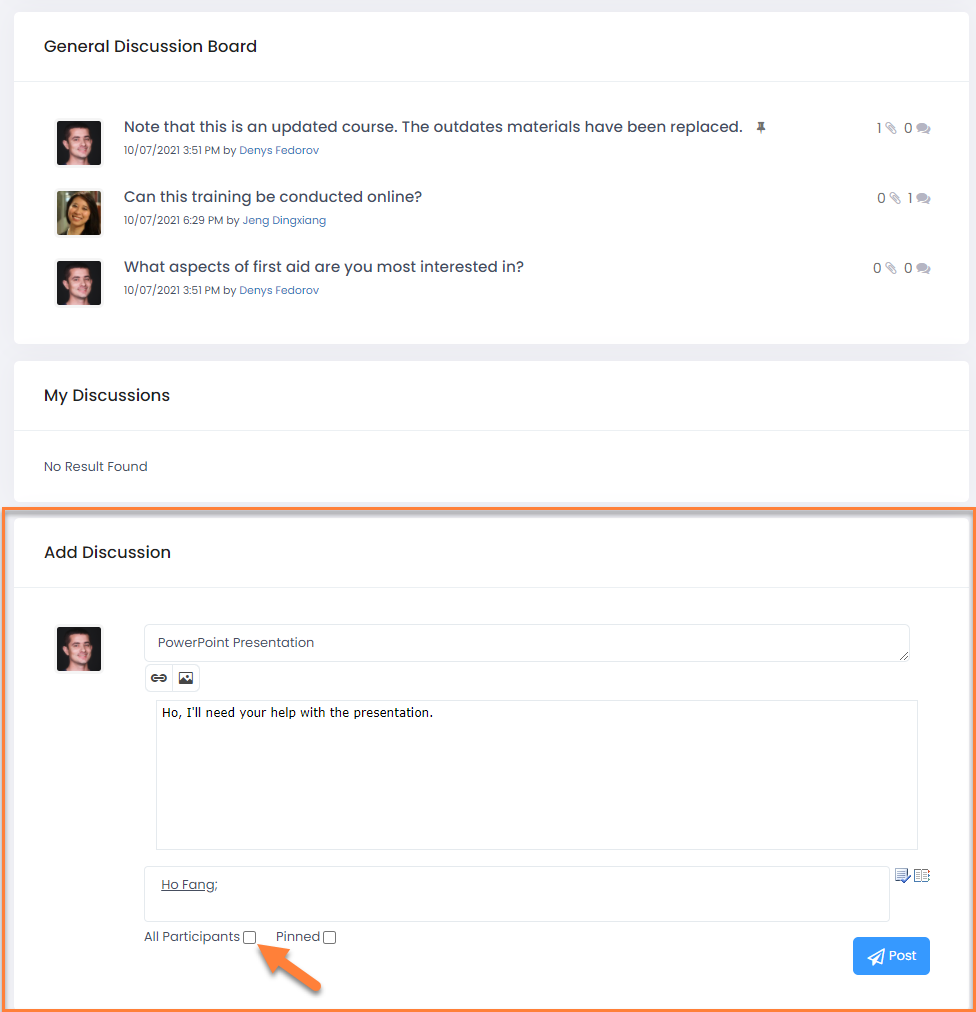
- On the Discussion Board page, in the Add Discussion section, type a discussion title in the upper text box over the Add a discussion title prompt text.
- In the lower text box, type the discussion message over the Add a discussion message prompt text. You can add links and images if necessary.
- Select the All Participants check box to have this discussion available for the training event participants.
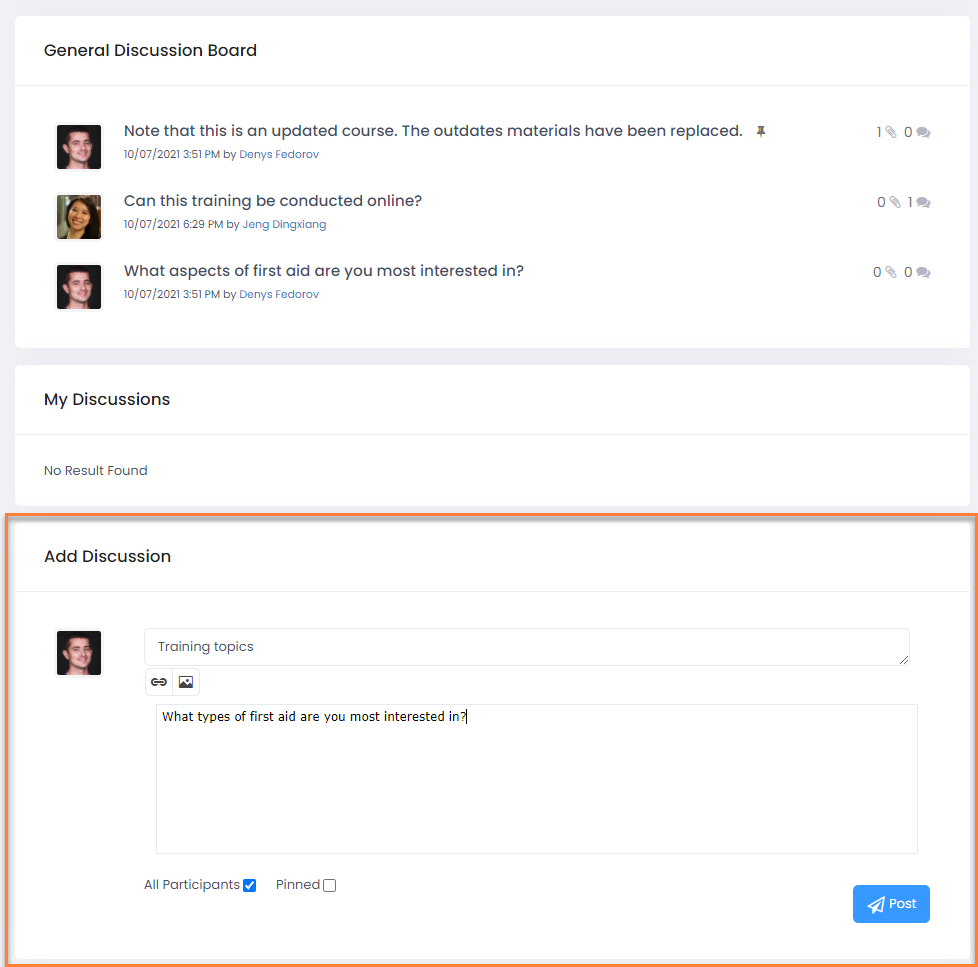
- Optionally, select the Pinned check box, if you want your general discussion to be pinned at the top of the General Discussion Board section. Pinned discussion have the
 icon next to the title.
 - Optionally, you can click the
 to add a hyperlink or the
  icon to add an image to the post (see Announcements for details on how to add these elements).
 - Click Post.
To add a post in a general discussion:
- On the Discussion Board page, in the General Discussion Board section, click the title of a general discussion that you would like to add a post to.

- In the text box, type your message.
- Optionally, you can click the
 to add a hyperlink or the
  icon to add an image to the post (see Announcements for details on how to add these elements).
 - Click Post.
- Add more messages if necessary. Also, on the discussion page you can perform one of the following actions:
- Add attachments in various formats (.docx, .xlsx, images (.png, etc.), .pdf., etc.) to a general discussion post or to a post reply. To add an attachment, click Attachments under the discussion post or post reply, click Choose File, browse to the file you want to attach, click Open and then click Upload. Select the Overwrite file if already exists check box to overwrite existing files or leave it cleared to allow duplicate attachments. You can add multiple attachments if necessary, and not only to your posts/replies. Click Attachments again when you are done adding attachment. The number of attachments will be shown next to the
 icon. Also, the total number of attachments will be displayed on the discussion board next to the discussion.
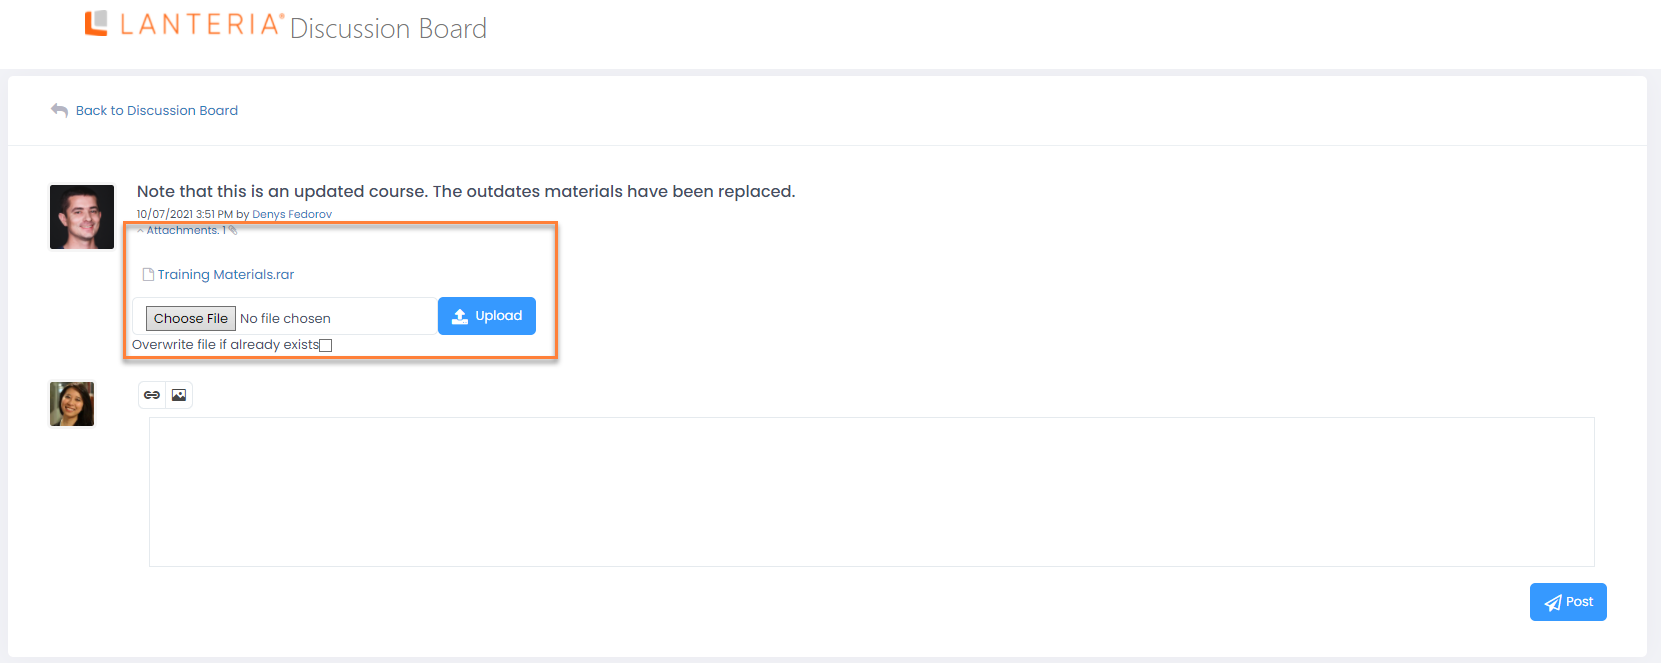
- Add comments to a discussion reply. To add a comment, click Comments under the discussion reply you want to comment on, type your comment in text box, and then click Post. Optionally, you can click the
 to add a hyperlink or the
  icon to add an image to the comment. Multiple comments can be added for a single reply, if necessary. However, you cannot add a comment to another comment. Click Comments again when you are done adding attachment. The number next to the
  icon will show how many comments a reply has.
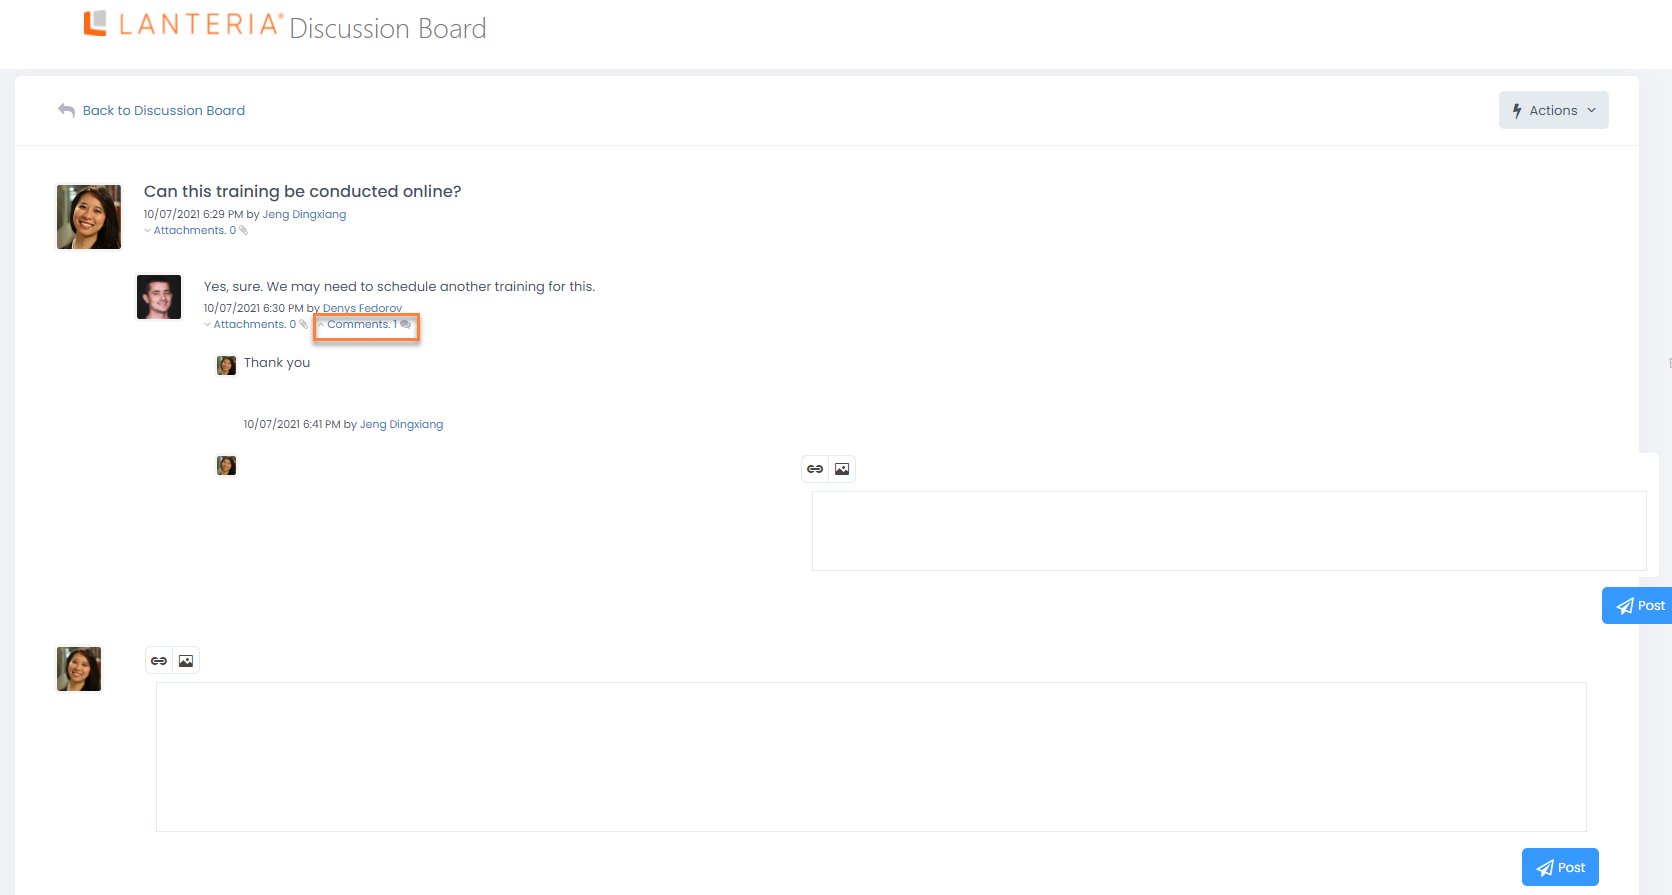
- Click the
 icon next to a message, a reply comment, or attachment to delete it. A message, comment, reply comment, or attachment can be deleted by its author or one of the following roles: HR, Training Manager, Local Training Manager (must be an event participant or be assigned to the related learning material), or Internal Trainer (must be assigned to the related learning material).
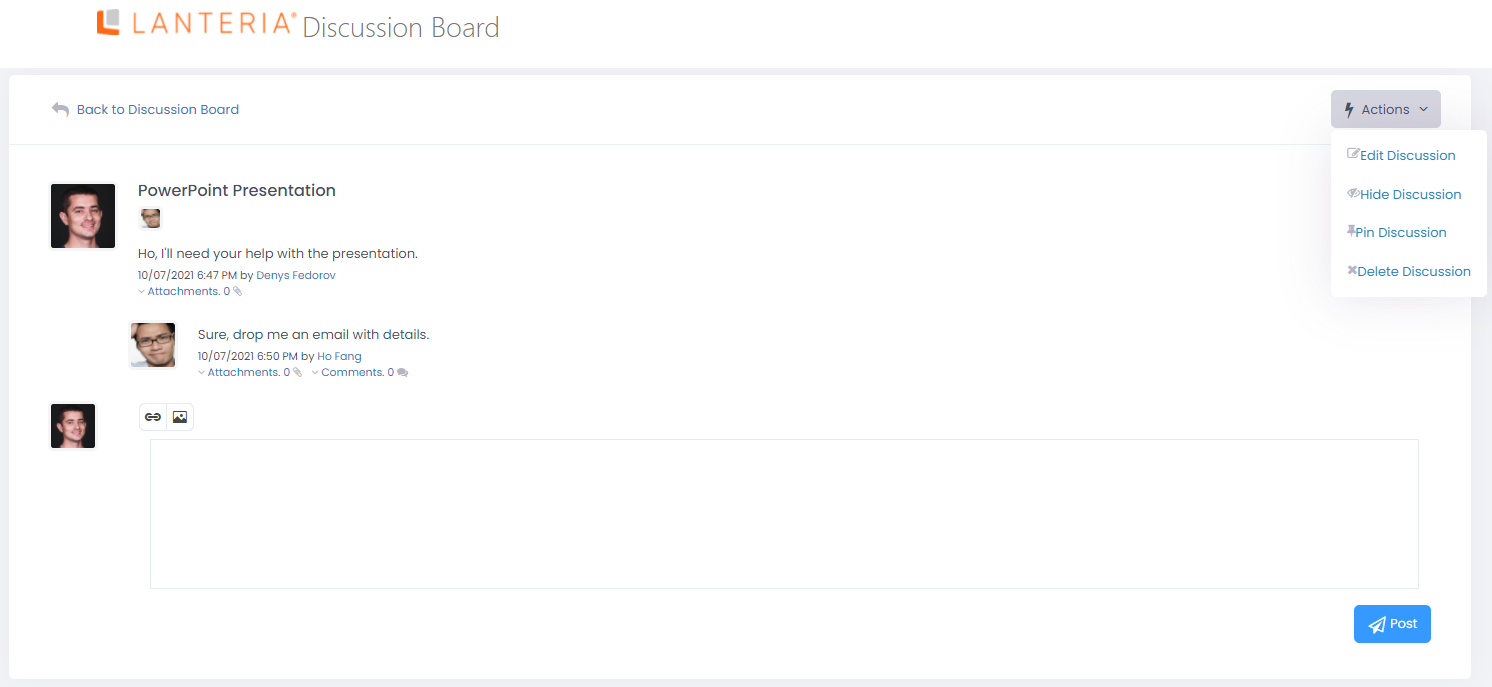
 - Click Actions > Hide Discussion to hide the discussion from other training event participants, including the discussion author. A hidden discussion will have the
 icon on the general discussion board. This action can be performed by one of the following roles: HR, Training Manager, Local Training Manager (must be an event participant or be assigned to the related learning material), or Internal Trainer (must be assigned to the related learning material). To make the discussion visible again, click Actions > Show Discussion. This action can be performed by the participant who hid the discussion.
 - Click Actions > Pin Discussion to pin the discussion to the top of the General Discussion Board section. This action can be performed by one of the following roles: HR, Training Manager, Local Training Manager (must be an event participant or be assigned to the related learning material), or Internal Trainer (must be assigned to the related learning material).
- Click Actions > Edit Discussion to edit the discussion title and/or first message, and click Post to save the changes. A discussion can be edited only by its author.
- Click Actions > Delete Discussion to delete the discussion. A discussion can be deleted by its author or one of the following roles: HR, Training Manager, Local Training Manager (must be an event participant or be assigned to the related learning material), or Internal Trainer (must be assigned to the related learning material).
- Add attachments in various formats (.docx, .xlsx, images (.png, etc.), .pdf., etc.) to a general discussion post or to a post reply. To add an attachment, click Attachments under the discussion post or post reply, click Choose File, browse to the file you want to attach, click Open and then click Upload. Select the Overwrite file if already exists check box to overwrite existing files or leave it cleared to allow duplicate attachments. You can add multiple attachments if necessary, and not only to your posts/replies. Click Attachments again when you are done adding attachment. The number of attachments will be shown next to the
- Click Back to discussion board to return to the Discussion Board page. Next to the discussion, you can see how many attachments (the number next to the
 icon) and replies (the number next to the
  icon) in total the discussion has. However, the number of comments within a discussion, can be seen only when you open the discussion thread.
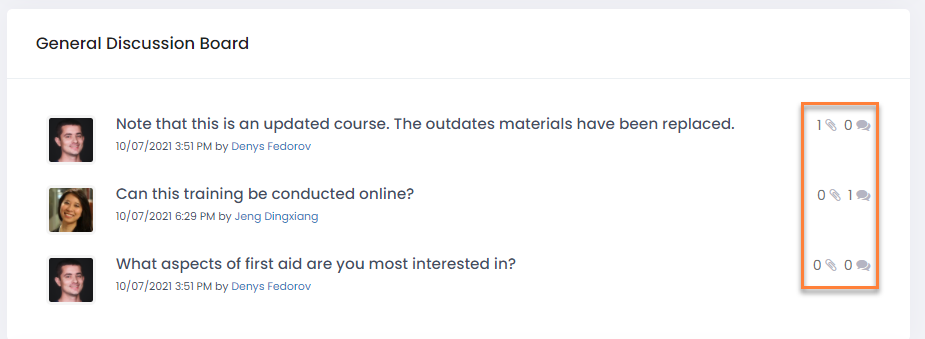
My Discussions
This section contains private discussions – discussions with a limited number of selected participants. A private discussion can be initiated by any participant. Next to each private discussion, you can see how many attachments (the number next to the  icon) were added and replies (the number next to the
  icon) were made in total in this private discussion. When you open a private discussion, you can see the images of the participants in that private discussion who will be able to see it and post messages.
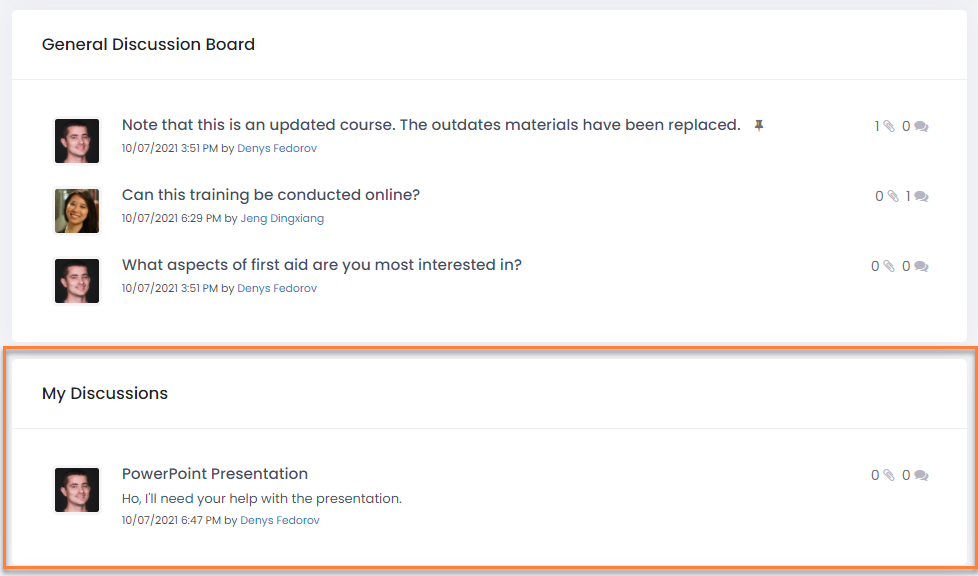
To add a private discussion:
- On the Discussion Board page, in the Add Discussion section, type a discussion title in the upper text box over the Add a discussion title prompt text.
- In the lower text box, type the discussion message over the Add a discussion message prompt text.
- Clear the All Participants check box, and then, in the field that appears, specify one or several participants, from the event attendees list, who will be able to see and take part in this private discussion.
- Optionally, you can click the
 to add a hyperlink or the
  icon to add an image to the post (see Announcements for details on how to add these elements).
 - Click Post.
To add a post in a private discussion:
- On the Discussion Board page, in the My Discussions section, click the title of a private discussion that you would like to add a post to. At the top of the discussion, you can see the photo of each participant who will be able to see this discussion and post messages; you can hover over a photo to see the name of the employee.
- In the text box, type you message.
- Optionally, you can click the
 to add a hyperlink or the
 icon to add an image to the post (see Announcements for details on how to add these elements).
 - Click Post.
- Add more messages if necessary. Also, on the discussion page you can perform one of the following actions:
- Add attachments in various formats (.docx, .xlsx, images (.png, etc.), .pdf., etc.) to a general discussion post or to a post reply. To add an attachment, click Attachments under the discussion post or post reply, click Choose File, browse to the file you want to attach, click Open and then click Upload. Select the Overwrite file if already exists check box to overwrite existing files or leave it cleared to allow duplicate attachments. You can add multiple attachments if necessary, and not only to your posts/replies. Click Attachments again when you are done adding attachment. The number of attachments will be shown next to the
 icon. Also, the total number of attachments will be displayed on the discussion board next to the discussion.
 - Add comments a discussion reply. To add a comment, click Comments under the discussion reply you want to comment on, type your comment in text box, and then click Post. Optionally, you can click the
 to add a hyperlink or the
  icon to add an image to the comment. Multiple comments can be added for a single reply, if necessary. However, you cannot add a comment to another comment. Click Comments again when you are done adding attachment. The number next to the
  icon will show how many comments a reply has.
 - Click the
 icon next to a message, a reply comment, or attachment to delete it. A message, comment, reply comment, or attachment can be deleted by its author or one of the following roles: HR, Training Manager, Local Training Manager (must be an event participant or be assigned to the related learning material), or Internal Trainer (must be assigned to the related learning material).
 - Click Actions > Hide Discussion to hide the discussion from other training event participants, including the discussion author. A hidden discussion will have the
 icon on the general discussion board. This action can be performed by one of the following roles: HR, Training Manager, Local Training Manager (must be an event participant or be assigned to the related learning material), or Internal Trainer (must be assigned to the related learning material). To make the discussion visible again, click Actions > Show Discussion. This action can be performed by the participant who hid the discussion.
 - Click Actions > Pin Discussion to pin the discussion to the top of the General Discussion Board section. This action can be performed by one of the following roles: HR, Training Manager, Local Training Manager (must be an event participant or be assigned to the related learning material), or Internal Trainer (must be assigned to the related learning material).
- Click Actions > Edit Discussion to edit the discussion title and/or first message, and click Post to save the changes. A discussion can be edited only by its author.
- Click Actions > Delete Discussion to delete the discussion. A discussion can be deleted by its author or one of the following roles: HR, Training Manager, Local Training Manager (must be an event participant or be assigned to the related learning material), or Internal Trainer (must be assigned to the related learning material).
- Add attachments in various formats (.docx, .xlsx, images (.png, etc.), .pdf., etc.) to a general discussion post or to a post reply. To add an attachment, click Attachments under the discussion post or post reply, click Choose File, browse to the file you want to attach, click Open and then click Upload. Select the Overwrite file if already exists check box to overwrite existing files or leave it cleared to allow duplicate attachments. You can add multiple attachments if necessary, and not only to your posts/replies. Click Attachments again when you are done adding attachment. The number of attachments will be shown next to the
- Click Back to discussion board to return to the Discussion Board page.
Add Discussion
This section is used to add a general or private discussion as described above.