On the Candidate Self-Service site, candidates can electronically sign candidate documents using the DocuSign service on condition the DocuSign integration is enabled and configured.
Documents that were sent from Lanteria HR for the candidate to DocuSign are displayed on the My Documents page on the Candidate Self-Service site. Only documents in the PDF or Word format with the correct sign here tag anchor string can be sent for electronic signature. If a document is sent for signature in the Word format, after it is signed, it will be converted into the PDF format.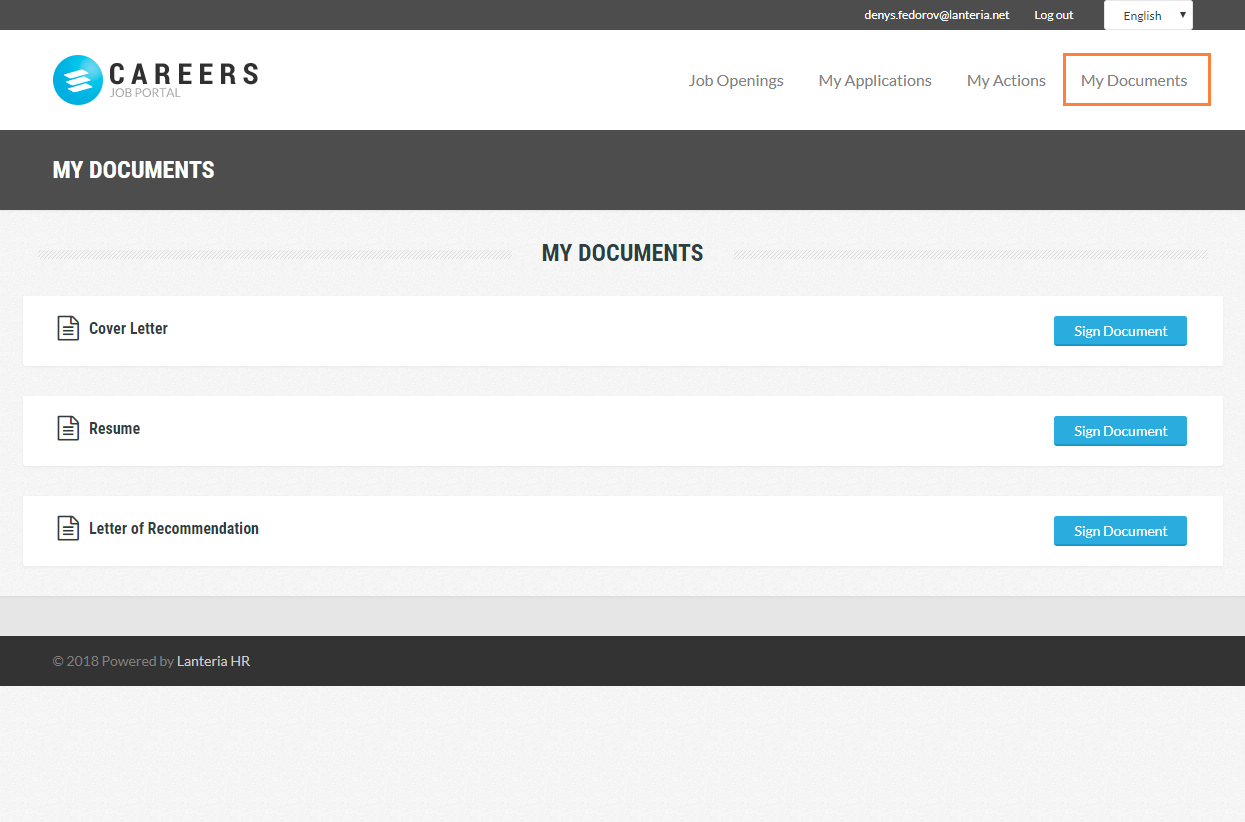
To DocuSign a document
- Log in to the Candidate Self-Service.
- On the home page, click My Documents. This page displays all candidate documents that were sent to be DocuSigned from the Candidate Documents page on the candidate card in Lanteria HR. If the document title was specified when uploading the document on the candidate card, it will be displayed on the Candidate Self-Service. Otherwise, the file name will be used as the document title.
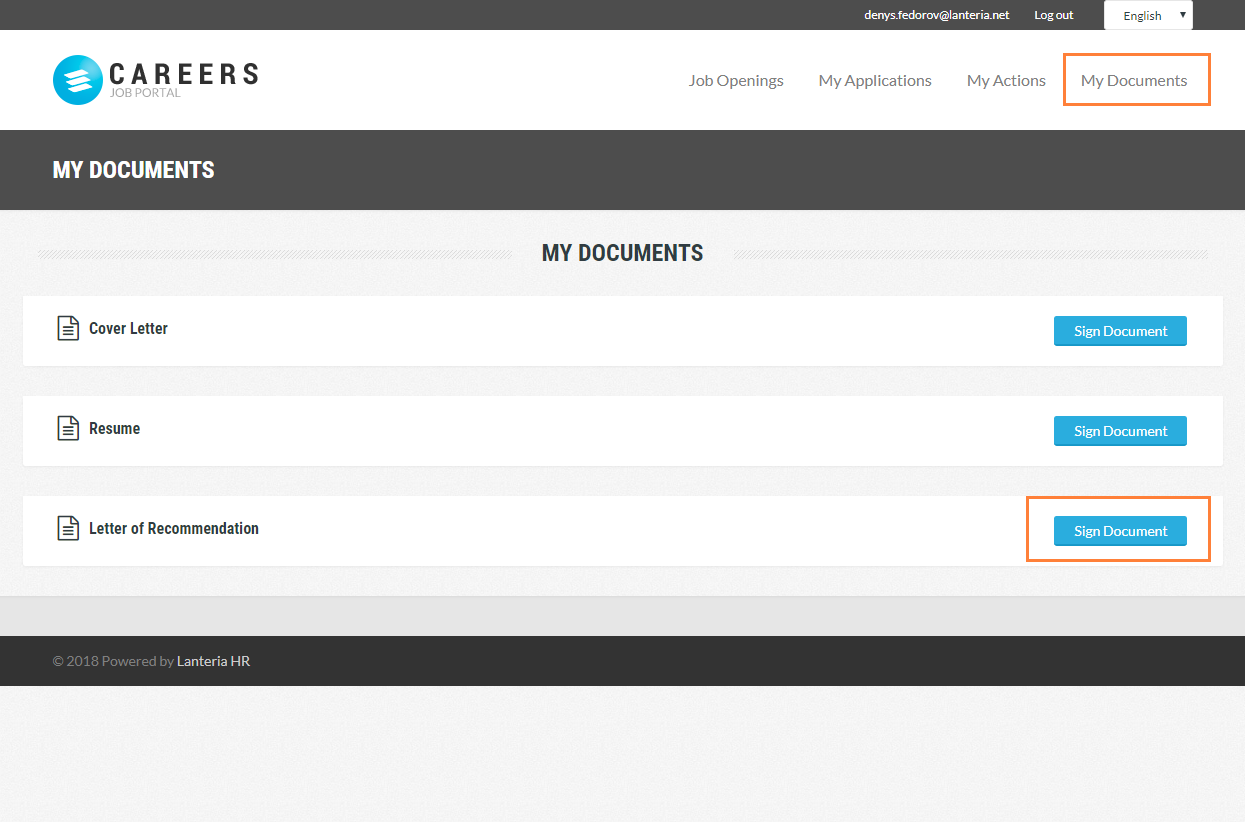
- Click Sign Document next to the document you want to sign. This will open the document on the DocuSign site.
- Select the I agree to use electronic records and signatures check box (done only once), and then click CONTINUE.
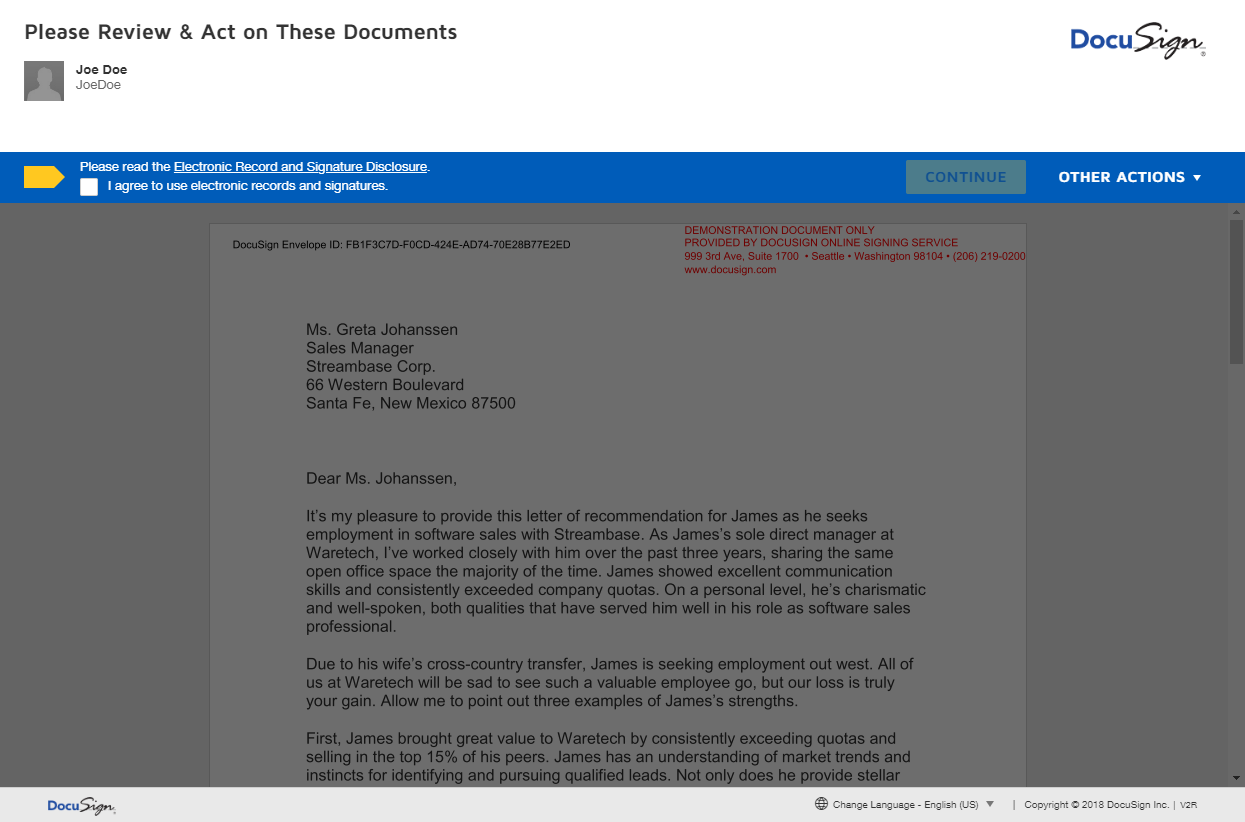
- Review the document you are going to sign, and find the signature location marked with the
 icon.
icon.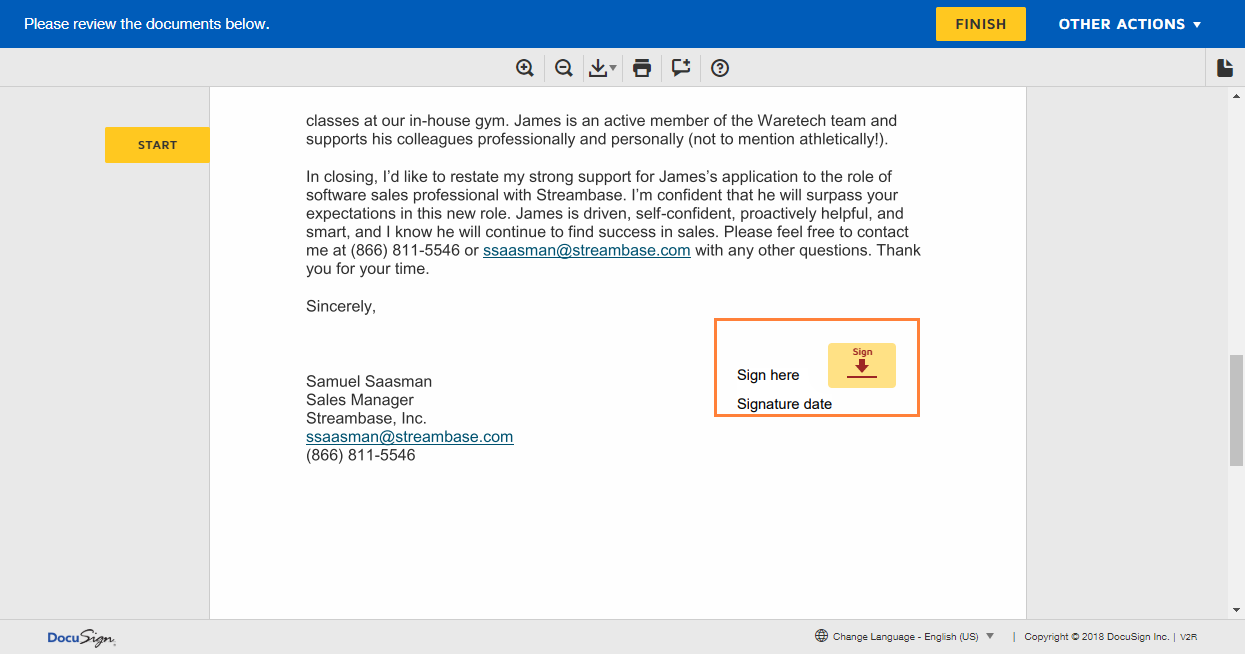
 NoteNext to the icon, there may be some text, such as "sign here" in this example. This text can be different depending on the DocuSign Integration settings in Lanteria HR. This tag defines where the button to sign the document will be added (and then replaced with a signature after the document is signed). Also, when preparing a document for electronic signature, this text (tag) can be hidden if necessary by changing its font color to make it the same as the background.
The same applies to the "signature date" tag, which defines where the date of the electronic signature will be automatically added as soon as you sign the document. The date tag is optional. - Click the
 icon.
icon. - In the Adopt Your Signature window, on the Select Style tab, in the Preview pane, you can see how the signature will look like. The style is based on your full name and initials.
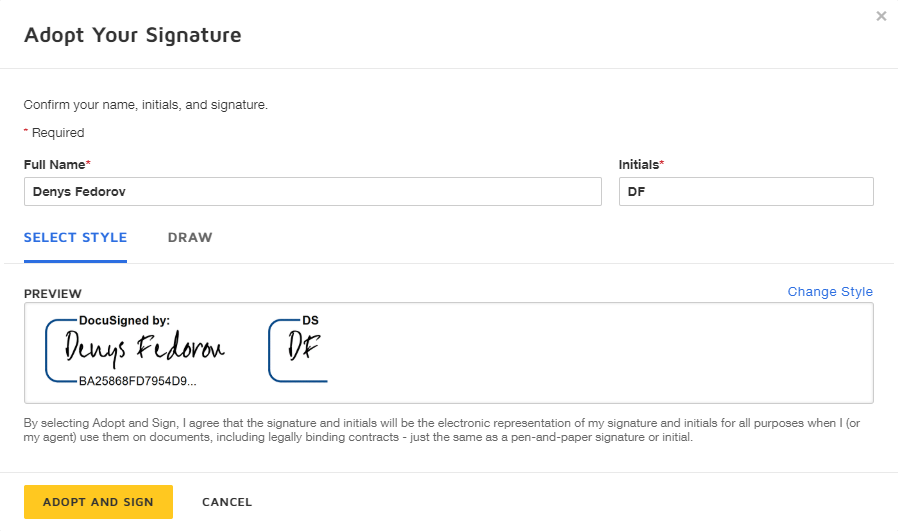
You can change the suggested style by clicking Change style in the top right corner of the preview pane and select a different signature style if necessary.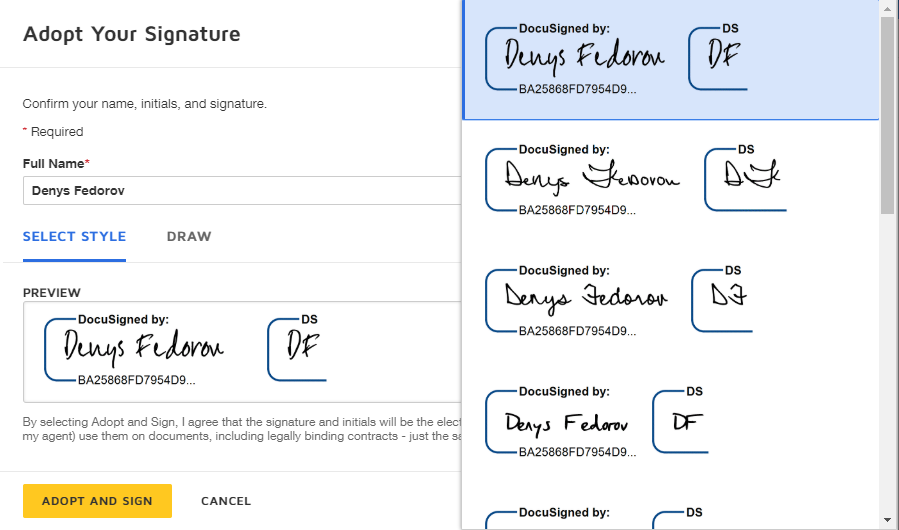
Alternatively, on the Draw tab, you can draw your signature.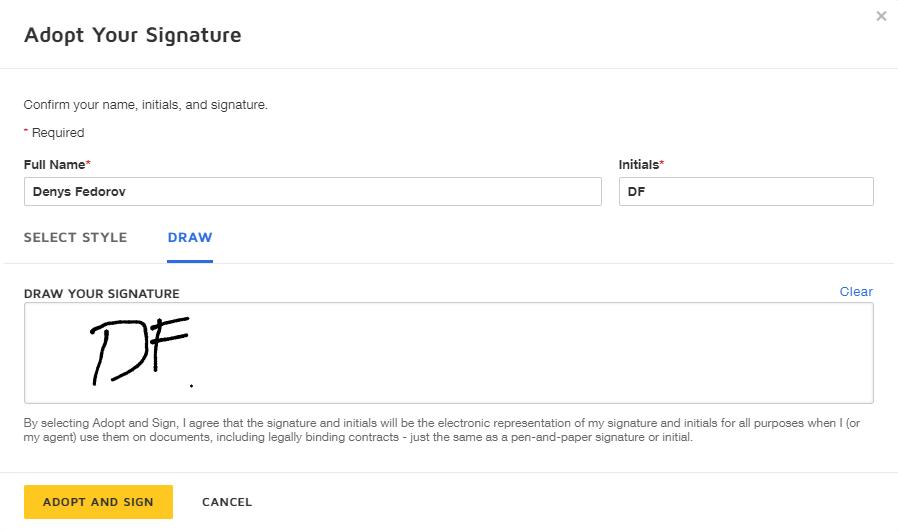
- Click ADOPT AND SIGN to sign the document.
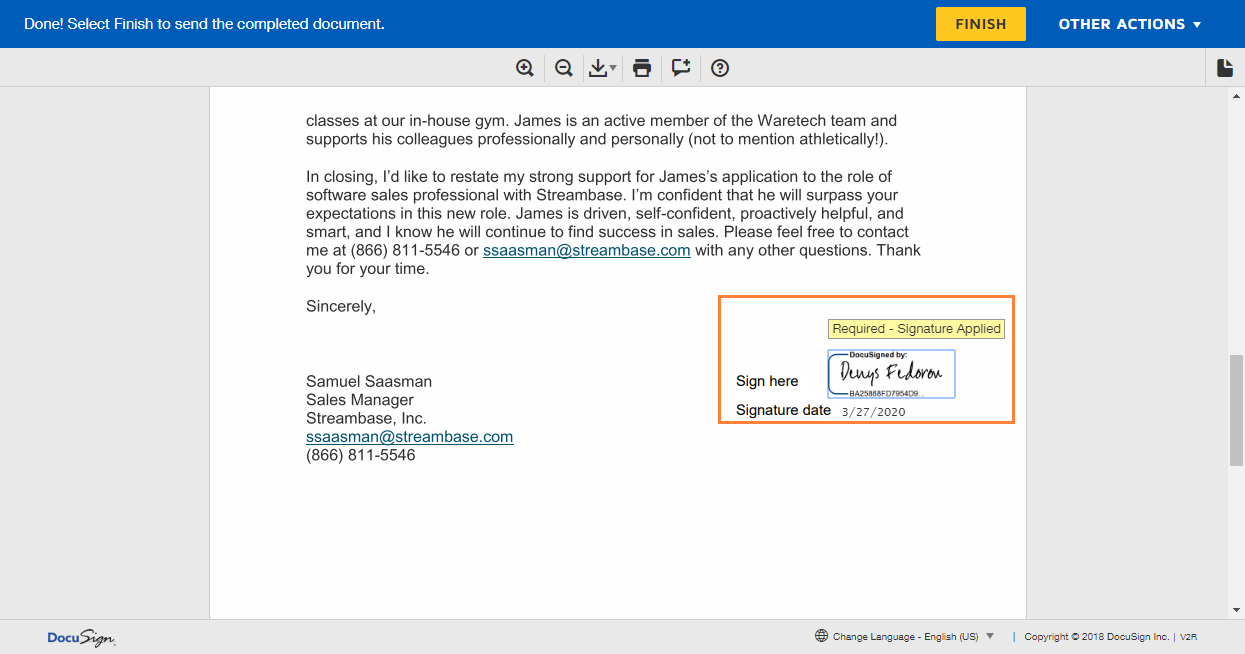
- Click FINISH to complete applying your signature to the document.
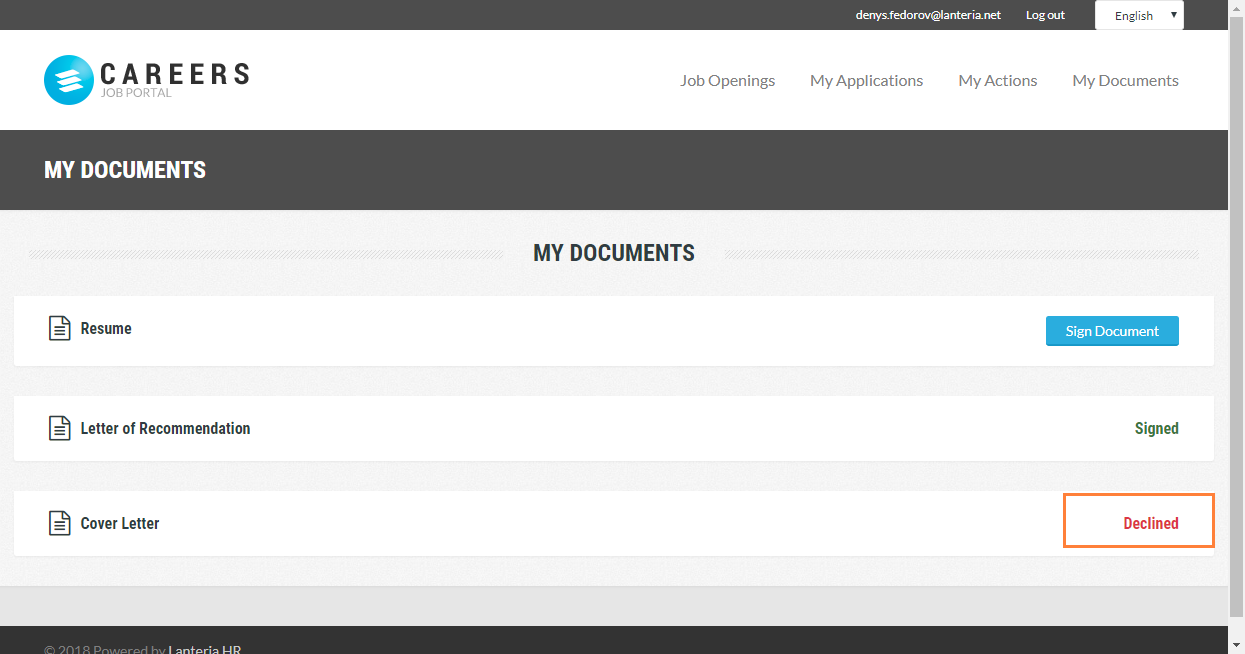
The status of the document becomes Signed.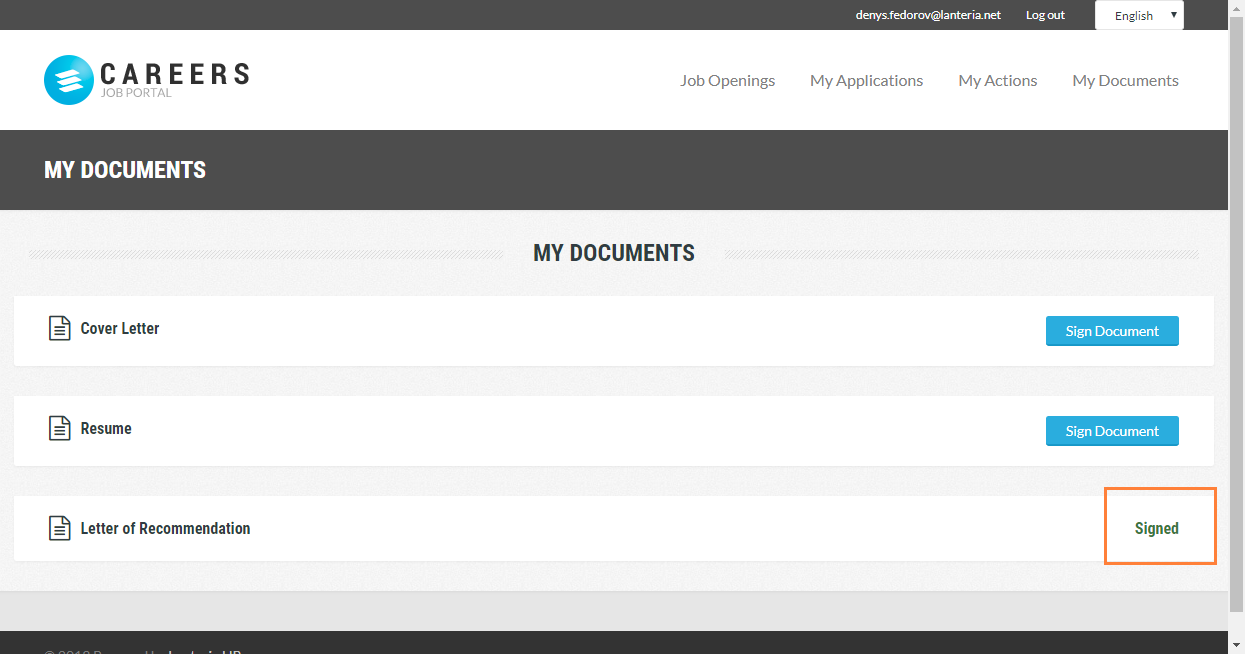
This status will also be displayed on the Candidate Documents page in the Sign Status field on the candidate card in Lanteria HR.
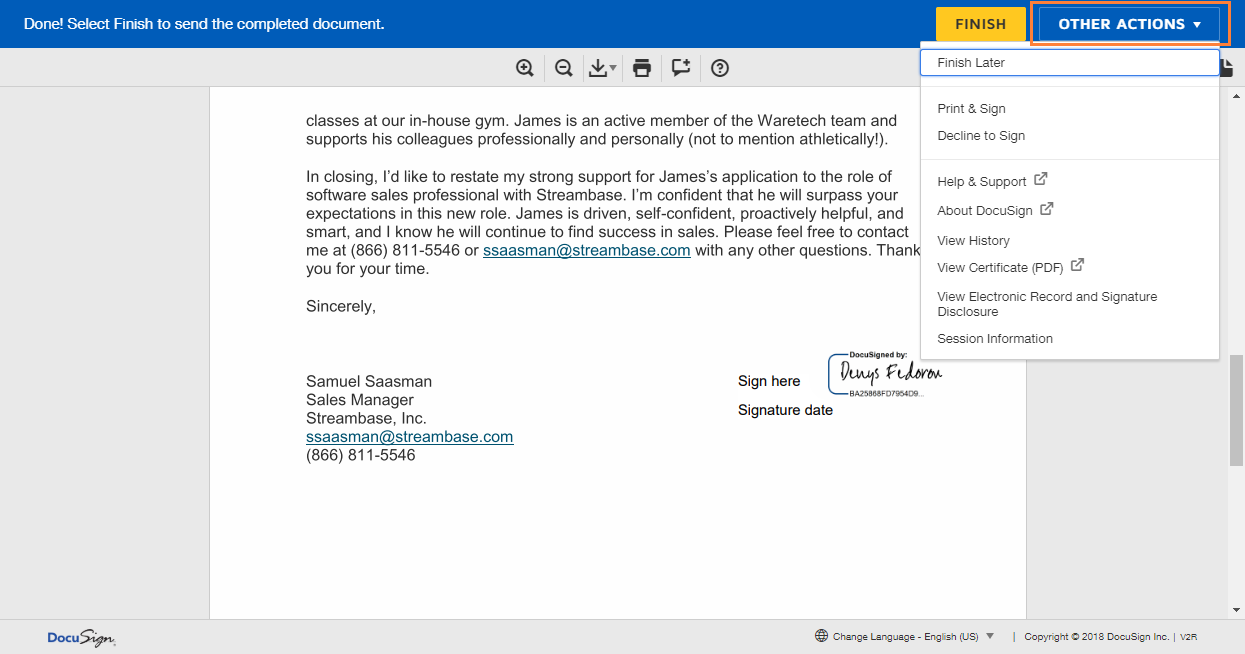
Other actions
Before clicking FINISH to sign a document, you may want to perform a different action. In document opened to apply a signature, you can click OTHER ACTIONS and select one of the following actions:
- Finish Later - To complete signing the document at a later time.
- Print & Sign - To print out a signed document.
- Decline to Sign - To decline to sign the document. The signature status of this document will be Declined in this case. You'll also be able to specify the reason why you decline to sign the document or choose to sign it later. Declined documents can be corrected, if necessary, and resent for signature from the document management page on the DocuSign site by the administrator.
- Help & Support - To get help or request support.
- About DocuSign - To learn more about the DocuSign services.
- View History - To view the history of signed documents.
- View certificate (PDF) - to view the certificate in the PDF format.
- View Electronic Record and Signature Disclosure - To read the agreement about to do business with the person or organization you are signing the document for.
- Session Information - To get an overview of the current signing session.
- If a document was deleted or voided from the DocuSign site by the administrator, the document will be removed from the My Documents page on Candidate Self-Service and its sign status will be cleared on the Candidate Documents page in Lanteria HR. However, this does not happen immediately - the document is deleted from Candidate Self-Service and the sign status is cleared in Lanteria HR by a special job, which is run automatically once a day. A document pending deletion will not be signable on Candidate Self-Service. After the sign status is cleared in Lanteria HR, the document can be resent from Lanteria HR to Candidate Self-Service for signature again if necessary.
- If a document was signed directly through the DocuSign site by the administrator, its sign status in Lanteria HR as well as the document itself will not be immediately updated in Lanteria HR or on the Candidate Self-Service site. The status and the document will be updated by a special job, which is run automatically in Lanteria HR once a day.
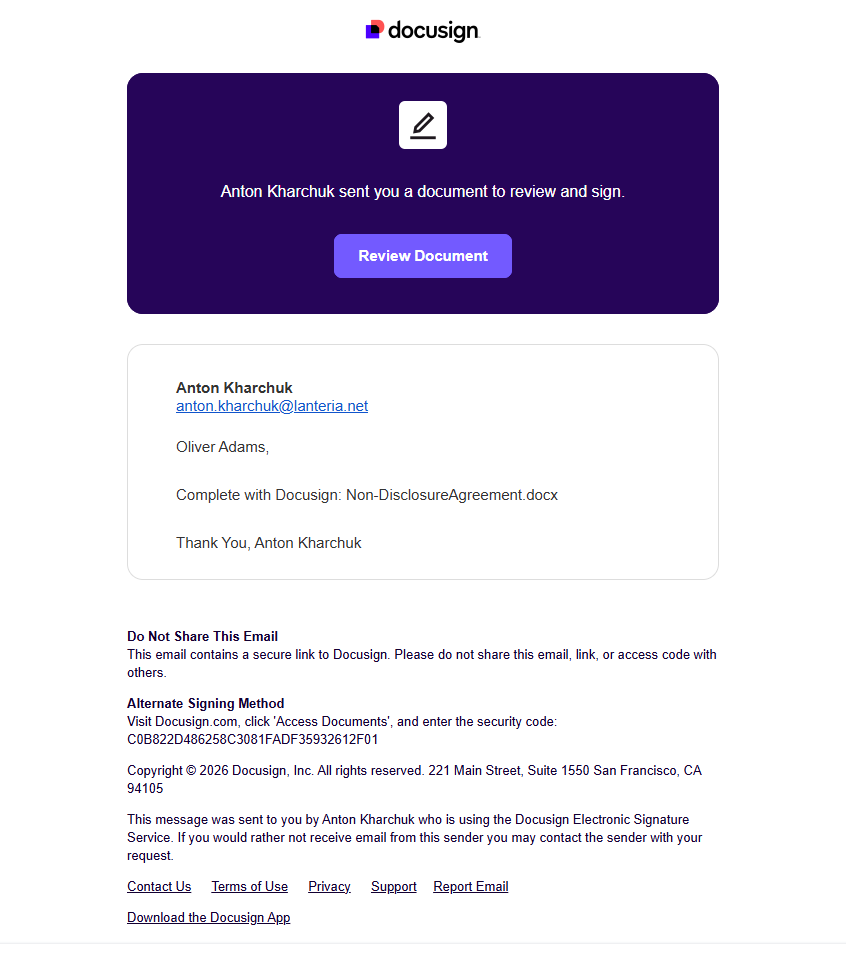
Email notification
Starting from Lanteria HR version 26.1.2, signers will receive the following email notification from the DocuSign service when they need to sign a document: