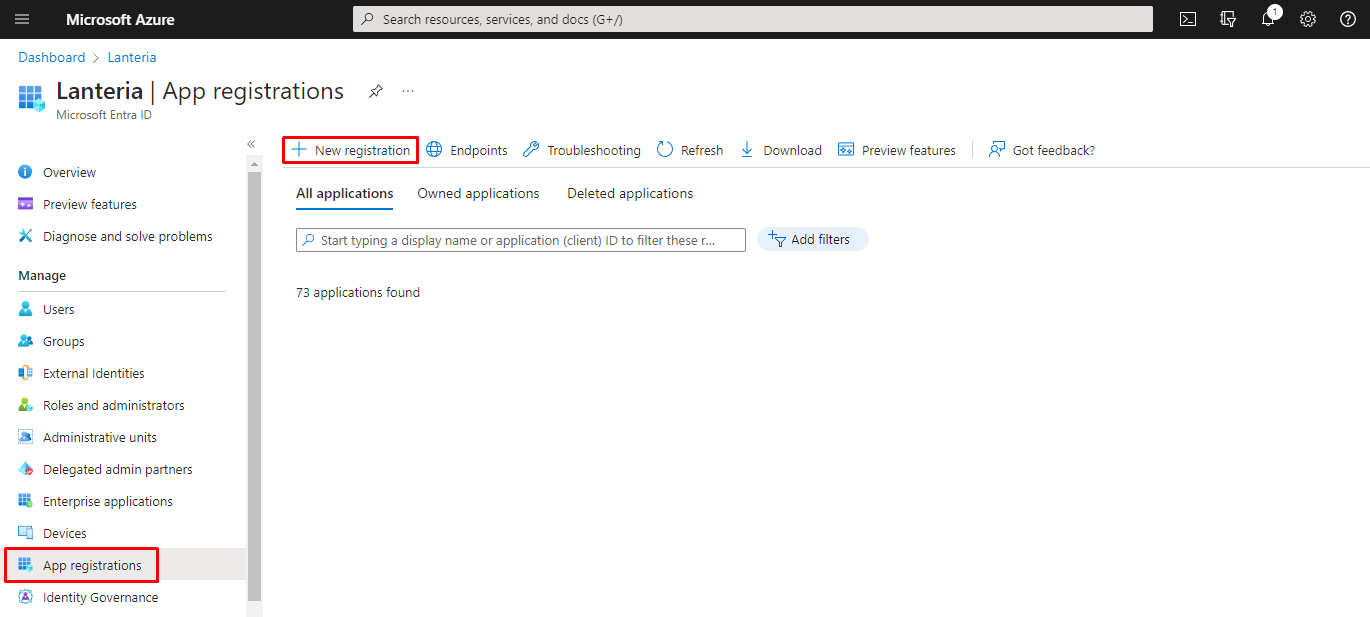
- Sign in to the Azure portal, browse to Microsoft Entra ID > App registrations, and then click New registration to create a new application registration.
- In the Register an application window, in the Name field, specify the name of the application.
- Under the Supported Account Types field, select Accounts in this organizational directory only (Default Directory only - Single tenant).
Select Accounts in any organizational directory (Any Microsoft Entra ID tenant - Multitenant) if users from other directory could also use this application to sign in to Lanteria HR. This is useful when you have single Lanteria HR system, but multiple directories (tenants). - Under Redirect URI (optional), select web, and then type https://youridentityserverurl, where instead of youridentityserverurl, type in your IdentityServer external DNS obtained when configuring identity server.
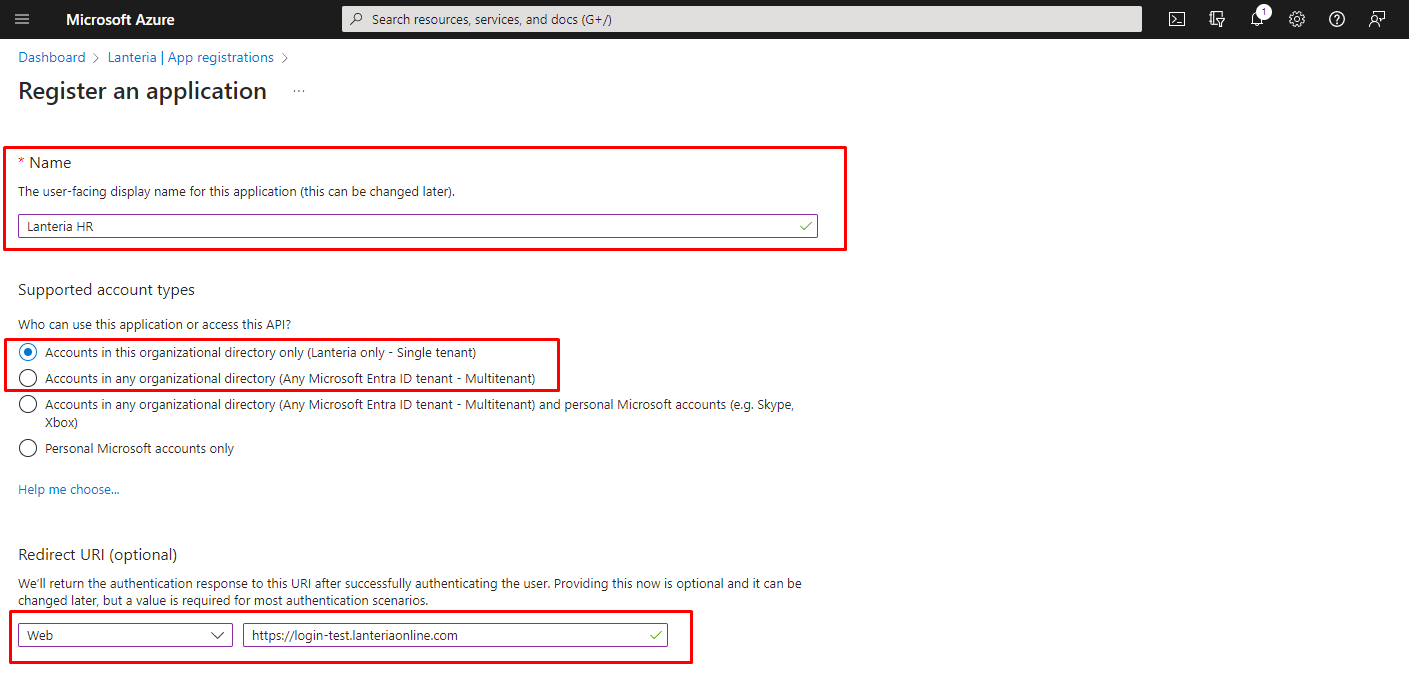
- Click Register.
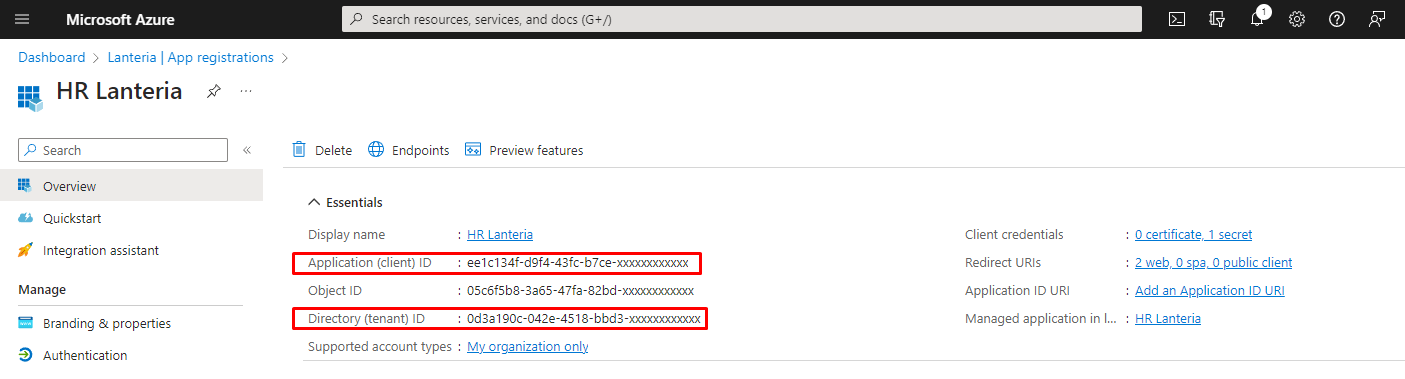
- Once registered, you can see Application (client) ID and Directory (tenant) ID. Save these IDs somewhere; they will be required when configuring the identity server.
- Click Authentication.
Under Redirect URIs, add another one by clicking Add URI and typing https://youridentityserverurl/signin-oidc.
Select the ID tokens check box.
Under Front-channel logout URL, type https://youridentityserverurl/connect/endsession
Under Implicit grant and hybrid flows, check the ID tokens (used for implicit and hybrid flows) check box
Click Save.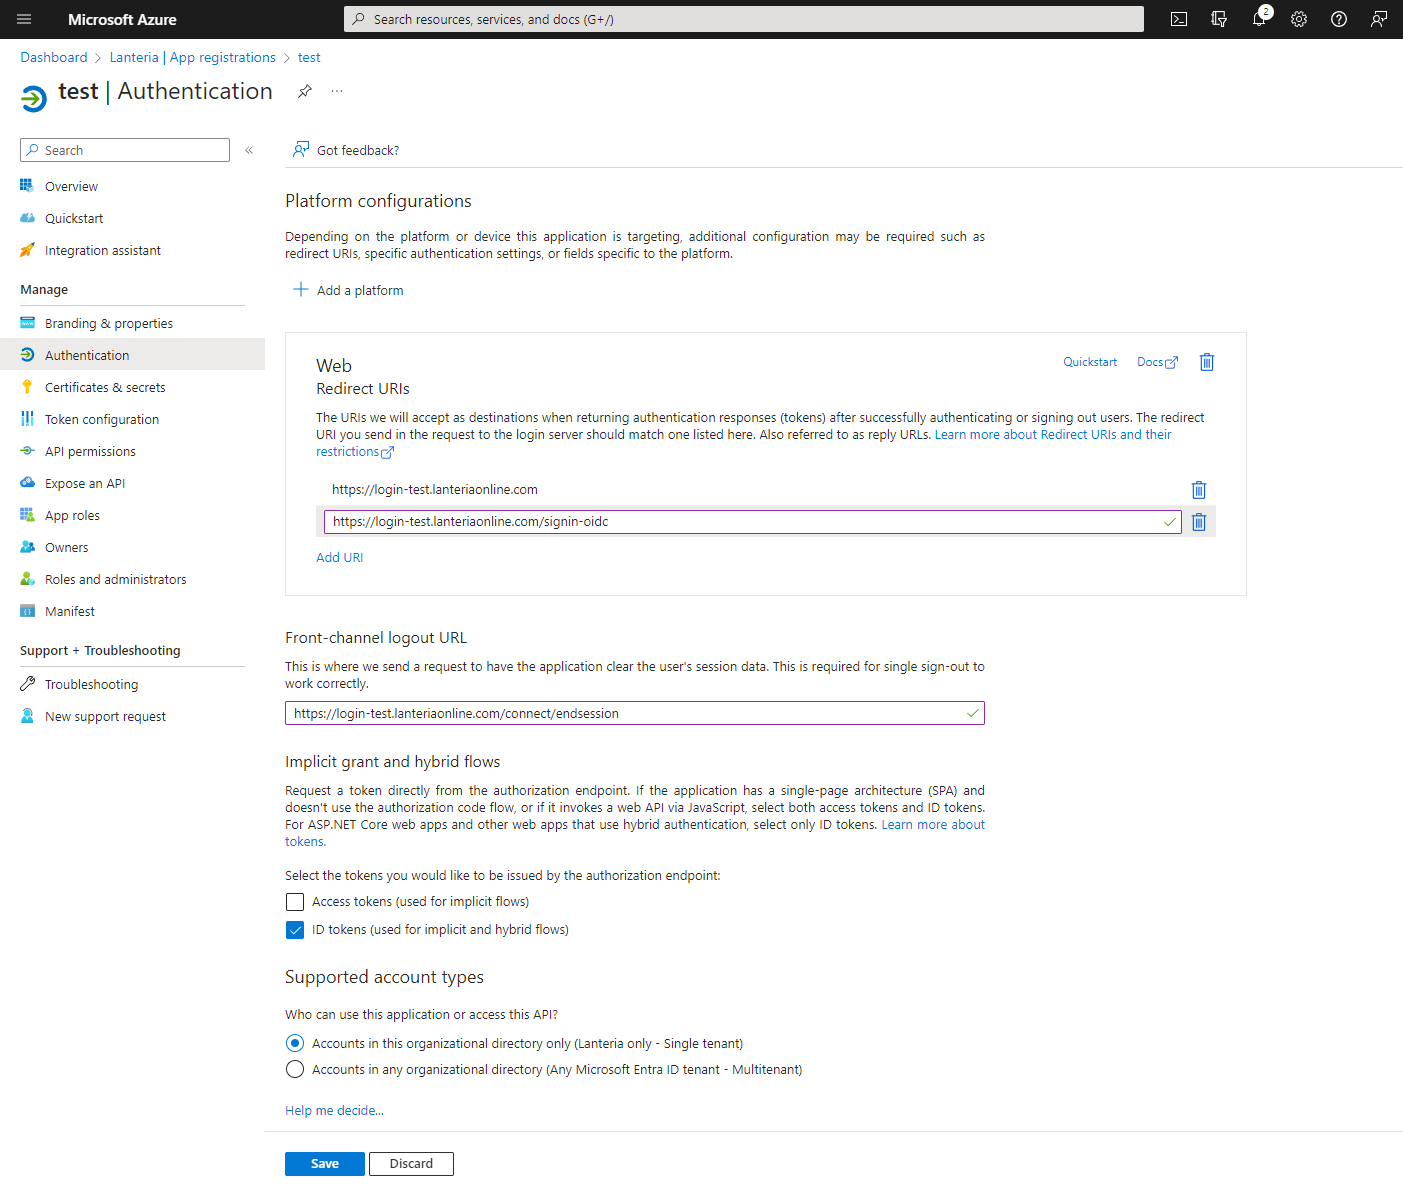
- Click API Permissions, and ensure that the following permissions are granted for the Microsoft Graph API:
API/PERMISSION NAME
Microsoft Graph (2)TYPE DESCRIPTION ADMIN CONSENT REQUIRED STATUS Directory.Read.All Application Read directory data Yes Granted/Not Granted for [Your_Directory] User.Read Delegated Sign in and read user profile No Granted/Not Granted for [Your_Directory] - Click Grant admin consent for [Your_Directory].
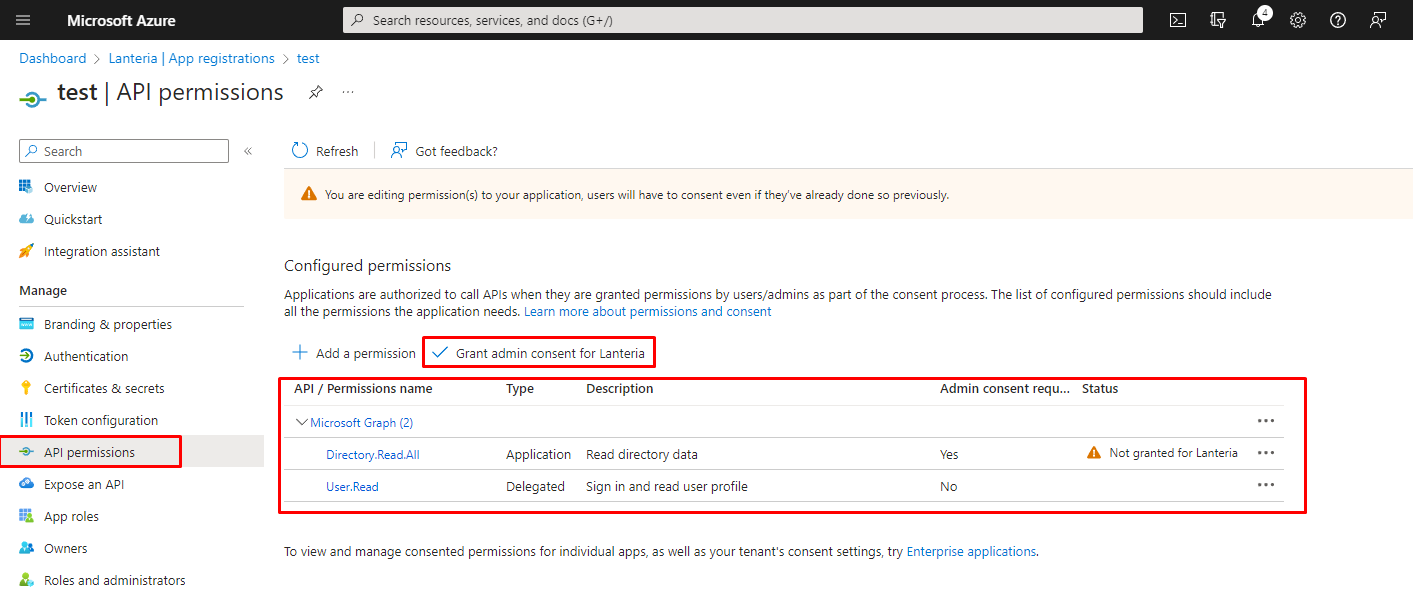
- Click Yes on the confirmation message that appears.
Create Application for Authentication
- Updated on Nov 14, 2023
- Published on Mar 2, 2023
- 1 minute(s) read
Was this article helpful?