Add Inbound Integration to Lanteria HR
- 07 Jun 2024
- 1 Minute to read
- Print
- DarkLight
Add Inbound Integration to Lanteria HR
- Updated on 07 Jun 2024
- 1 Minute to read
- Print
- DarkLight
Article summary
Did you find this summary helpful?
Thank you for your feedback!
The first step to configure the data synchronization with any system's data in the .csv format is adding a new inbound integration to Lanteria HR:
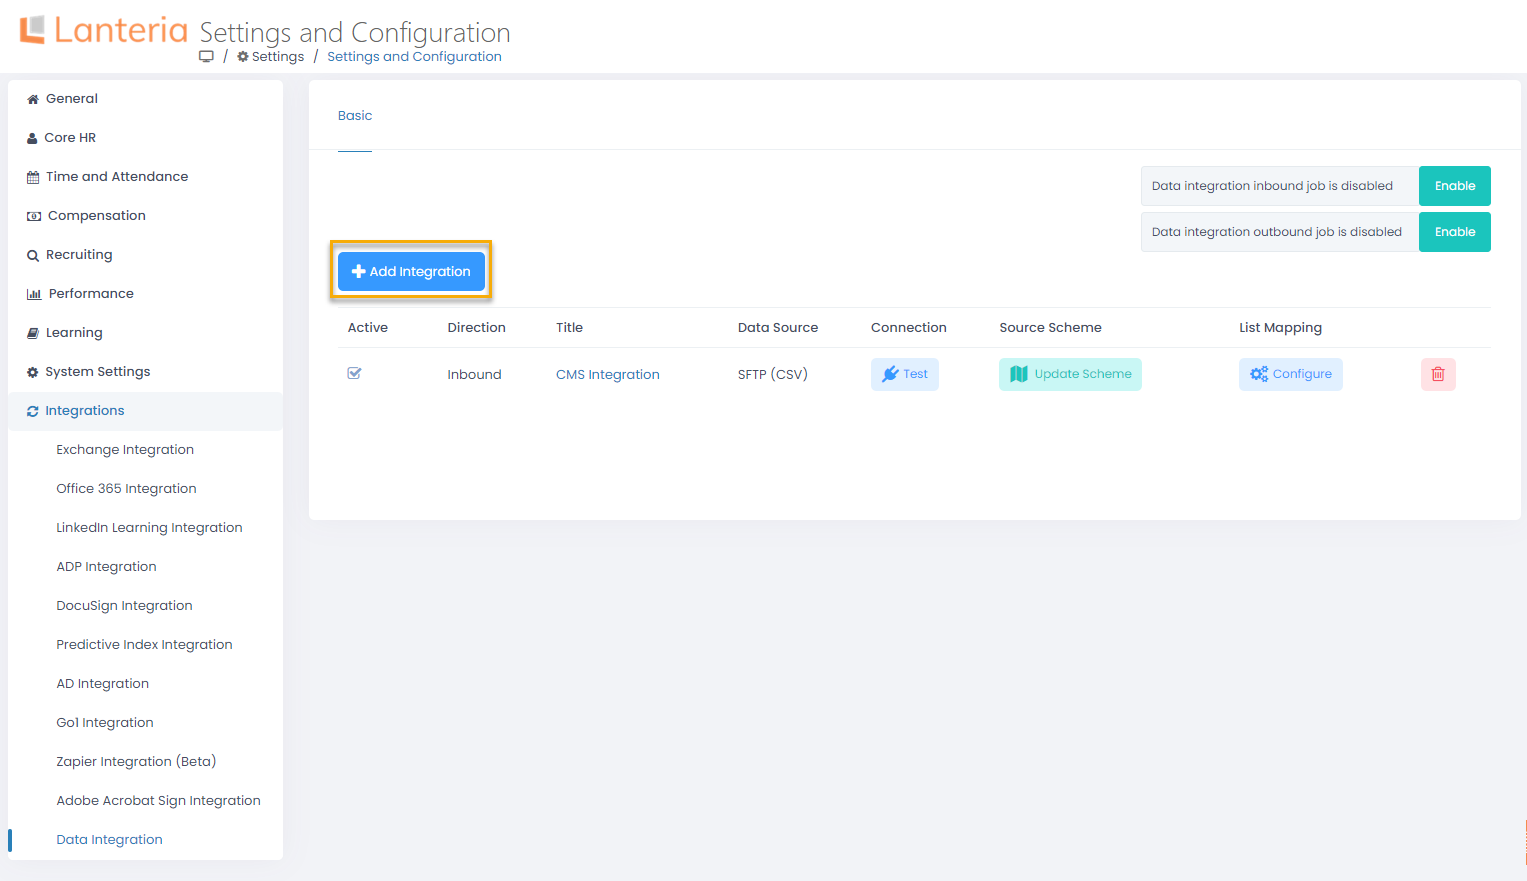
- In Lanteria HR, go to Settings > Settings and Configuration > Integrations and click Data Integration.
- Next, click Add Integration.

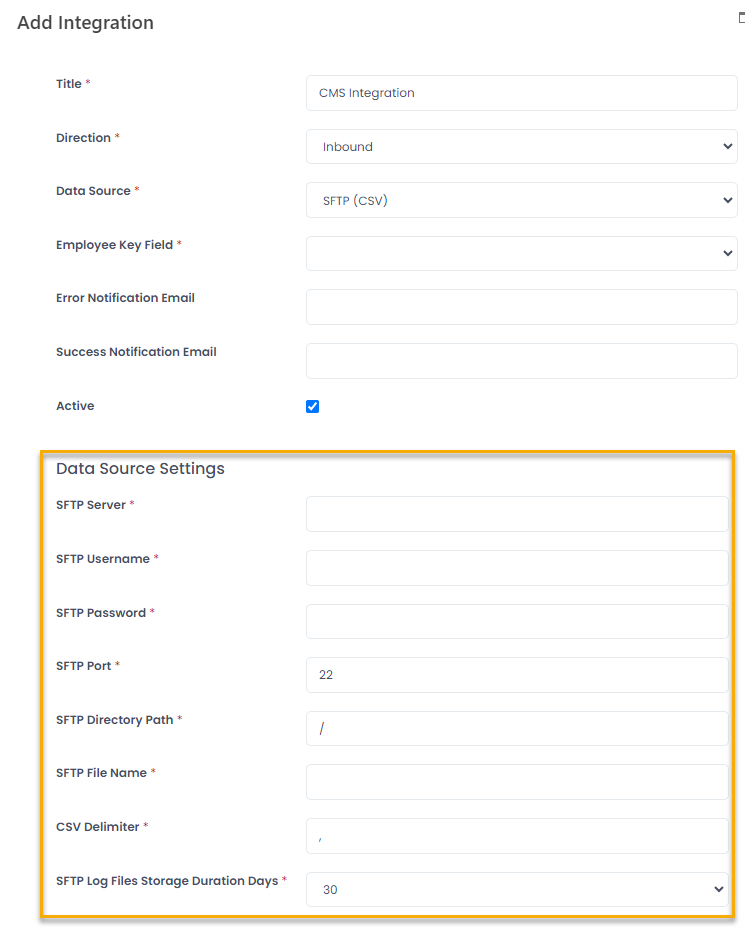
- Next, select the integration direction. To update the Lanteria HR data based on the .csv file, select Inbound. If you are setting up data synchronization from another system to Lanteria HR, refer to the Add Outbound Integration article.
That being done, the Employee Key Field and Data Source fields will display..png)
- The data source can be set to FTP (CSV) (.csv file on the FTP or FTPS server) or SFTP (CSV) (.csv file on the SFTP server). Upon selection, additional fields for entering the FTP or SFTP credentials will display.

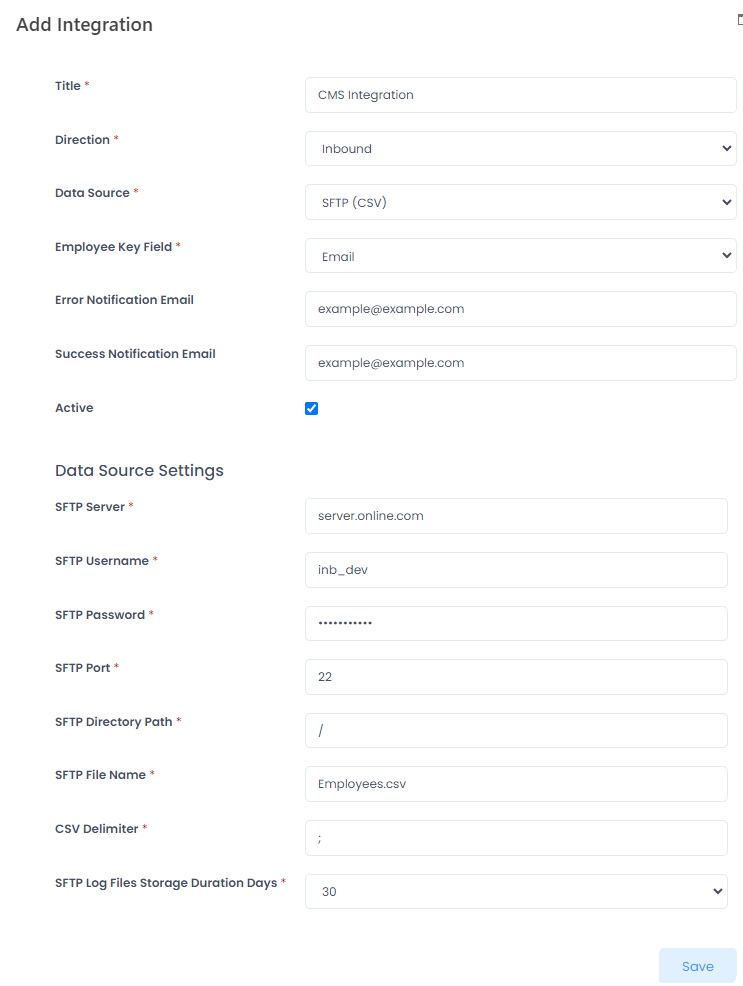
- In the Employee Key Field, specify a key to be used for data synchronization. Since the primary list to be updated is the Employees list, we can choose one of the three fields from this list to be a key: Account, Email, Global ID.
- Use the Error Notification Email and Success Notification Email fields to set mail addresses for sending notifications if any errors occur during the data synchronization and in case the data synchronization was successful.
- Select or clear the Active check box to switch the integration on or off, correspondingly.
- Under Data Source Settings, provide details for connecting to FTP/SFTP. Specify the name of the server where the .csv file will be taken from. Also, provide the user name and password for connecting to the server.
- The port will be set to the default FTP/SFTP port, which can be modified, if required.
- By default, the file will be taken from the route directory. To change this, provide path to the folder containing .csv in the Directory Path field.
- Next, specify the name of the .csv file the data must be taken from.
- In the CSV Delimiter field, provide the delimiter used in the .csv file.
- Use the Log Files Storage Duration Days field to select the period during which the log files will be stored on the server.
- Click Save.

When a new integration has been saved, click Test in the Connection column to check connection with the server. You'll see the information message whether the connection has been established. Next, set up the data mapping for the current integration.
Was this article helpful?

