When the integration is added and the connection tested, you are ready to proceed to configuring endpoints and field mapping. Endpoint is a location in the system the data is uploaded to with specific set of fields that will be mapped with the Lanteria HR list fields. You can map two different lists to the same endpoint and two different endpoints to the same list. This is relevant if, for example, employee personal data and contact details are stored in the Employees list in Lanteria HR, whereas this data is stored in two different tables in the system you are integrating with.
Mapping
Follow these steps to map Lanteria HR lists and endpoints:
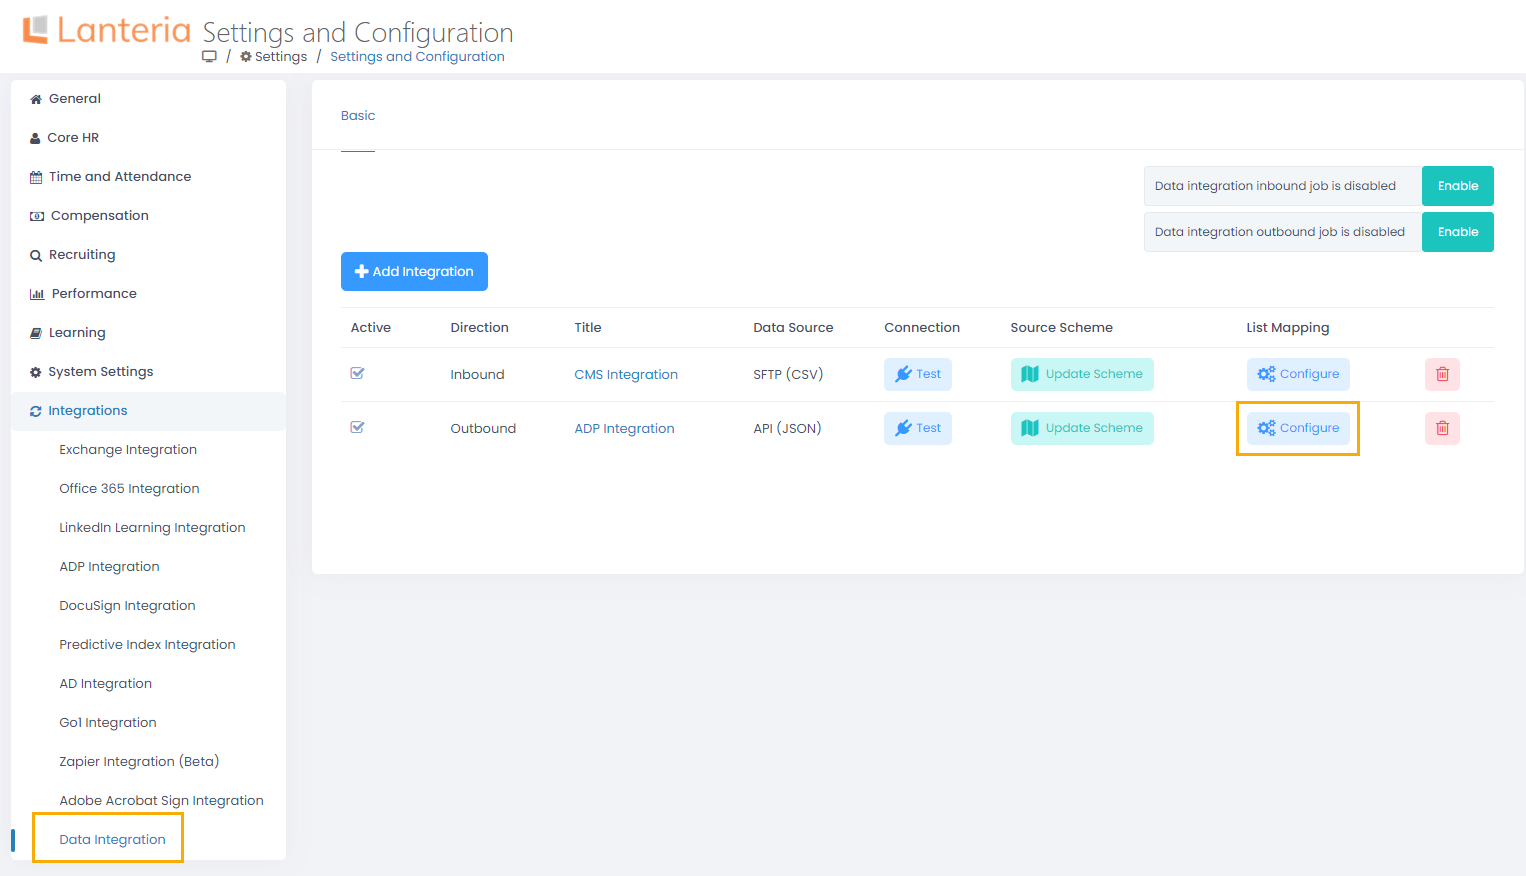
- Before mapping the lists and endpoints, the API endpoint scheme must be obtained. Under Settings > Settings and Configuration > Integrations, click Data Integration. Next, click Get Scheme for the outbound integration being configured.
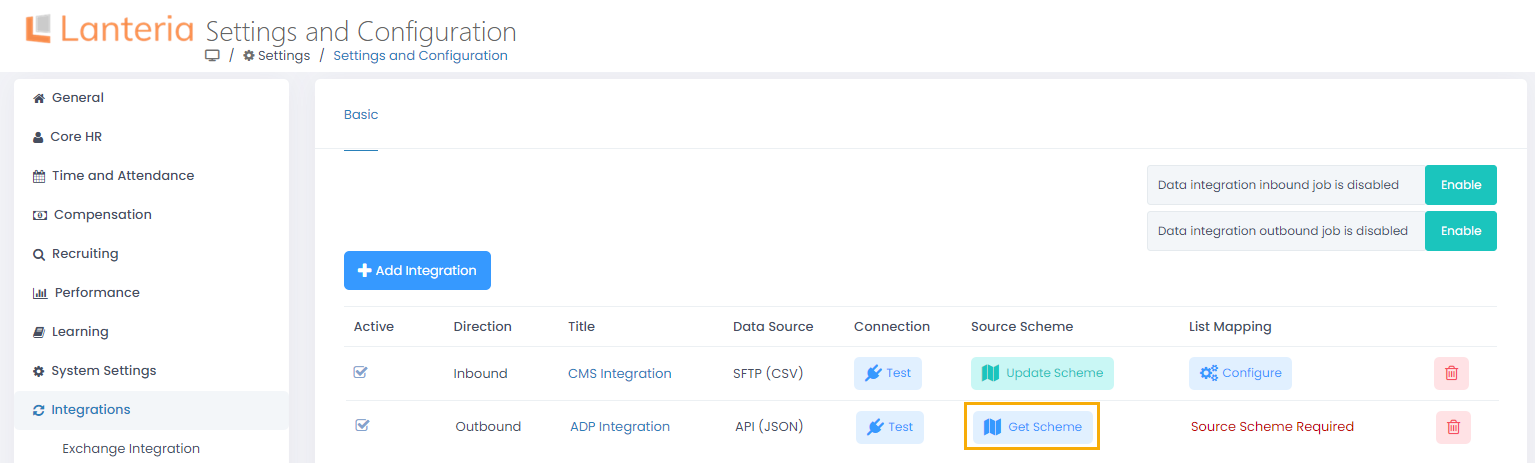
- If everything is set up correctly, a message will be displayed informing about the number of endpoints that were found.NoteFor the endpoint to be fetched, it mustn't contain required complex field types. If it does contain fields with complex field types, but they are not required, the endpoint will be fetched without these fields.
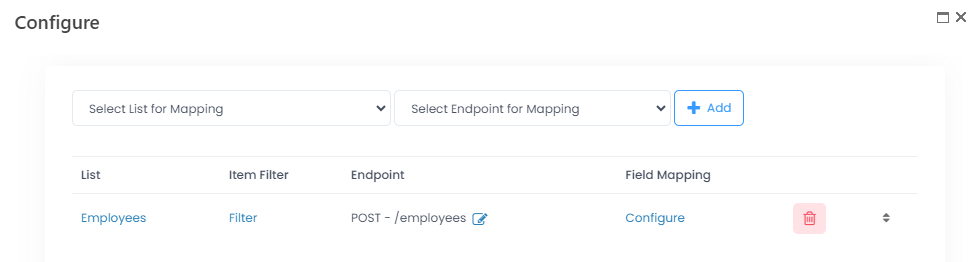
The uploaded endpoint scheme can be updated - the Get Scheme button will change to Update Scheme. - In the List Mapping column, the Configure button will display. Click it to proceed to mapping the lists and endpoints.
.png)
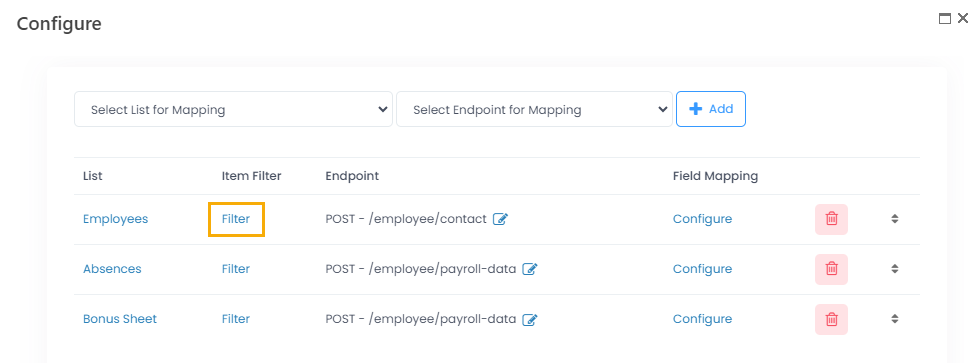
- Select a Lanteria HR list and endpoint it will be mapped with. Click Add.
 NoteIf the scheme is updated and some previously added endpoint has been deleted or renamed in the source scheme, the error icon will be displayed next to it. Use the edit icon to change the endpoint to another one.
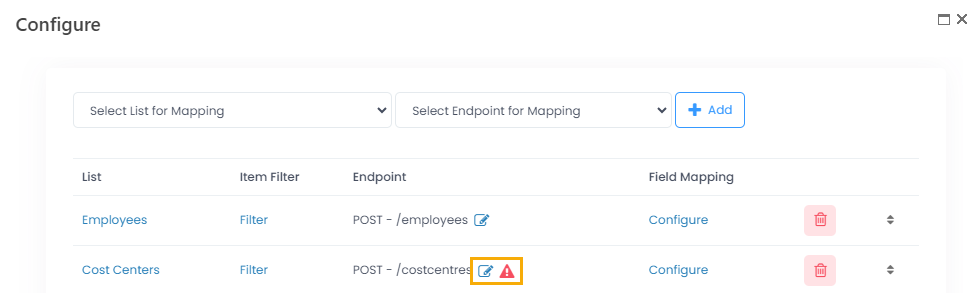
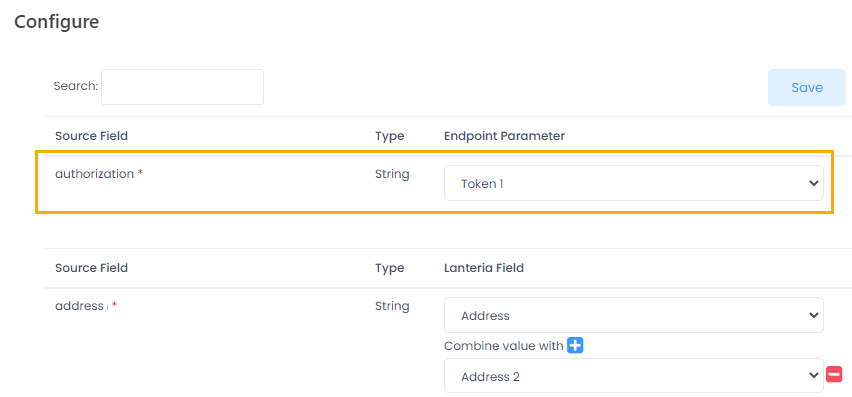
- First of all, set up the endpoint header parameters (allowed formats, authorization, etc.) required by API. These parameters will be fetched from the API data model and displayed under Source Field. Use the Endpoint Parameter column to map them with parameters registered under Endpoint Parameters when adding the integration.
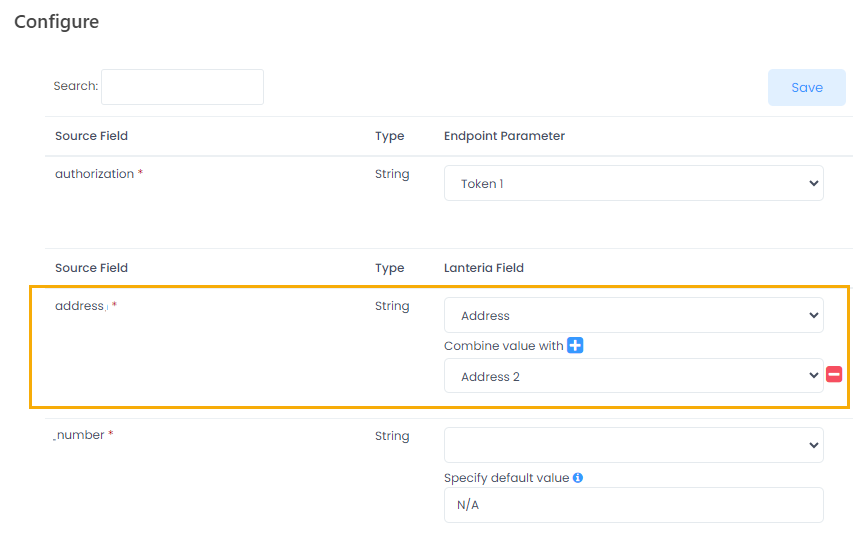
- Next, proceed to mapping the endpoint fields with Lanteria HR fields. Endpoint fields are displayed under Source Field and its type can be checked in the Type field. The following types are available for endpoints: string, boolean, number or integer. You can map them with the following Lanteria HR field types:
- Text (single line of text), Note (multiple line of text) - have option to combine value with another field from Lanteria HR. Values will be combined together with the space delimiter. For example, if an endpoint field has one address field, we can combine two Lanteria HR address lines into one.
- Lookup - The lookup values can be uploaded by any field you select. Use the Bind from option that will display after you choose a lookup field for mapping. For example, if an endpoint is tracking payment frequencies by codes, create an additional field in the Pay Frequencies list of Lanteria HR and add the corresponding codes to it. Next, when mapping the payment frequencies, select to bind from code.
.png)
- DateTime - Specify the date format required by the endpoint field.
.png)
- Choice - For the choice fields, it is possible to transform the value. For each choice, you can specify how the value of the Lanteria HR field corresponds to the endpoint field value. For example, an endpoint can accept the marital status values S and M, whereas in Lanteria HR it will be Single and Married. Specify it when mapping the Marital Status field.
.png)
- Number
- Yes/No - for the Boolean fields, the value will be interpreted as true if it equals 1, y, yes or true.
- Hyperlink or Picture
- Text (single line of text), Note (multiple line of text) - have option to combine value with another field from Lanteria HR. Values will be combined together with the space delimiter. For example, if an endpoint field has one address field, we can combine two Lanteria HR address lines into one.
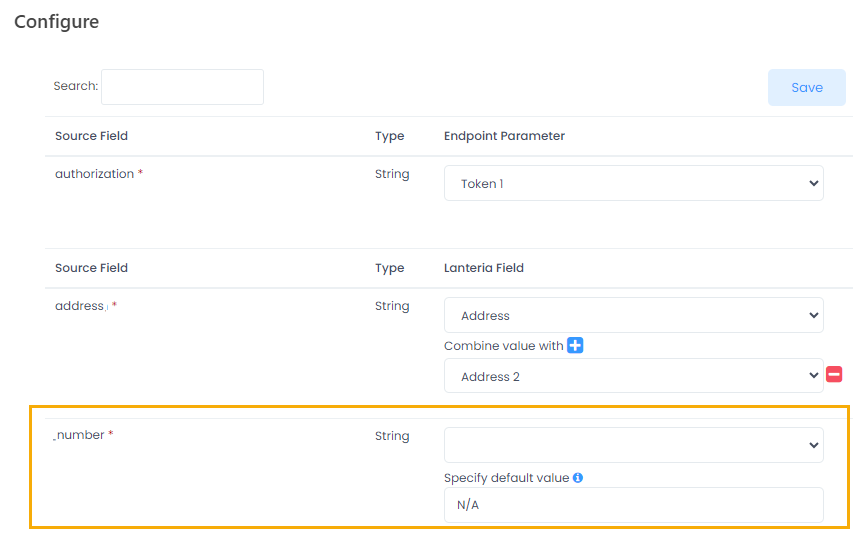
- If any endpoint field is required, but it cannot be mapped to Lanteria HR, you can specify a default value that will be transferred for that field. If the field type is boolean, specify "y", "yes", "true" or "1" for yes, otherwise, the value will be interpreted as no.
- When all the fields have been mapped, click Save.
Set up Processing Order
The Lanteria HR list and endpoint mappings will be processed in the same order as they are located on the Configure page. Drag and drop the records to change the processing order. 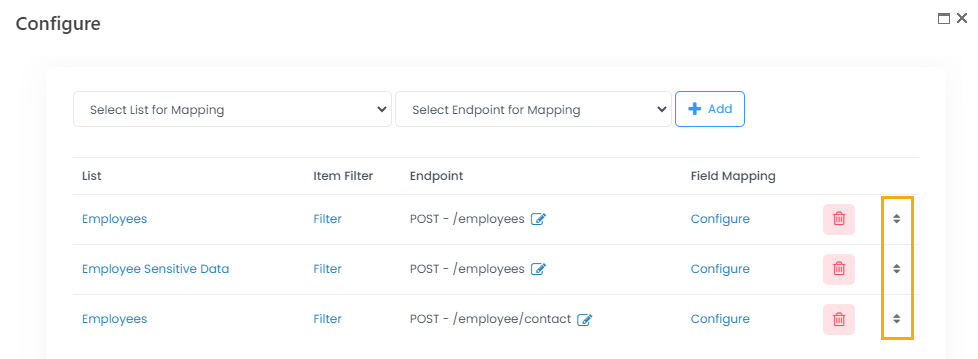
Filter Data to Be Synchronized
You can set up filters to limit data synchronization to records corresponding to the selected criteria. For example, if only data for employees from Canada is to be sent to the Canadian payroll, set up filtering to achieve this. For filtering, you can use fields of the lookup and boolean field types.
The filters can be reused. If you have several list-endpoint mappings and any of them contain lookups to the lists above, you can reuse filters set up for these mappings. For example, the Employees list is uploaded to some endpoint first and then the Employee Absences list is uploaded to another endpoint. The Employee Absences list has lookup to the Employees list. If the Employees list mapping has a filter so that only employees from Canada are processed, reuse this filter for the absences to sync only absences of the Canadian employees. Please note that the list-endpoint mapping whose filter is reused must be processed before the one reusing the filter.
If there is a filtering dependency and some record from the first list couldn't be processed, the related record from the list with dependent filter will also be skipped. If the parent list-endpoint mapping is deleted, the filtering dependency will be removed as well.
Create Filter
Follow these steps to filter data to be processed by integration:
- Go to Settings > Settings and Configuration > Integrations and click Data Integration.
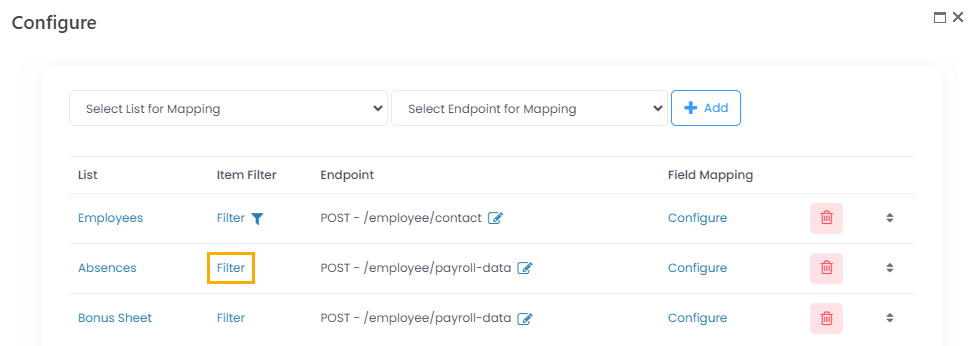
- Select an outbound integration to create filters for and click Configure.
- On the page that opens, select a list-endpoint mapping to set filters for and in the Item Filter column, click Filter.
- Select a field to filter data by and click Add.
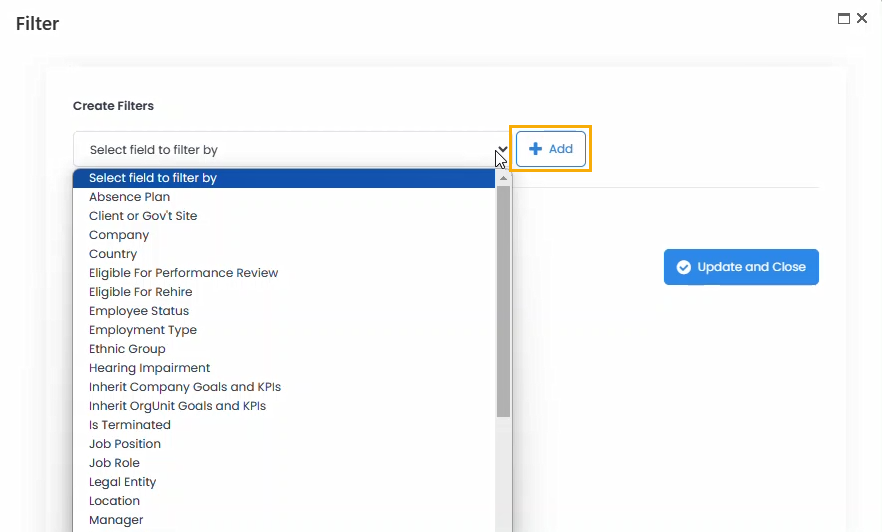
- Use the Only for Values field to specify which values the records must contain to be processed.
.png)
- Click Update and Close to save the filter or use the Add button to add another one. If you add several filters, only records meeting all the selected criteria will be processed.
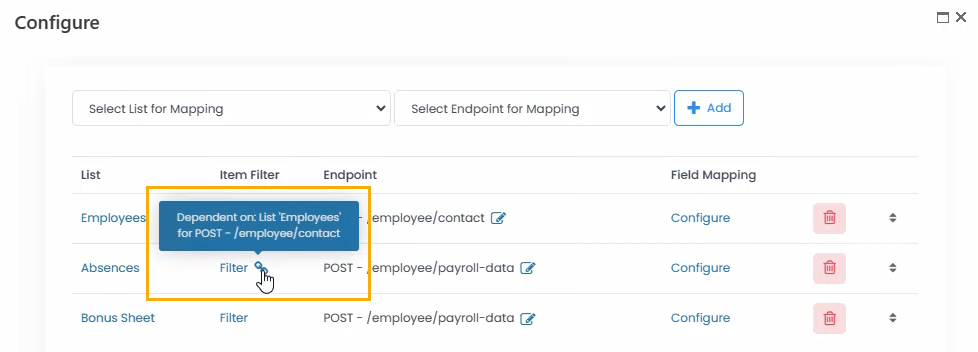
When the filter is created, the filter icon will be displayed next to the list-endpoint mapping and if you point to it, the filtering fields will be shown in the pop-up. 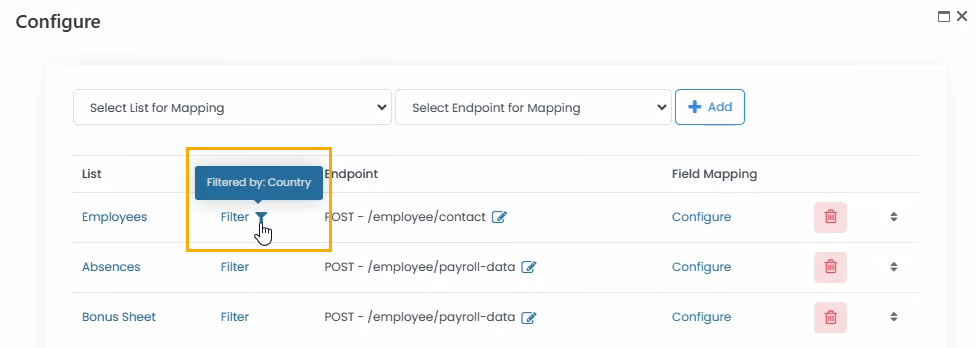
Set Filtering Dependency
To reuse a filter from another mapping, follow these steps:
- Go to Settings > Settings and Configuration > Integrations and click Data Integration.
- Select an outbound integration to define filters for and click Configure.
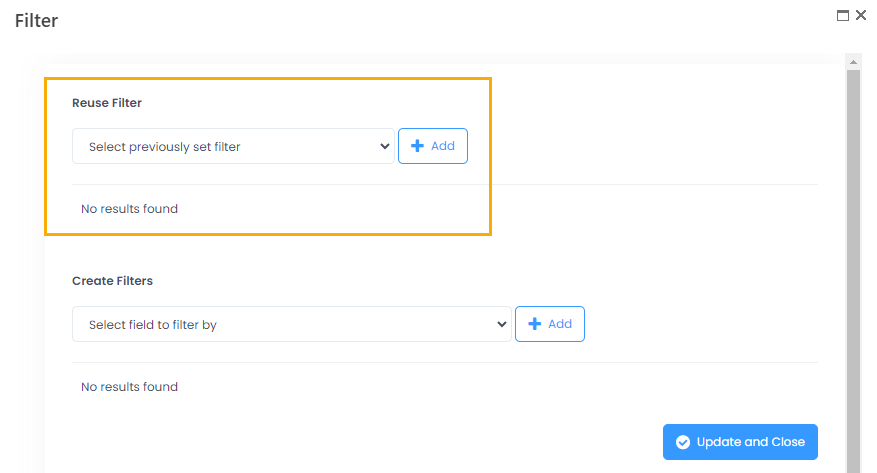
- On the page that opens, select a list-endpoint mapping for which you are setting up filter reuse and in the Item Filter column, click Filter.
- Please note that to set up a filtering dependency for the list-endpoint mapping, there must be a list-endpoint mapping above with set up filter and the current list must have lookup to this above list. If these conditions are met, the Reuse Filter section will display.
- Select a filter to be reused. The Filter by Field option will be displayed. Select a lookup whose filter will be reused.
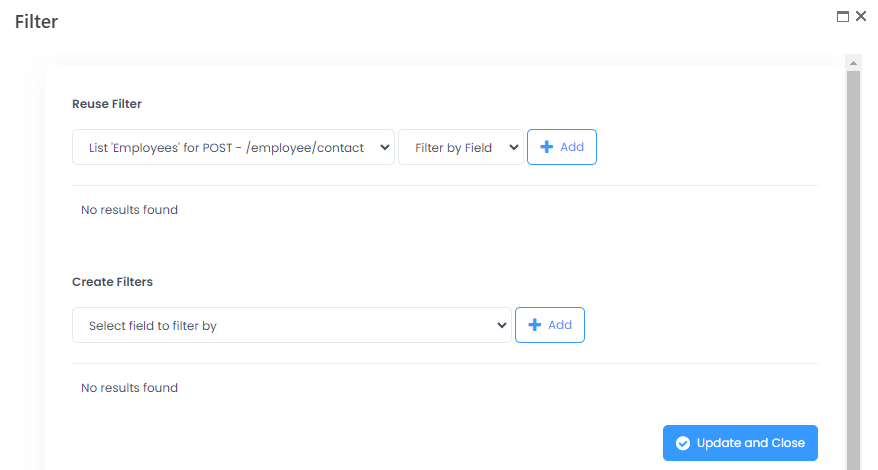
- Click Add. The filter will be added and the option will be disabled - you can reuse only one filter per endpoint-list mapping. To set up reusing another filter, remove the existing one. Under Create Filters, you can create the list of own filters in addition to the reused one.
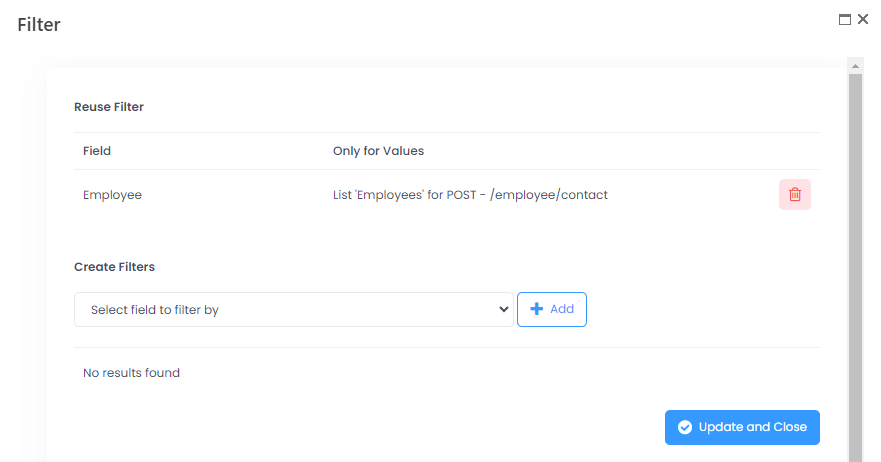
After the filter reuse is set up, the link icon will be displayed next to the list-endpoint mapping. Point to it to view the filtering dependency details.