When setting up the Exchange integration in Lanteria HR, the authentication method is to be selected. The users can choose between the Basic (login and password) and Modern (OAuth) authentication. Microsoft announced deprecation of basic authentication to connect to their services including Exchange Web Service. Thus, it is recommended to choose Modern and configure the OAuth authentication method.
The OAuth configuration steps in the Microsoft Entra ID (previously known as Azure Active Directory) admin center are as follows:
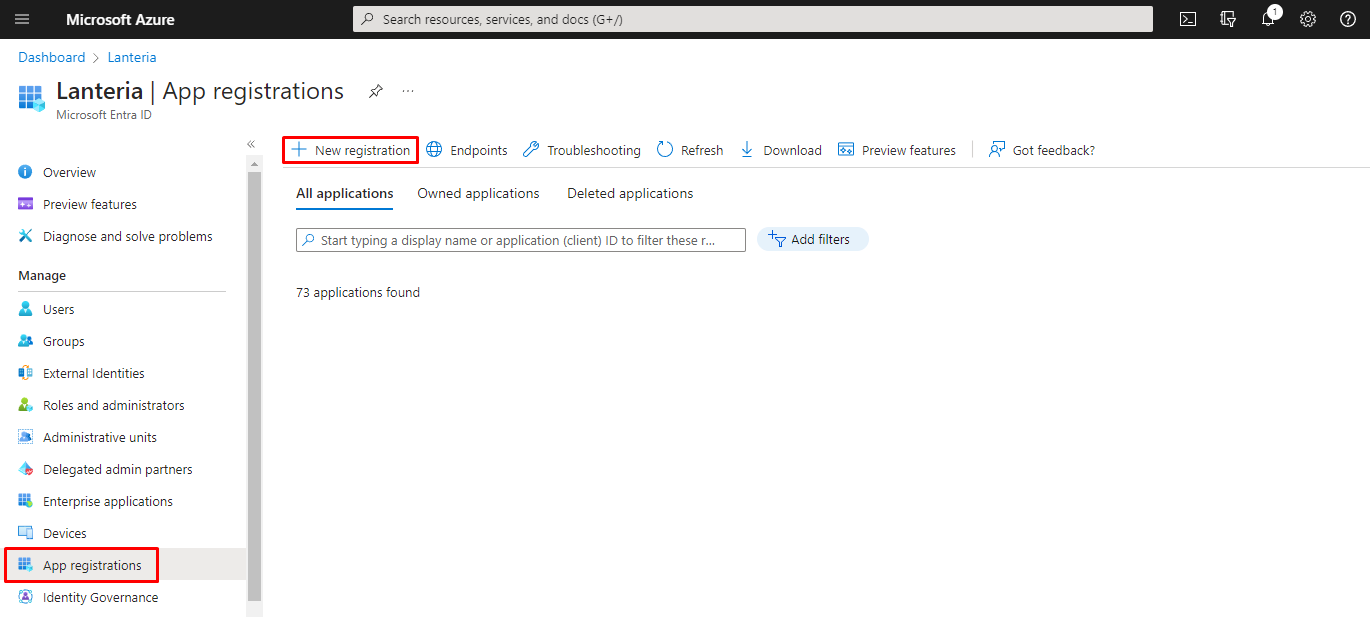
Sign in to the Azure portal, browse to Microsoft Entra ID > App registrations, and then click New registration to create a new application registration.
In the Register an application window, in the Name field, specify the name of the application.
Under the Supported Account Types field, select Accounts in this organizational directory only (Default Directory only - Single tenant).
Under Redirect URI, select Public client (mobile & desktop) and set the value to https://login.microsoftonline.com/common/oauth2/nativeclient.

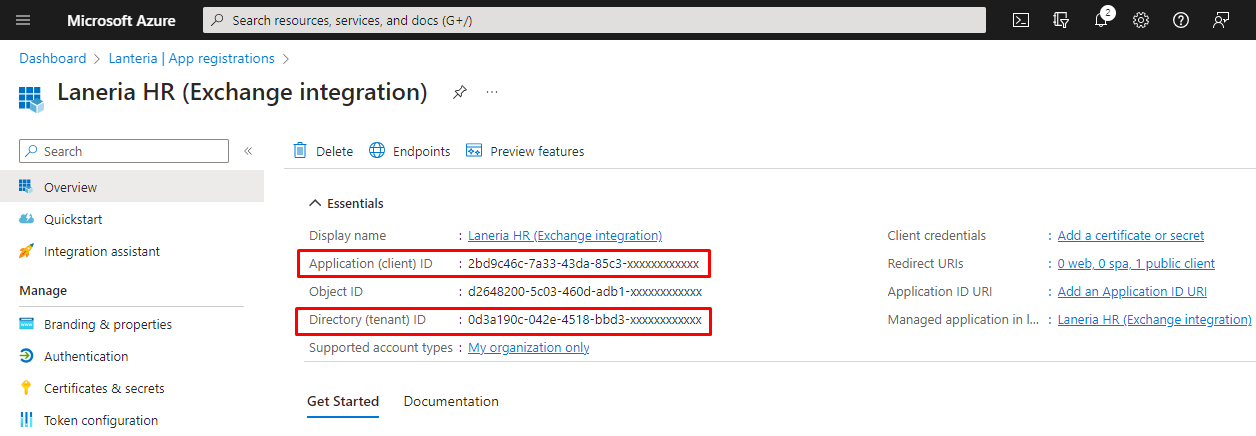
Click Register. From the page that opens, copy the values of the Application (client) ID and Directory (tenant) ID and save them. These will be used when setting up the Lanteria HR part of integration.
Under Manage, click Manifest.
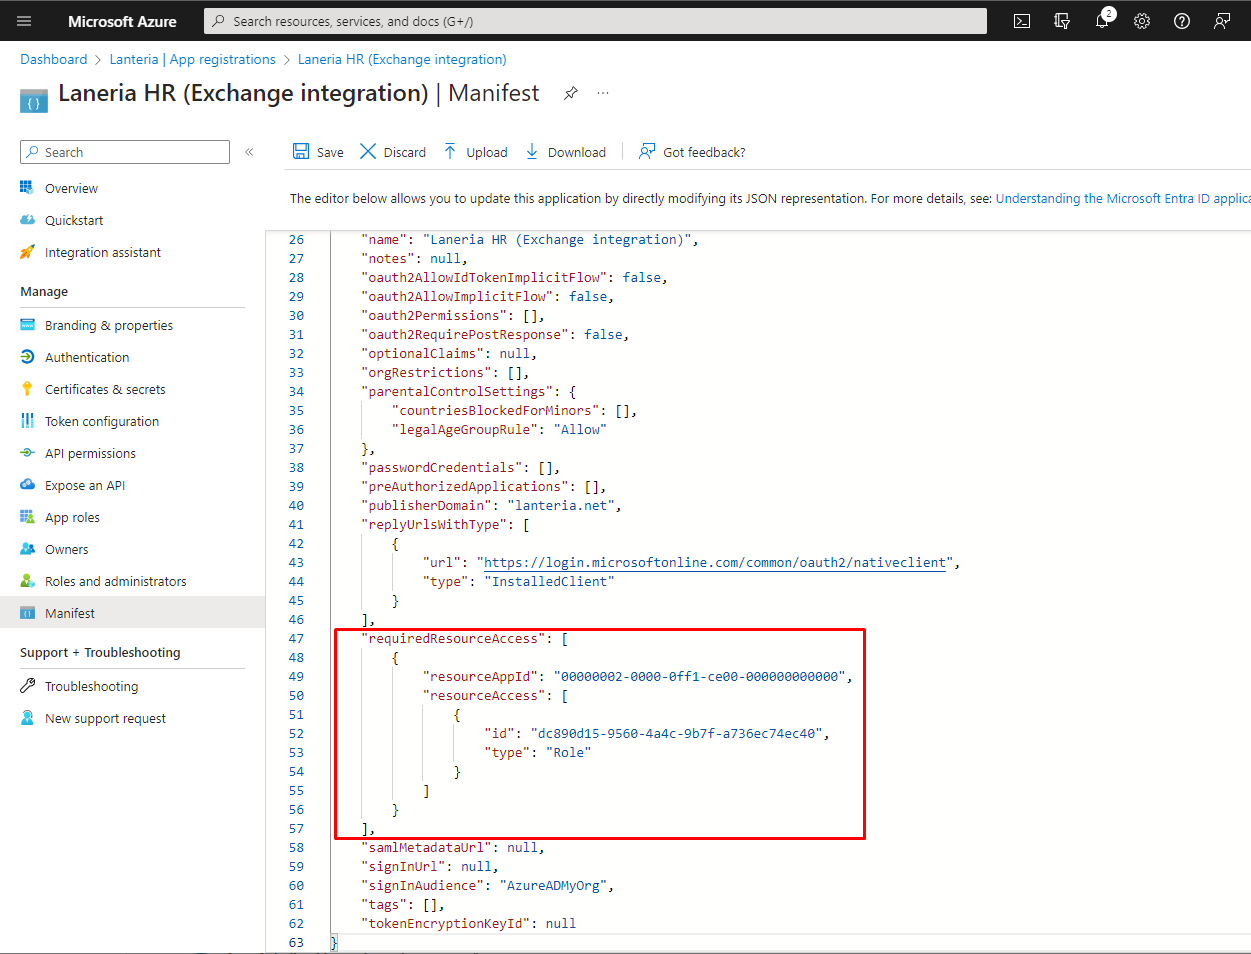
Locate the requiredResourceAccess property in the manifest (use Ctrl+F to find a key), and set
"resourceAppId" to "00000002-0000-0ff1-ce00-000000000000
Under resourceAccess, change "id" to "dc890d15-9560-4a4c-9b7f-a736ec74ec40" and "type" to "Role". After the changes, the manifest must look as follows:
Click Save.
Under Manage, click API permissions.
Make sure that the full_access_as_app permission is listed.
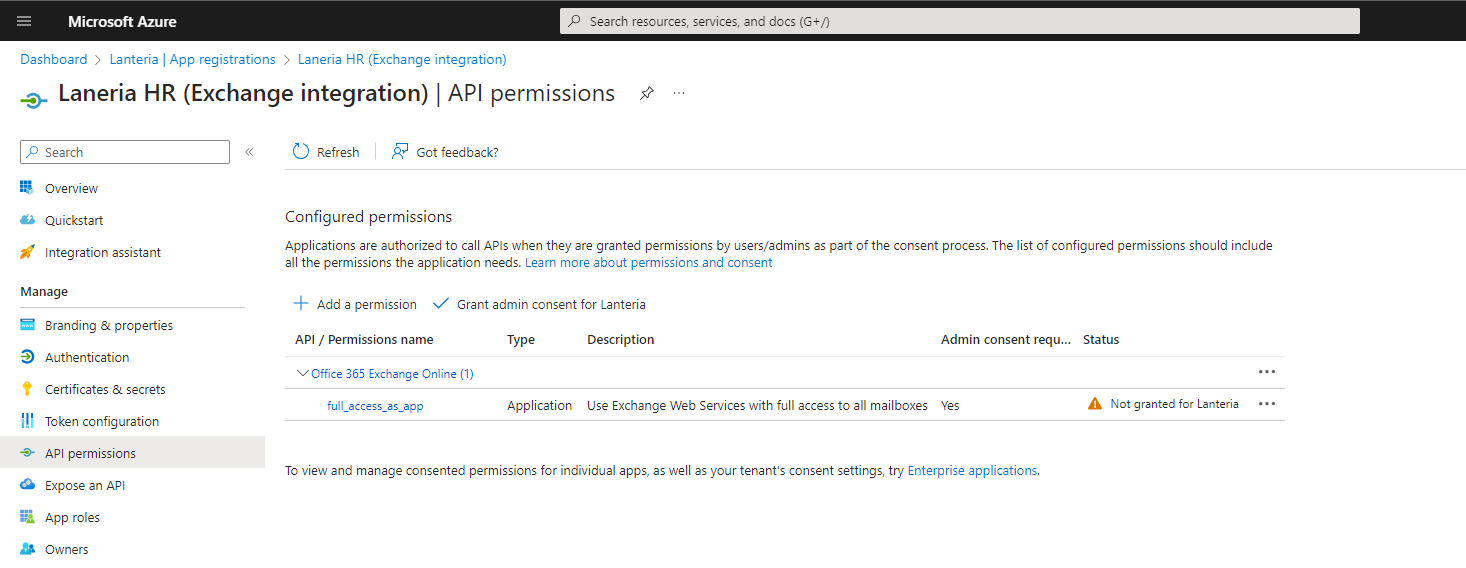
Select Grant admin consent for app and provide confirmation.
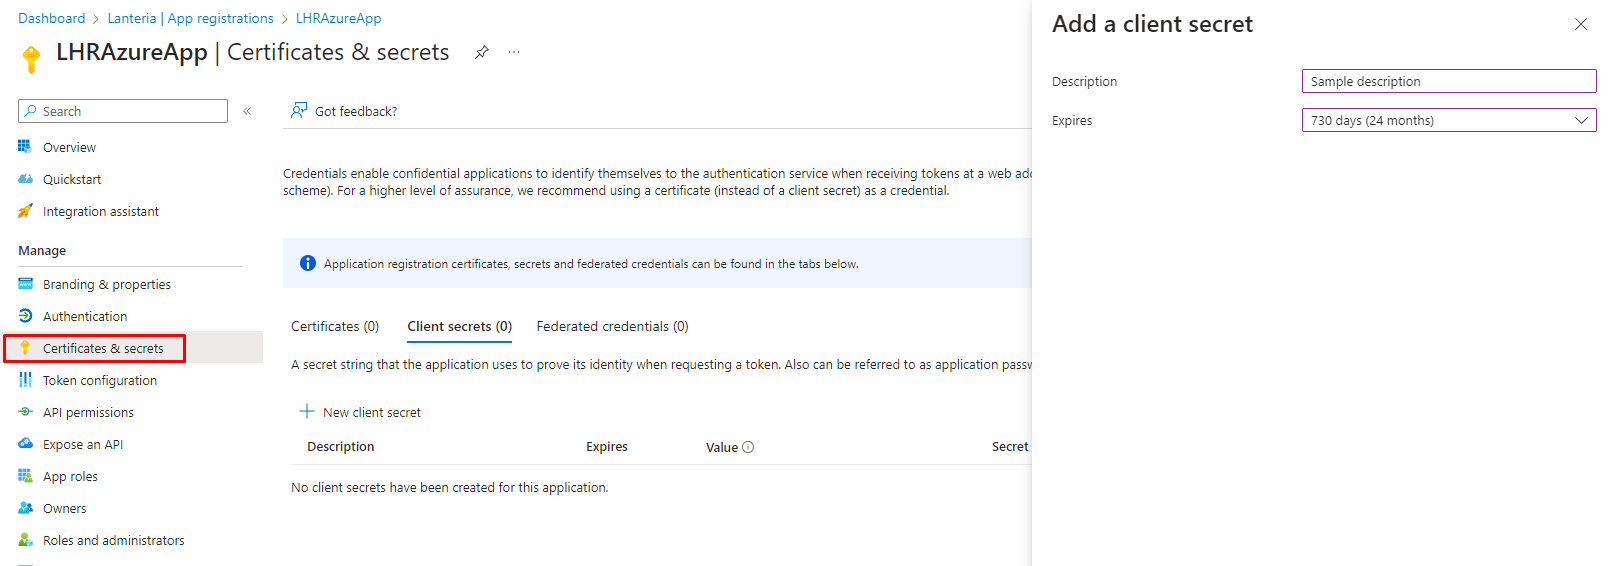
Under Manage, click Certificates and Secrets, and then add a new client secret, which will be used when you fill in the Azure AD Connection Settings field while configuring Exchange Integration Settings in Lanteria HR.
In the Description field, type the secret description.
Set Expires to 730 days (24 months).
Click Add.
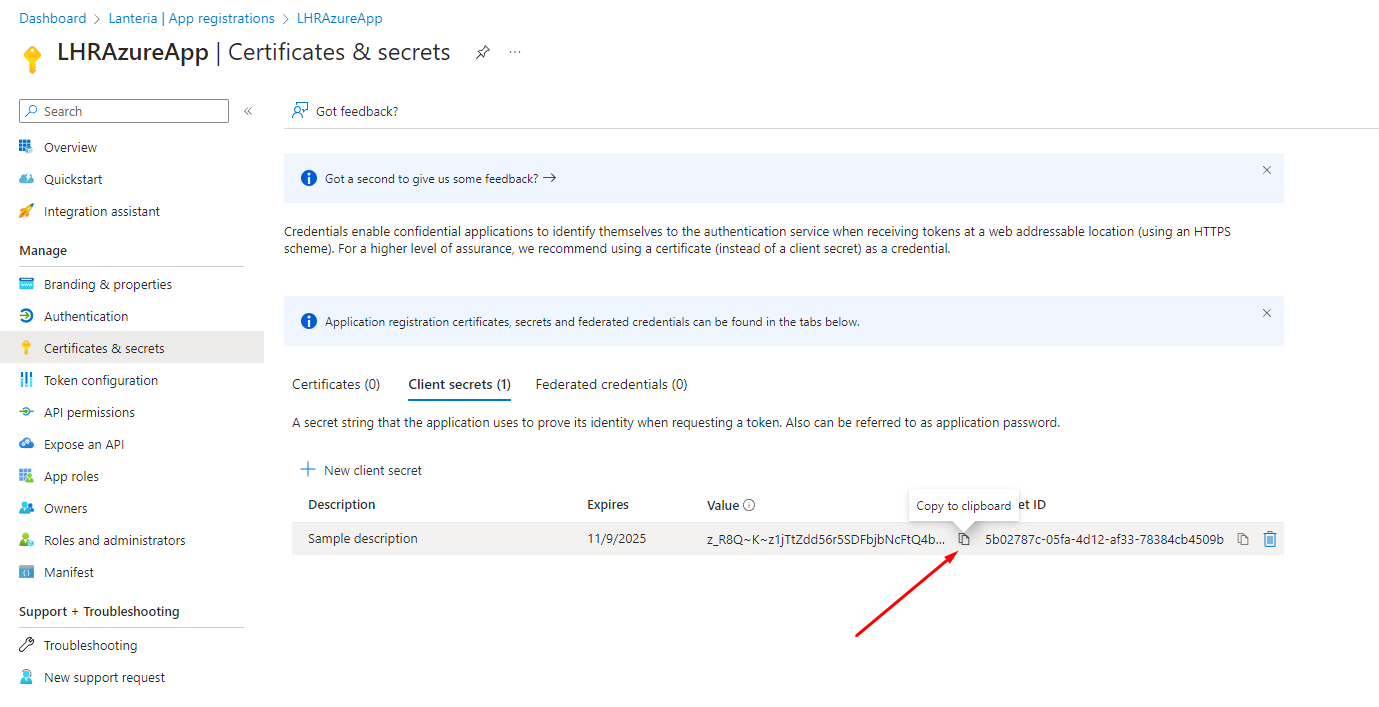
Once a new client secret is created, please copy its value and save somewhere, it will be used when configuring Lanteria HR.
Note
The portal Never Expire option for the Client Secret Expiry was removed in April 2021.
Please set up a reminder to create a new client secret and update Lanteria HR settings before it expires.
Alternatively, you can create a client secret which almost never expires.
Create a Never Expiring Client Secret with PowerShell
After creating an app registration, you can create a client secret with PowerShell and set the unlimited expiration date.
Open Windows PowerShell (Terminal) as administrator and run the following command to install the Microsoft Graph PowerShell module.
Install-Module Microsoft.Graph.Applications -Scope CurrentUserCopy the following script and paste it into any text editor. Don’t forget to replace the Object ID you copied earlier (when creating an app registration at step 5 of the current article).
# Connect to Microsoft Graph
Connect-MgGraph -Scopes 'Application.ReadWrite.All'

# Parameters
$AppObjectId = "xxxxxxxx-xxxxxx-xxxx-xxxx-xxxxxxxxx"
$AppSecretDescription = "Never expired client secret"
$AppYears = "50"

$PasswordCred = @{
    displayName = $AppSecretDescription
    endDateTime = (Get-Date).AddYears($AppYears)
}

# Add App Client Secret - Valid for 50 years (change to 999 for unlimited years)
$Secret = Add-MgApplicationPassword -ApplicationId $AppObjectId -PasswordCredential $PasswordCred

# Write Client Secret value
$Secret | Format-List
Your code is ready, copy and paste it into the PowerShell windows, then sign in with your global administrator credentials.
Select Consent on behalf of your organization and click Accept.
The PowerShell output shows the SecretText (сlient secret value). Copy the SecretText (client secret value) and save it.
PS C:\> $Secret | Format-List

CustomKeyIdentifier  :
DisplayName          : Never expired client secret
EndDateTime          : 1/19/2074 3:00:18 AM
Hint                 : tFs
KeyId                : 9fffb36d-788d-437f-b10b-f986e5fd0a47
SecretText           : tFs8Q~VJBO8Yrgq6gFxexUfyLRWuIfAXin7jYbKl
StartDateTime        : 1/19/2024 3:00:20 AM
AdditionalProperties : {[@odata.context,
                       https://graph.microsoft.com/v1.0/$metadata#microsoft.graph....]}
Note
Client secret values cannot be viewed except immediately after creation. Remember to save the secret before you close the PowerShell window.
Go to the Microsoft Entra ID admin center to verify the secret has been created. You can see that your new сlient secret has been added and expires after 50 years. You successfully configured a client secret for an application in Microsoft Entra ID that never expires.