The Dynamics Absences mode in Lanteria HR provides extended functionality that provides the ability to create custom absence types.
Caution
Once the Dynamic Absences mode is enabled, it is impossible to revert to the default mode.
This topic is aimed at engineers and IT Pros who configure Lanteria HR.
To enable the Dynamic Absences mode
- Go to Settings > Site Lists and Libraries > General Settings.
- Create a setting in the General Settings list with title Dynamic Absences; set the Value field to yes.

- Go to Settings > Settings and Configuration > General > Company Settings > Development tab and, regardless of the Lanteria HR version you currently use, set the Version setting to 4.3.18 or an earlier version number.
Note
This is necessary for the Update Manager to perform automatic operations related to enabling the Dynamics Absences mode. The Version setting value will be automatically reverted upon features reactivation further in this procedure.
.png)
- Go to Settings > Settings and Configuration > Time and Attendance > Absences > Advanced tab and ensure that the Time & Attendance Storage setting is set to SharePoint.
.png)
- Start Windows PowerShell as Administrator and deactivate and then re-activate the Lanteria HR Web and Content features using the following commands:
- disable-spfeature Lanteria.ES.SharePoint_LanteriaContent -url http://siteurl/es confirm:$false
- disable-spfeature Lanteria.ES.SharePoint_LanteriaWeb-url http://siteurl/es confirm:$false
- In Windows PowerShell, re-activate the Lanteria Web and Content features using the following commands:
- enable-spfeature Lanteria.ES.SharePoint_LanteriaWeb-url http://siteurl/es confirm:$false
- enable-spfeature Lanteria.ES.SharePoint_LanteriaContent -url http://siteurl/es confirm:$false
To set up dynamic absences after activation (engineer's part)
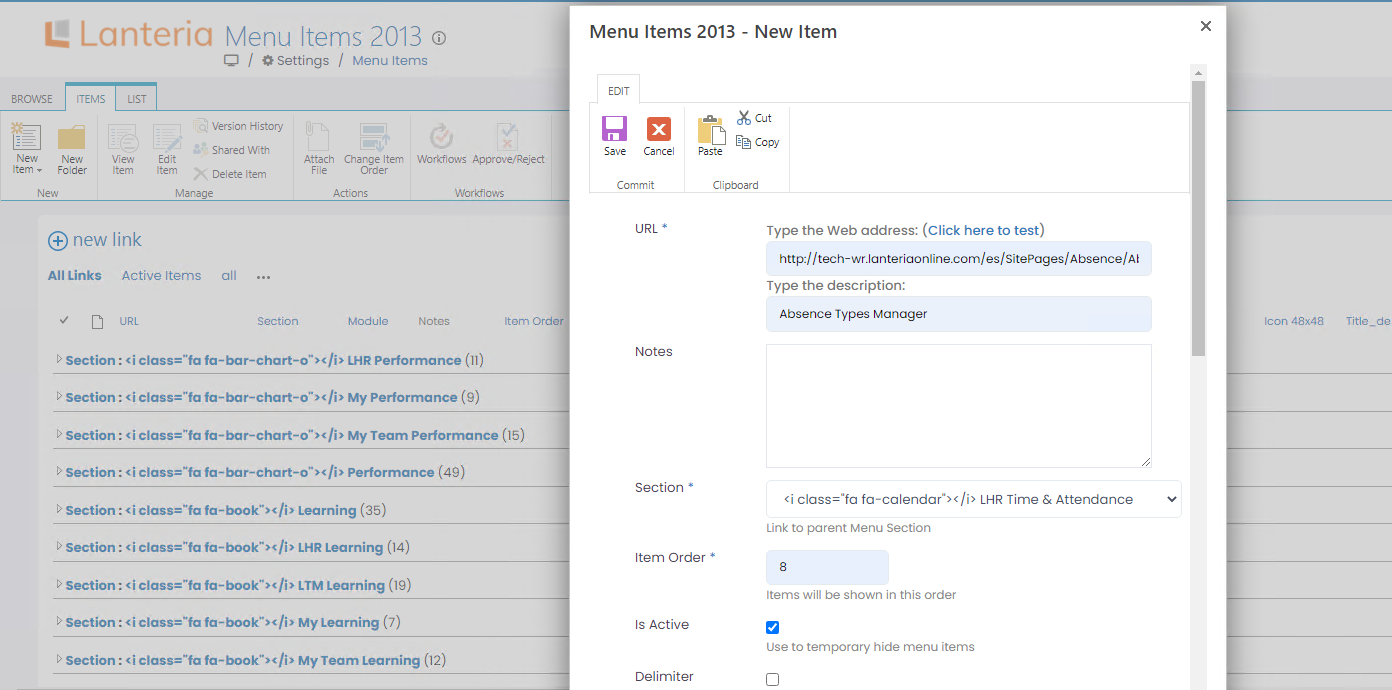
- Create an item in the HR menu with a page reference to the following: SitePages/Absence/AbsenceTypesManager.aspx
This can be done from two places:
- Settings > Settings and Configuration > System Settings > User Interface > Menu Items.
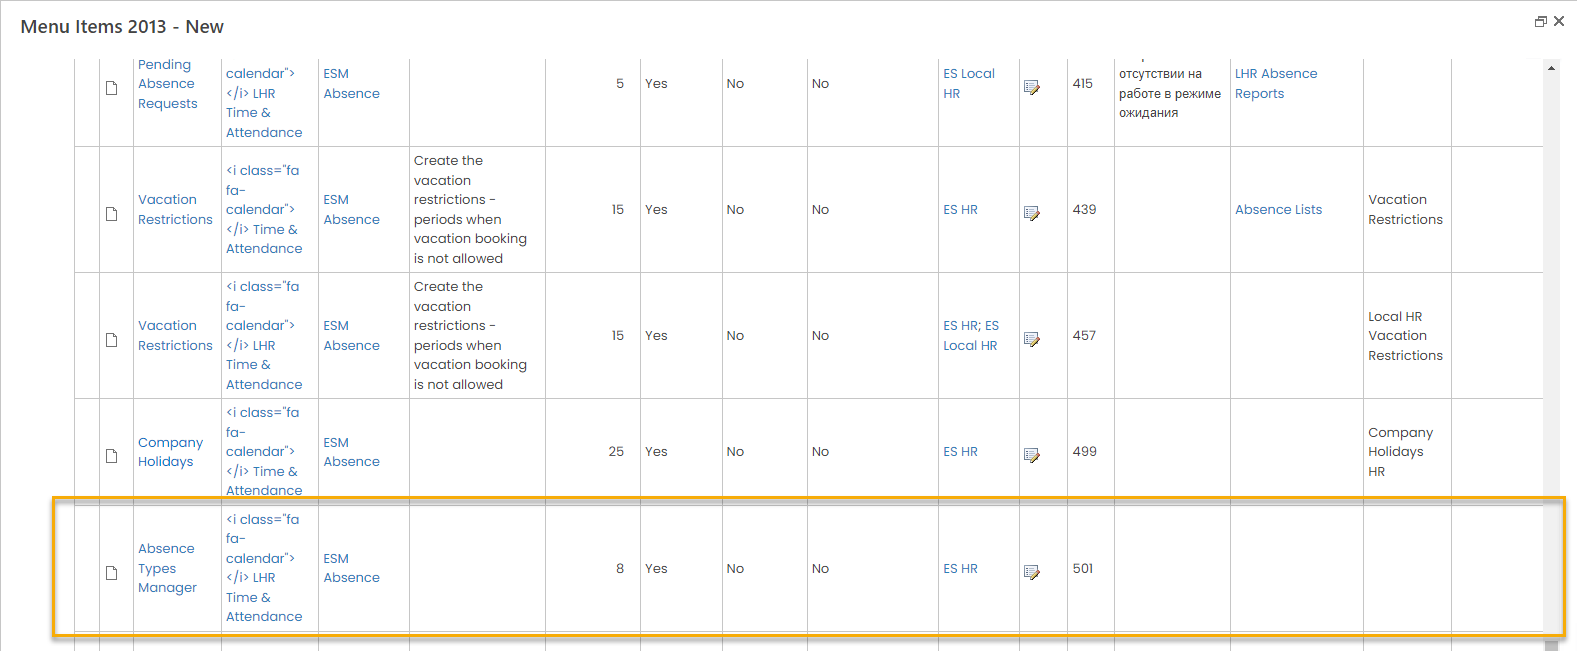
or
- Directly in the Menu Items list (Settings > Site Lists and Libraries > Menu Items 2013)
- Modify the workflows for absences cancellation. The workflow name should be "WF_Cancel" + the internal name of the absences type list. For example, WF_CancelHolidays. This must be done for absences, vacations, sicknesses and business trips.
- After the customer decides to use a custom absence type and creates it in the Absence Types Manager, the engineer should create a workflow for notifications on the add/edit and cancel workflow as for other types.
Note
After a new custom absence type is created using the Absence Types Manager, wait for 10 to 15 minutes before proceeding with configuration so that the system has enough time to create new lists, tables, etc.