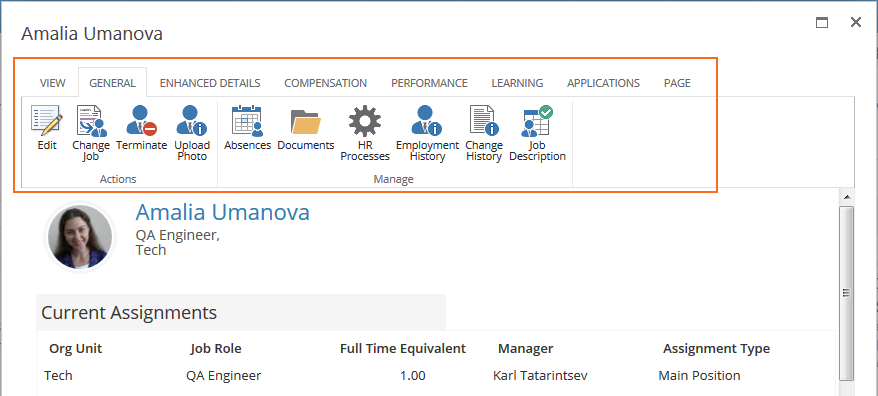
By default, each SharePoint page has a ribbon that contains the Browse and Page tabs, each list - Browse, Items and List tabs, and each list item - View or Edit tab. Lanteria has created custom ribbons for some pages, lists and list items. Ribbon Editor is a tool that allows modifying custom Lanteria HR ribbons and creating new ones. For any page, list or list item, the users can set up their own ribbons with custom buttons.
The ribbon setup includes the following processes:
Create a Custom Ribbon
To create a ribbon for a page that doesn't have a custom ribbon yet, follow these steps:
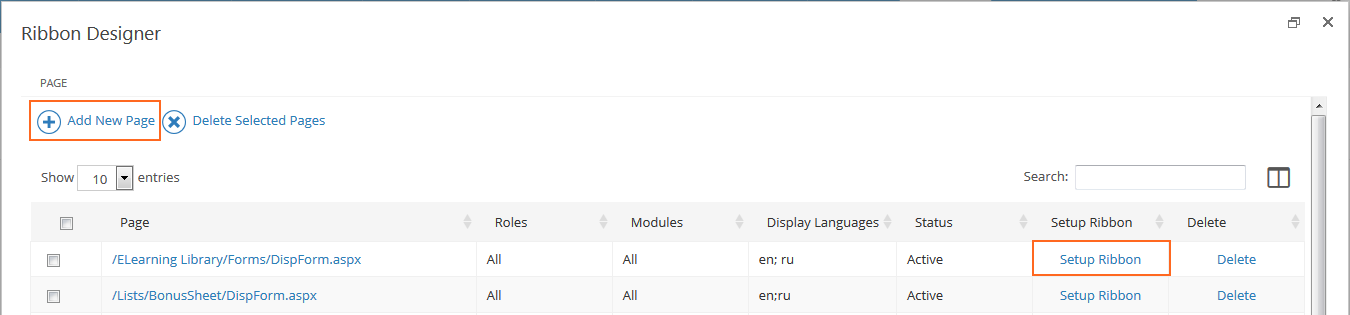
- Under Settings > Settings and Configuration > System Settings, click User Interface and then Ribbon Editor.

- Ribbon Designer with settings of all the custom ribbons will open. To modify any of the existing ribbons, select a ribbon and click Setup Ribbon. To add a custom ribbon to a new page, click Add New Page.
- The ribbon creation window will open.

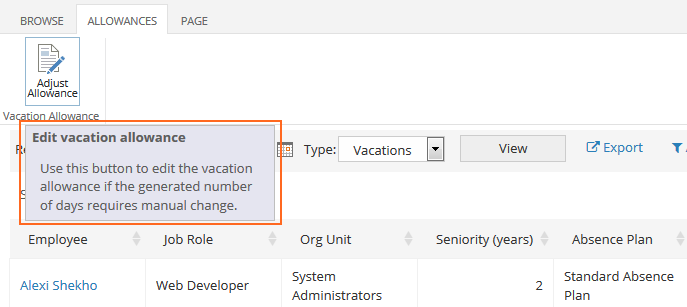
- First of all, specify a link to the page on which the custom ribbon is being created that starts from the first slash after /es. For example, HR Manager wants to be able to have a button for editing the allowances in the Vacation Statistics report. In this case, in the Page field, specify a link to Vacation Statistics - /SitePages/Absence/HolidayStatistic.aspx (the full link might be http://office.lanteria.com/es/SitePages/Absence/HolidayStatistic.aspx, in this case http://office.lanteria.com/es is omitted).
- In the Two Letter ISO Language Names field, type the two letter codes of the languages the ribbon text translations are to be provided for. The codes you type in are to correspond to the ISO international standards for the two letter language codes. When creating the ribbon tabs, groups and buttons, you will be able to provide translations for the specified languages. Please note that these translations will be displayed only if the corresponding language packs are installed for Lanteria HR.
- Next, specify the roles that will be able to see and use the custom ribbon.
- Use the Modules section to select the modules the custom ribbon is to be included to. Only the users owning license for the selected modules will be able to see the ribbon.
- Clear the Active check box to hide the ribbon from the users. The ribbon is automatically hidden if it doesn't have any active tabs.
- Click Save to finalize creating the ribbon.
Add Tabs to the Ribbon
Next, proceed to creating the ribbon tabs, groups and buttons.
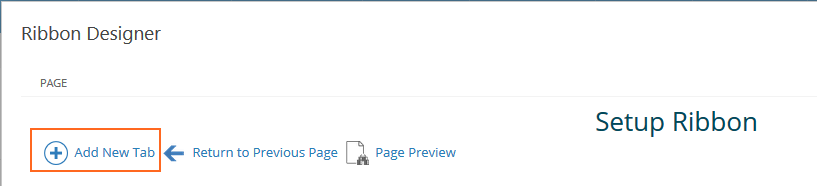
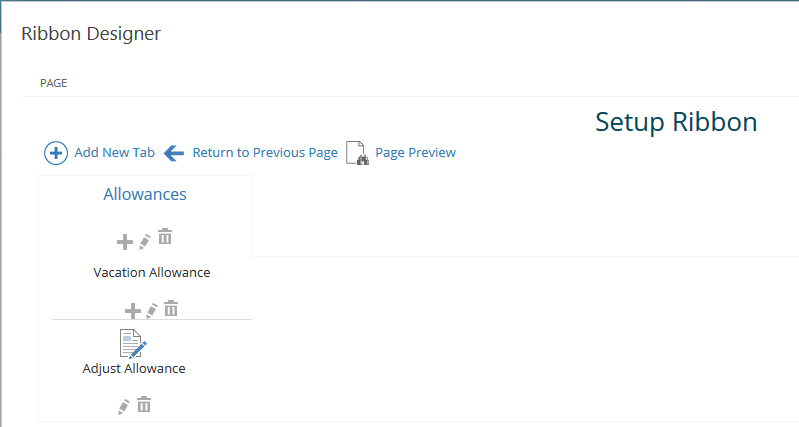
- Locate the created ribbon in the Ribbon Designer and click Setup Ribbon.
.png)
- In the page that opens, click Add New Tab to add a tab to the ribbon.
- In the Create Ribbon Tab page, specify the tab title and its translations to the selected languages.
.png)
- Select the roles and modules that will have permissions for viewing the tab. By default, the check boxes will be set to the choices you made when creating the ribbon, but you can modify them at this point.
- Use the Active check box to define whether the current tab is active and visible to the users. The tab is automatically hidden if it doesn't have any active actions.
- Select Initial Tab if the tab being created is the initial tab to be displayed to the user when opening the page.
- Save the tab.
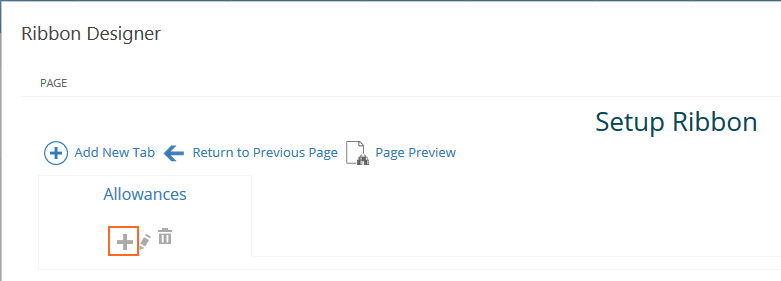
Create Action Button Groups
Next, add groups for grouping the tab buttons. If you have several buttons on the tab, the groups are convenient for organizing them.
- Click the Add New Group icon for the newly created tab.
- Specify the group titles in the selected languages, select the modules and roles, and define whether the group is active.
- Click Save.
Add Actions to Groups
Next, add the action buttons to the created groups.
- To add a button to be displayed in the newly created group, click the Add New Action icon.

- Specify the button title, select modules and roles. Roles and modules available for selection will be the same as on the selected action group.

.png)
- In the Image URL 32*32 field, specify a path to the icon to be displayed for the button being created. The images can be previously uploaded to a document library in Lanteria HR. 32*32 is a standard size for the button images. However, you can also upload a 16*16 size image and specify a path to it in the Image URL 16*16 field.
- Specify the tooltip title and its description in the selected languages. The entered texts will display when the user points out the button being created.
- Next, select the type of action that will be performed when the user clicks the button. Depending on the choice you make, additional fields will display for setting up the selected action. The following options are available:
- Initiate Workflow - when clicking the button, the selected workflow will be initiated. After choosing this option, the Initiate Workflow section will display where you can select a SharePoint page and a workflow from this page that will be launched.
.png)
- Navigate to URL - when clicking the button, the user will be redirected to the selected page. The Navigate to URL field will display where you can specify the path to the page to be opened. In the Mode for Opening Link field, select how the selected page will open - either the current page will be changed for the selected one (Redirect), or the selected page will open in a new tab (Open in New Tab), or it will open in a new window and the current page will remain open in the background (Open in Popup). If you selected to open a page in popup, specify whether it should be opened maximized using the Show Maximized check box.
- Command JavaScript - a Java script will be performed after clicking the button. Type the script in the Command JavaScript field that will display after selecting this option.
- Initiate Workflow - when clicking the button, the selected workflow will be initiated. After choosing this option, the Initiate Workflow section will display where you can select a SharePoint page and a workflow from this page that will be launched.
- Specify whether the button is active and save it.
.png)